Skip to content
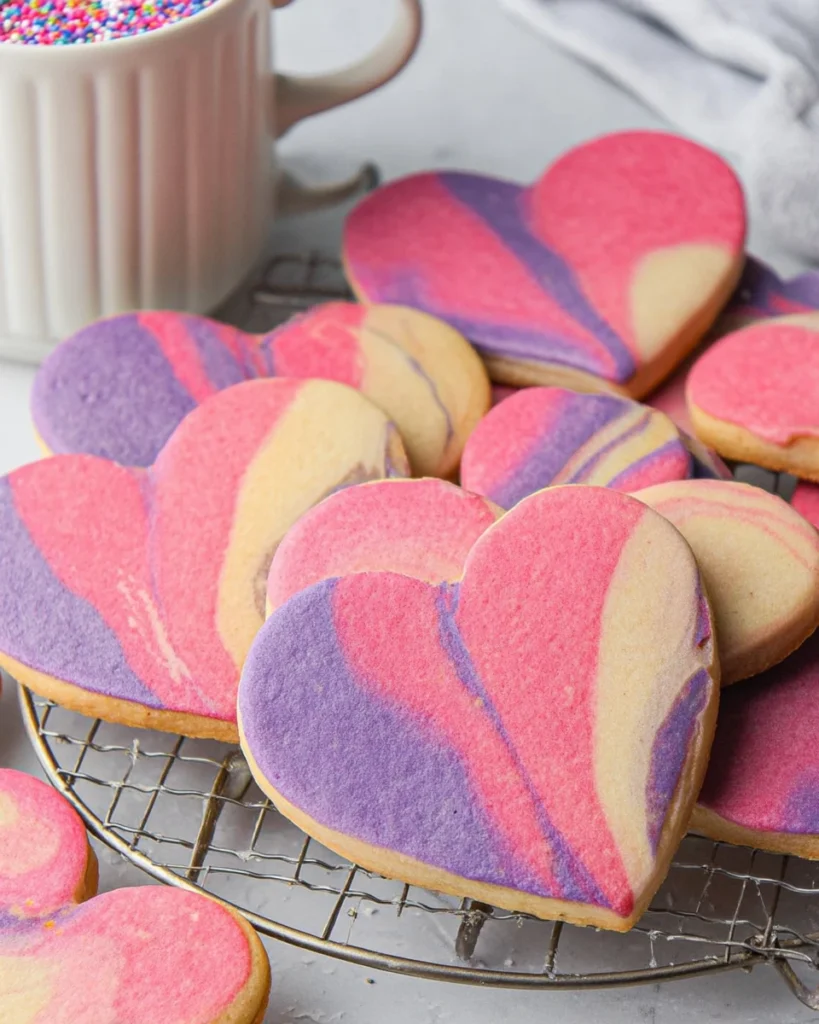
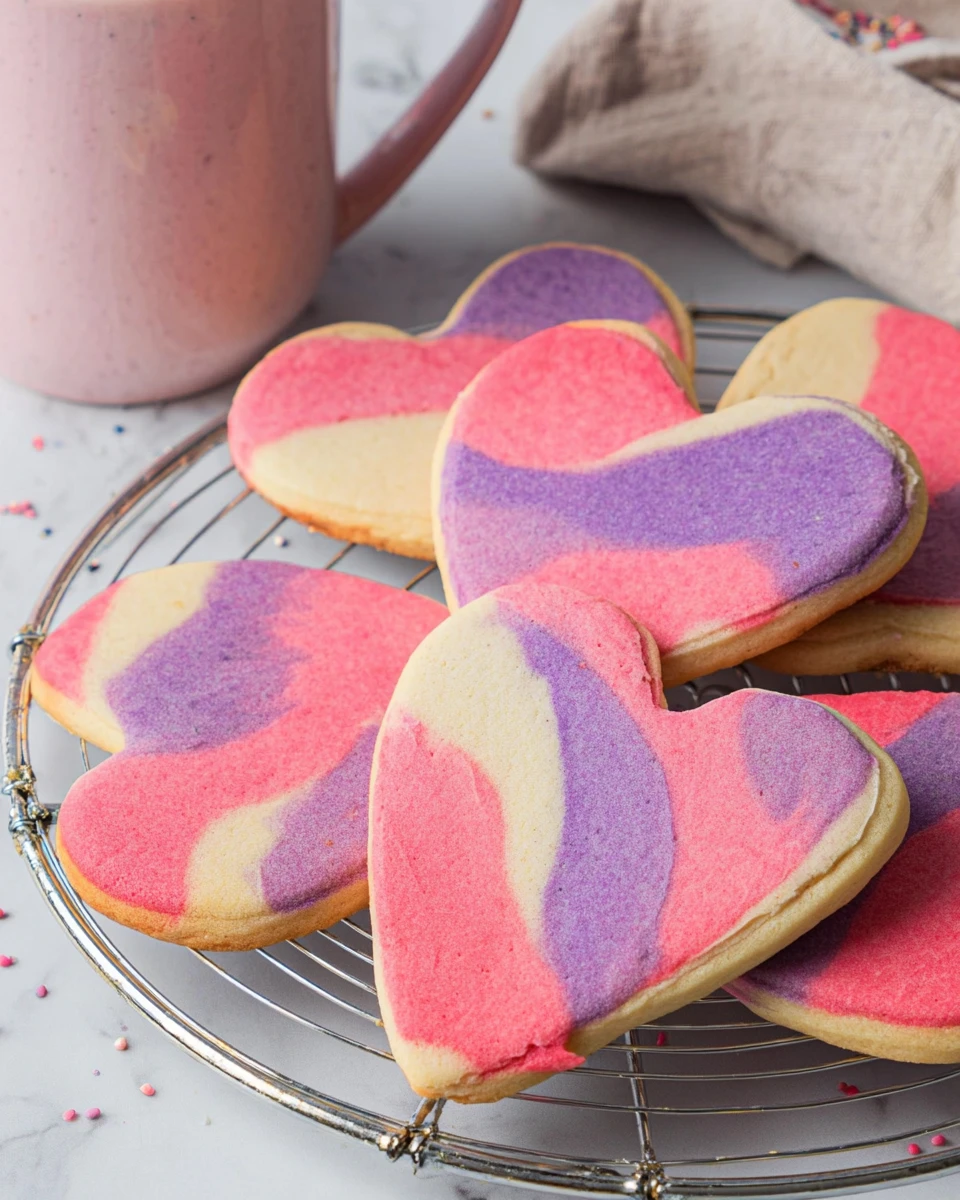
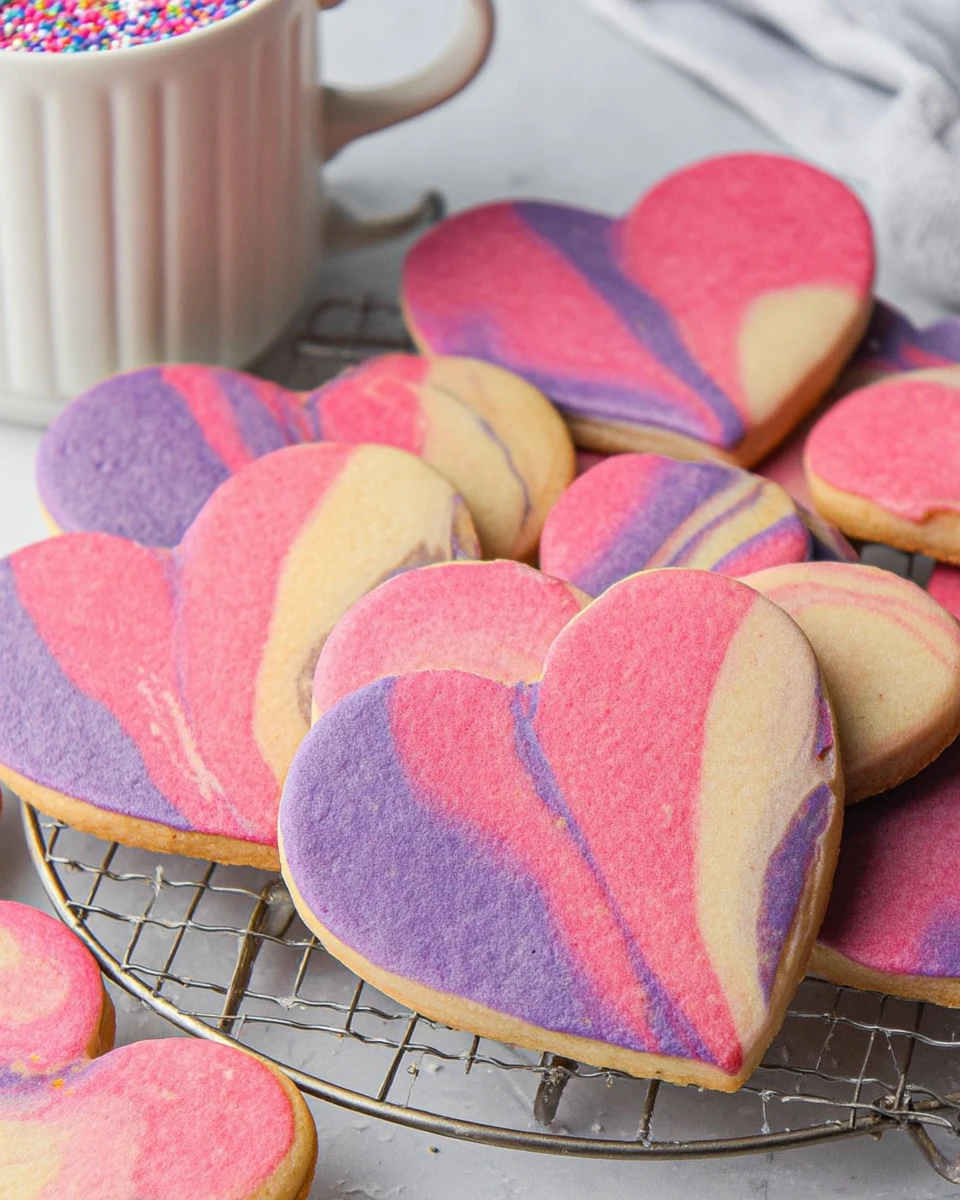
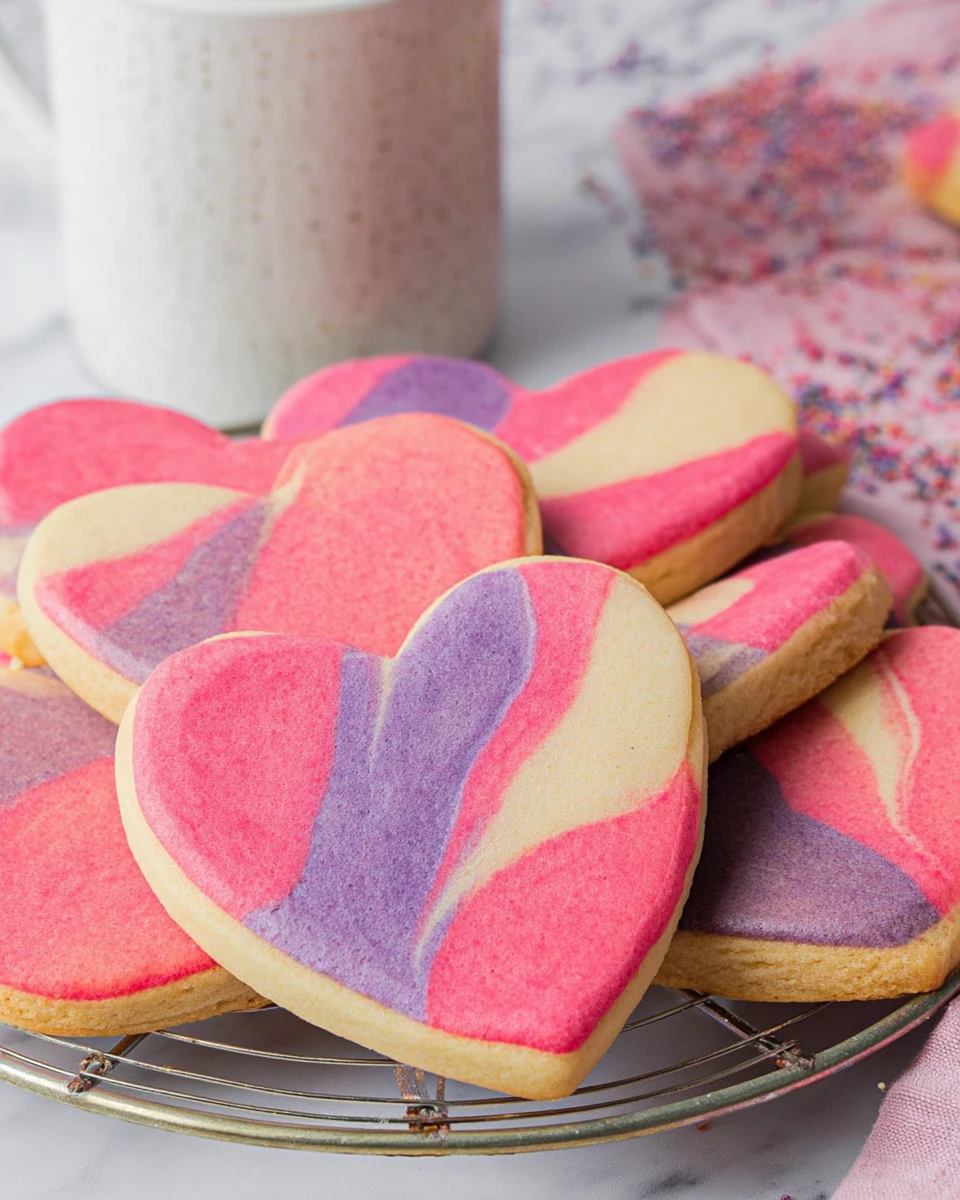
Creating Valentine’s Day Marbled Sugar Cookies is a fun and easy way to show your love and creativity in the kitchen. These cookies not only taste amazing but also bring a splash of color to your Valentine’s Day celebrations. Picture this: soft, buttery cookies with pink and purple swirls that melt in your mouth. Whether you’re treating your partner, friends, or family, these cookies add a personal touch to any occasion. As you bake, the delightful aroma of vanilla and butter fills your home, making it feel festive! So grab your mixing bowl, and let’s get started on making these delicious treats together. You’ll be amazed at how simple and satisfying it is to create such a beautiful and tasty cookie, perfect for sharing or gifting this Valentine’s Day.
Thank you for reading this post, don't forget to subscribe!Why This Recipe Works
Creating these Valentine’s Day Marbled Sugar Cookies combines the classic appeal of sugar cookies with a visually stunning marbling technique. The ingredients you’ll use are familiar, yet the technique adds a touch of artistry. So, not only are your cookies a treat for the taste buds, but they also provide a feast for the eyes. The richness of the butter and the sweetness of the sugars come together perfectly, while the marbled effect gives each cookie its own unique look. It’s this mix of familiarity and creativity that makes these cookies special. You’ll impress everyone who sees and tastes them!
Why You’ll Love This Valentine’s Day Marbled Sugar Cookies
These cookies are not only scrumptious but also super easy to make. With whimsical pink and purple swirls, they are like little pieces of art you can eat! You can bake these cookies for anyone you love; they capture the spirit of Valentine’s Day beautifully. Plus, the fun of making marbled dough creates a bonding experience if you’re baking with loved ones. Every bite is a delightful reminder of affection, making these treats perfect for the occasion.
Ingredients
- ¾ cup unsalted butter, room temperature
- ¾ cup granulated sugar
- 2 tablespoons powdered sugar
- 1 large egg
- 1 egg yolk
- 2 ½ cups all-purpose flour
- 1 teaspoon vanilla extract
- ½ teaspoon salt
- ½ teaspoon baking powder
- ¼ teaspoon baking soda
- Pink food coloring
- Purple food coloring
Preparing the Dough
Creaming the Butters and Sugars
Begin by placing the room temperature butter, granulated sugar, and powdered sugar into the bowl of your stand mixer fitted with the paddle attachment. Beat on high for 1 to 2 minutes until you have a smooth and creamy mixture. This is the foundation of your dough, so make sure it’s well mixed and airy.
Incorporating the Eggs and Dry Ingredients
Next, add in one large egg and one egg yolk. Beat the mix for another 30 seconds to combine. Now, it’s time to add the dry ingredients! Incorporate the all-purpose flour, vanilla extract, salt, baking powder, and baking soda into the mixture. Continue to beat for about 1 minute until everything is fully combined, and your dough is smooth.
Dividing and Coloring the Dough
Now, it’s time to add the fun! Divide the dough into three separate bowls. Wrap one portion in plastic wrap and set it aside in the fridge for later. Take another portion and color it with pink food coloring until it’s well-saturated. Do the same with the last portion, but use purple food coloring. Keep in mind that the colors should be vibrant! Once colored, wrap each portion in plastic wrap and chill them in the refrigerator for about 45 minutes.
Shaping the Cookies
Prepping the Oven and Baking Sheets
While your dough chills, preheat your oven to 350°F. Line one or two large baking sheets with parchment paper. This step is crucial for ensuring your cookies don’t stick while baking.
Rolling the Dough
After the dough has chilled, remove it from the fridge. Roll all portions of colored dough into 1 tablespoon-sized balls, mixing the colors together for that marbled effect. Once shaped, use a rolling pin to flatten the combined dough into a rough rectangle about ¼ inch thick. The mixing of colors at this stage truly brings your cookies to life!
Folding and Cutting the Marbled Dough
Here’s where the magic happens! Gather the dough sheet, fold it in half, and roll it out again. Repeat this folding and rolling process 1 to 2 more times. This technique creates those beautiful swirls in your cookies. Now, using a 4-inch heart-shaped cookie cutter, cut out as many cookies as possible. Place the cut-out cookies onto the prepared baking sheets, making sure they’re spaced apart.
Baking the Cookies
Now comes the exciting part! Bake your cookies in the preheated oven for about 10 minutes. They should come out soft with lightly browned edges—perfectly baked! Once done, allow your cookies to cool on a wire rack before you enjoy them.
Rolling Out Dough Scraps
While your first batch is baking, don’t forget about the dough scraps! Roll them back into a ball, flatten, and cut out more cookies until all the dough is used. This way, nothing goes to waste, and you get even more cookies to share!
Serving Suggestions
These Valentine’s Day Marbled Sugar Cookies are perfect for serving with a warm cup of hot cocoa, a comforting coffee, or a classic glass of milk. They make excellent gifts or are perfect for sharing at gatherings. Whether you’re having a romantic dinner or a friendly get-together, these cookies fit the occasion beautifully!
Tips for Success
- Remember to use butter at room temperature; it makes mixing easier.
- Be cautious not to overmix after adding the dry ingredients; doing so keeps your cookies tender.
- For those vibrant marbling effects, use gel food coloring instead of liquid food coloring.
Variations
Feel free to get creative with these cookies! Swap out the food colors for festive themes, like green for St. Patrick’s Day or orange for Halloween. You can even add chocolate chips for an extra delicious twist. The possibilities are endless!
Storage Tips
To keep your cookies fresh, store them in an airtight container at room temperature for up to a week. If you want to save some for later, feel free to freeze them—just layer them with parchment paper to keep them from sticking together.
Pairing Ideas
Enhance your cookies with some strawberry or raspberry jam or add a sweet icing drizzle to elevate both flavor and appearance. These additions can really make your cookies shine!
FAQs
1. Can I use different colors for the marbling?
Yes, feel free to use any colors that fit your theme. Be creative!
2. How long do these cookies take to prepare?
Including chilling and baking, the entire process takes about 2 hours.
3. What’s the best way to store these cookies?
Store them in an airtight container at room temperature for optimal freshness.
4. Can I make the dough in advance?
Absolutely! You can prepare the dough a day ahead and chill it until you’re ready to bake.
5. Are these cookies suitable for gluten-free diets?
You can substitute the all-purpose flour with a gluten-free flour blend, though results may vary.
These Valentine’s Day Marbled Sugar Cookies are a heartfelt way to celebrate love and joy. The appealing colors and delightful flavors make them perfect for any gathering. Enjoy the process of baking and sharing with loved ones, and create those sweet, memorable moments along the way!
Print
Valentine’s Day Marbled Sugar Cookies
These delightful cookies feature soft, buttery textures with vibrant pink and purple swirls. Perfect for sharing with loved ones on Valentine’s Day!
- Total Time: 1 hour 25 minutes
- Yield: Approximately 24 cookies 1x
Ingredients
- ¾ cup unsalted butter, room temperature
- ¾ cup granulated sugar
- 2 tablespoons powdered sugar
- 1 large egg
- 1 egg yolk
- 2 ½ cups all-purpose flour
- 1 teaspoon vanilla extract
- ½ teaspoon salt
- ½ teaspoon baking powder
- ¼ teaspoon baking soda
- Pink food coloring
- Purple food coloring
Instructions
- Cream butter and sugars until smooth and creamy.
- Incorporate the eggs and mix well.
- Add the dry ingredients and beat until just combined.
- Divide dough into three portions; color two with pink and purple food coloring.
- Chill dough portions for 45 minutes.
- Preheat oven to 350°F and line baking sheets with parchment paper.
- Roll portions into balls and shape into a rectangle.
- Fold, roll, and cut shapes using a cookie cutter.
- Bake for about 10 minutes until edges are lightly browned.
Notes
Use room temperature butter for easier mixing.
Avoid overmixing the dough after adding dry ingredients.
Consider using gel food coloring for brighter colors.
- Prep Time: 1 hour 15 minutes
- Cook Time: 10 minutes
- Category: Dessert
- Method: Baking
- Cuisine: American
Nutrition
- Calories: 120
- Sugar: 7
- Sodium: 50
- Fat: 6
- Saturated Fat: 4
- Unsaturated Fat: 1
- Trans Fat: 0
- Carbohydrates: 16
- Fiber: 0
- Protein: 1
- Cholesterol: 30