 Skip to content
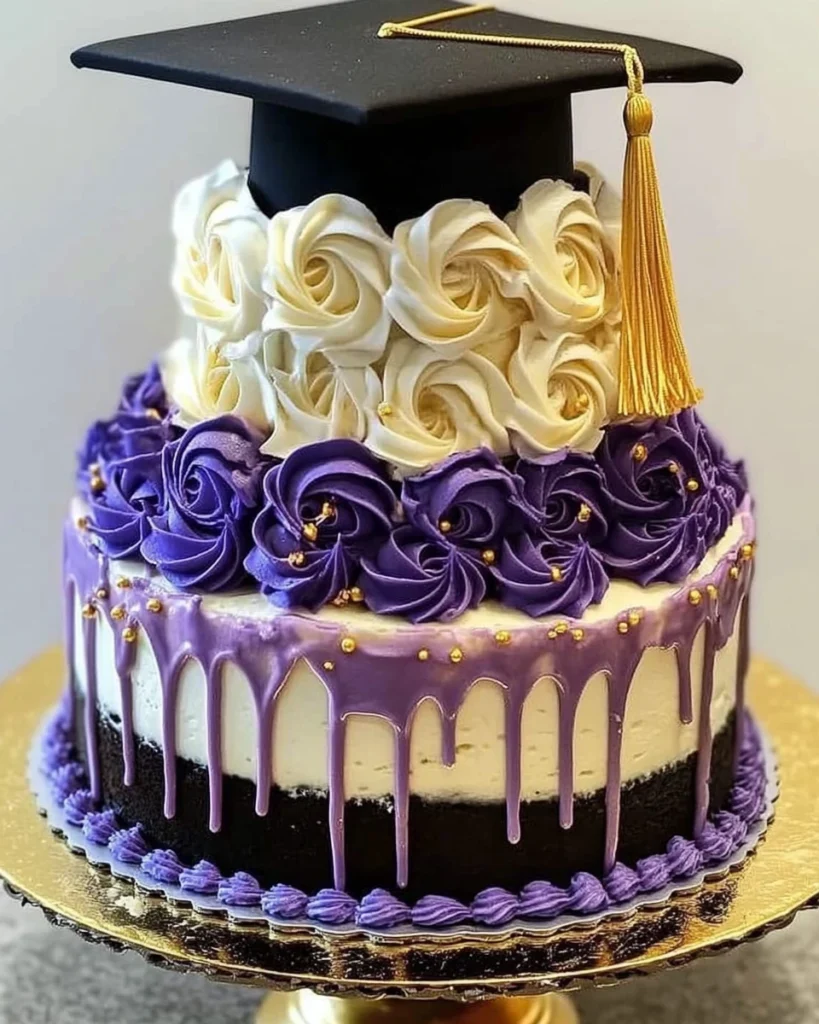
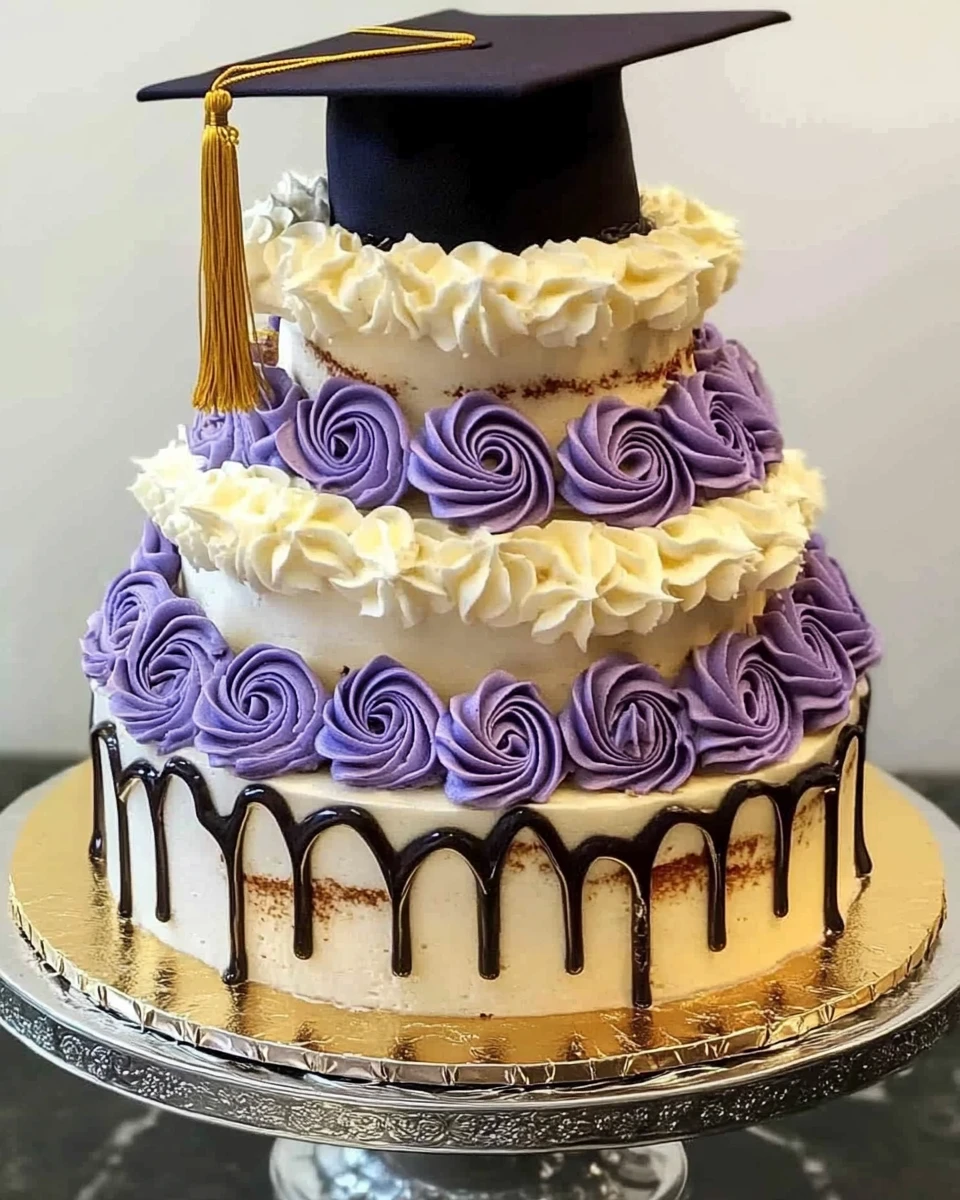
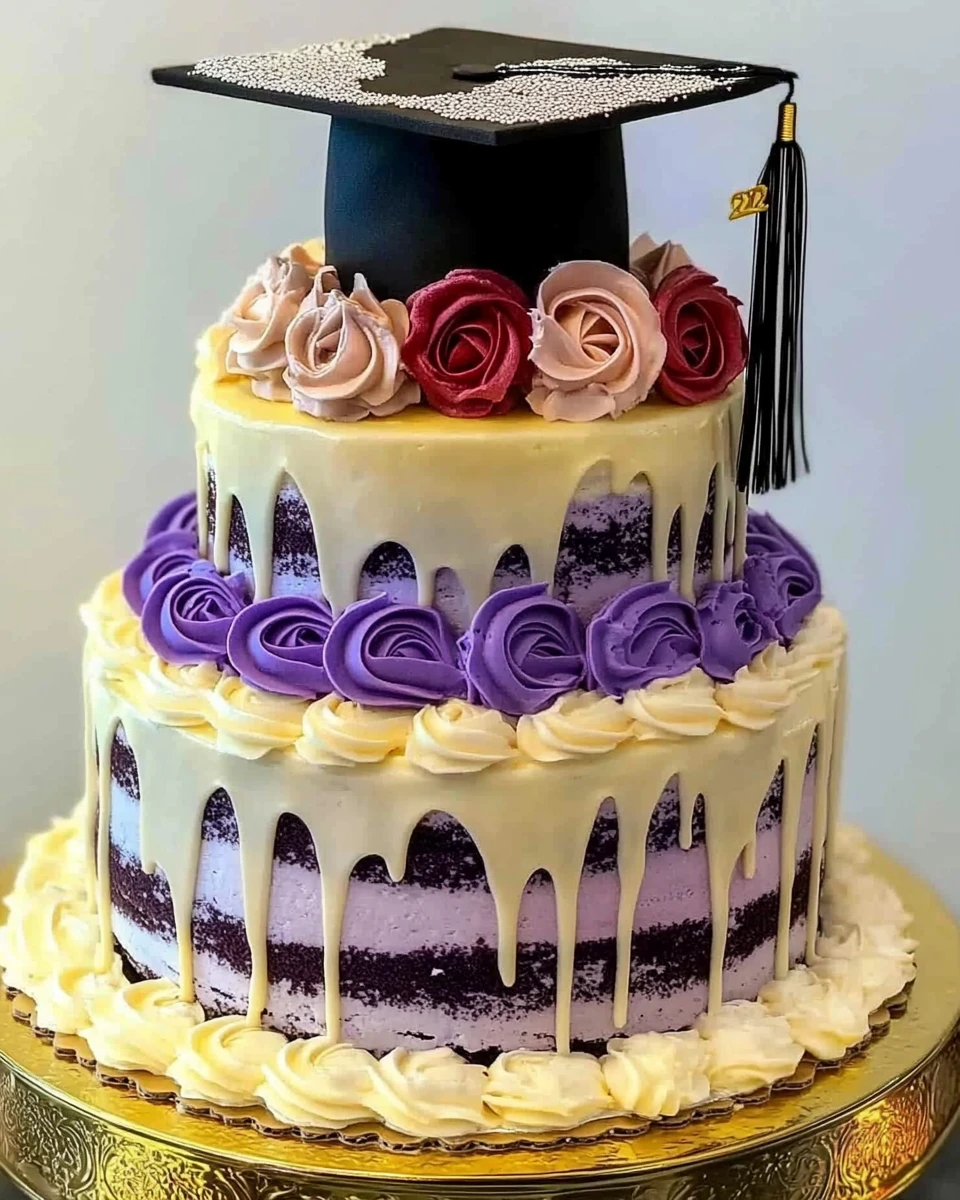
Creating a tiered graduation cake is such an exciting project, especially if you’re looking to celebrate someone’s hard-earned achievement! Whether it’s a high school grad heading off to college or a college grad ready to take on the world, this cake is sure to impress. It’s not only visually stunning but also delicious with layers of moist cake and rich cream cheese frosting. Imagine the smiles as your friends and family gather around, ready to share some sweet slices of this beautiful masterpiece. Making a tiered graduation cake lets you showcase your baking skills while delivering a meaningful gift. So roll up your sleeves and get ready to create a delicious celebration that no one will forget!
Thank you for reading this post, don't forget to subscribe!Why This Recipe Works
Creating a tiered graduation cake is not just about the ingredients; it’s about achieving a perfect balance of flavors and textures. This recipe uses room temperature butter and buttermilk to create moist cake layers, while the cream cheese frosting adds a delightful tanginess that complements the sweetness of the cake. The structure of the cake is retained through the use of dowels, ensuring that your masterpiece stands tall and proud.
Why You’ll Love This Tiered Graduation Cake
This tiered graduation cake isn’t just visually stunning; it’s a celebration of achievement wrapped in deliciousness. Perfect for graduation parties, this cake brings joy and festivity to the table. The customizable colors and decorations allow you to tailor it to the graduate’s school colors or personal style, making it a personal and meaningful gift.
Ingredients
- 4 ⅞ cups all-purpose flour
- 4 ½ cups granulated sugar
- 3 ¾ teaspoons baking powder
- 1 ½ teaspoons salt
- 1 ½ cups unsalted butter (3 sticks, room temperature)
- 9 large eggs
- 2 ¼ cups buttermilk (room temperature)
- 1 tablespoon clear vanilla extract
- 3 tablespoons vegetable oil
- 12 ounces cream cheese (softened)
- 1 ½ cups unsalted butter (softened)
- 9 cups powdered sugar
- 2-4 tablespoons heavy cream (as needed)
- 1 ½ tablespoons vanilla extract
- ½ teaspoon salt (if using unsalted butter)
- Gel food coloring (optional)
- 4 ounces black candy melts
- 4 ounces white candy melts (optional)
- 5 tablespoons heavy whipping cream (divided)
- Gold luster dust or edible paint (optional)
- Small paintbrush (optional)
- Graduation cake topper
Baking the Vanilla Cake Layers
Preheat and Prepare Pans
First off, preheat your oven to 350°F (175°C). Next, grease three 8-inch and two 6-inch cake pans with baker’s flour or simply line them with parchment paper. This way, your cakes will come out nice and smooth.
Combine Dry Ingredients
In a stand mixer, combine flour, sugar, baking powder, and salt on low speed until fully mixed. This process creates a nice, even base for your cake, prepping it perfectly.
Mix in the Butter
Now, gradually add the room-temperature butter. Mix until it looks crumbly with no large lumps. This method helps the butter meld evenly into the dry ingredients, creating a delightful texture.
Add Eggs and Liquid Ingredients
Slowly mix in the eggs, one at a time, making sure they’re fully incorporated. After the eggs, add buttermilk in two installments. Don’t forget to incorporate the vanilla extract and vegetable oil until everything is fully blended.
Divide Batter and Bake
Evenly distribute the batter among the prepared pans. Bake for about 34-37 minutes or until a toothpick inserted comes out clean. Once baked, allow the cakes to cool for a few minutes before removing them from the pans. Then, let them cool completely on a wire rack.
Preparing Cream Cheese Buttercream Frosting
Cream Butter and Cheese
In a large bowl, beat together the softened cream cheese and unsalted butter until creamy. This step is key for achieving that smooth and rich frosting everyone loves.
Add Sugar and Liquid
Now, gradually mix in the powdered sugar, alternating between adding the vanilla extract and whipping cream. Continue until the frosting reaches that perfect smooth consistency. If you’re using unsalted butter, add a little salt to balance the sweetness. Feel free to incorporate some food coloring to match your graduate’s school colors!
Assembling the Cake
Base Layer Setup
Start by spreading a thin layer of frosting on a large cake board. Center the first large cake layer and frost it generously. This layer sets the foundation for your beautiful creation.
Stack Remaining Layers
Continue stacking the remaining cake layers while alternating between the large and smaller cakes. Make sure each layer is level for a neat and professional finish. This ensures a beautiful presentation that will wow your guests!
Crumb Coat Application
Now, it’s time for a crumb coat. Apply a thin layer of frosting around the outside of the cake to catch any crumbs. Pop the cake in the fridge for about 5-10 minutes to set the coat. This is a handy trick that helps achieve a smooth final frosting layer.
Final Frosting
Once your crumb coat is firm, add that final layer of frosting. Use an offset spatula to smooth it out perfectly. This step gives your cake that polished appearance.
Decorating the Cake
Applying Ombre Rosettes
For a fun and stylish decoration, divide the remaining frosting into three bowls, coloring each a progressively darker shade. Then, use a piping bag fitted with a star tip to pipe beautiful rosettes around the base tier, starting from dark and moving to light shades.
Stacking the Tiers
Insert dowels into the base tier for extra support; this will keep everything steady. Carefully place the top tier on, ensuring it’s centered perfectly. This gives your cake that impressive multi-layer look that everyone loves.
Adding Candy Melt Drip
Prepare the Candy Melts
In separate bowls, melt the black and white candy melts with a bit of heavy cream until smooth. This drippy decoration adds a fun touch to your cake!
Drip and Set
Using squeeze bottles, alternate drizzling the colors around the edge of the top tier, allowing some to drip down the sides. Once finished, place the cake in the fridge to set up nicely.
Gold Drip Finishing Touch
Mix luster dust with a little water and paint over the drips for a stunning golden finish. Top it off with a graduation cake topper for that perfect final touch!
Tips for Success
- Make sure all your ingredients are at room temperature for an even mixture.
- If you have a kitchen scale, use it for accurate batter distribution across pans.
- Be patient and allow your cakes to cool completely before leveling to prevent crumbling.
Variations
- You can substitute food coloring for natural alternatives like fruit purees; they add fresh flavor too.
- Feel free to mix up flavors—chocolate or citrus cake layers can be delicious!
- To up the decoration game, top the cake with fresh fruits or edible flowers.
Serving Suggestions
- Serve slices with a scoop of vanilla ice cream for a delightful treat.
- Pair your cake with fresh berries to enhance the presentation and flavor. A refreshing touch!

FAQs
1. Can I make this cake ahead of time?
Yes! You can bake the layers in advance and freeze them. Just wrap them tightly in plastic wrap for freshness.
2. What if my frosting is too thick?
Simply add a tiny bit of heavy cream until you reach the desired consistency. Easy fix!
3. How do I store leftovers?
Use an airtight container to store any leftover cake in the fridge for up to five days.
4. Can I use a different type of frosting?
Absolutely! Both chocolate ganache and whipped cream would be great alternatives.
5. What other occasions can I use this recipe for?
This cake is fantastic for weddings, birthdays, or any celebration that needs a stunning centerpiece.
Creating a tiered graduation cake is more than just baking; it’s about crafting a moment of joy and celebration. This cake stands tall, symbolizing hard work and dedication, making it the perfect dessert to honor any graduate. With the right tools and a sprinkle of creativity, you’ll achieve a beautiful masterpiece that tastes as good as it looks. Don’t hesitate to customize your creation to match your graduate’s personality—it’s their special day, after all! Enjoy the smiles and compliments coming your way!
Print
Tiered Graduation Cake
This tiered graduation cake is a delightful blend of moist flavors and textures, making it the perfect centerpiece for any graduation celebration.
- Total Time: 1 hour 10 minutes
- Yield: Serves 20 1x
Ingredients
- 4 ⅞ cups all-purpose flour
- 4 ½ cups granulated sugar
- 3 ¾ teaspoons baking powder
- 1 ½ teaspoons salt
- 1 ½ cups unsalted butter (3 sticks, room temperature)
- 9 large eggs
- 2 ¼ cups buttermilk (room temperature)
- 1 tablespoon clear vanilla extract
- 3 tablespoons vegetable oil
- 12 ounces cream cheese (softened)
- 1 ½ cups unsalted butter (softened)
- 9 cups powdered sugar
- 2–4 tablespoons heavy cream (as needed)
- 1 ½ tablespoons vanilla extract
- ½ teaspoon salt (if using unsalted butter)
- Gel food coloring (optional)
- 4 ounces black candy melts
- 4 ounces white candy melts (optional)
- 5 tablespoons heavy whipping cream (divided)
- Gold luster dust or edible paint (optional)
- Small paintbrush (optional)
- Graduation cake topper
Instructions
- Preheat the oven to 350°F. Grease and prepare cake pans.
- Combine dry ingredients in a stand mixer until mixed.
- Mix in room-temperature butter until crumbly.
- Add eggs, buttermilk, vanilla, and oil, blending until smooth.
- Divide batter among pans and bake for 34-37 minutes.
- Cool cakes before removing from pans and cooling completely.
- Beat cream cheese and butter for frosting until creamy.
- Gradually add powdered sugar, vanilla, and whipping cream until smooth.
- Set up the base layer, frost, and stack remaining layers.
- Apply a crumb coat, refrigerate, then frost the final layer.
- Decorate with ombre rosettes, stack tiers, and add candy melt drip.
- Finish with gold luster dust and graduation topper.
Notes
Ensure all ingredients are at room temperature for even mixing.
Use a kitchen scale for accurate distribution of batter.
Let cakes cool completely before leveling to prevent crumbling.
- Prep Time: 30 minutes
- Cook Time: 40 minutes
- Category: Dessert
- Method: Baking
- Cuisine: American
Nutrition
- Calories: 550
- Sugar: 50
- Sodium: 300
- Fat: 24
- Saturated Fat: 14
- Unsaturated Fat: 6
- Trans Fat: 0
- Carbohydrates: 75
- Fiber: 1
- Protein: 6
- Cholesterol: 120


