Skip to content
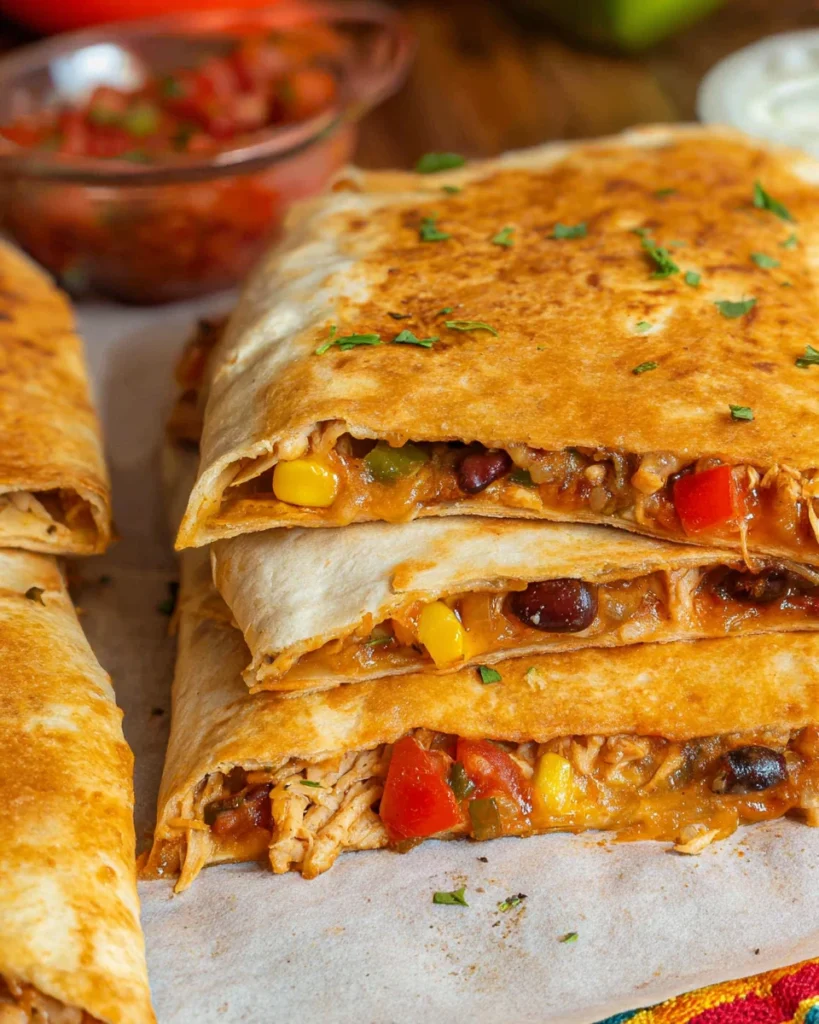
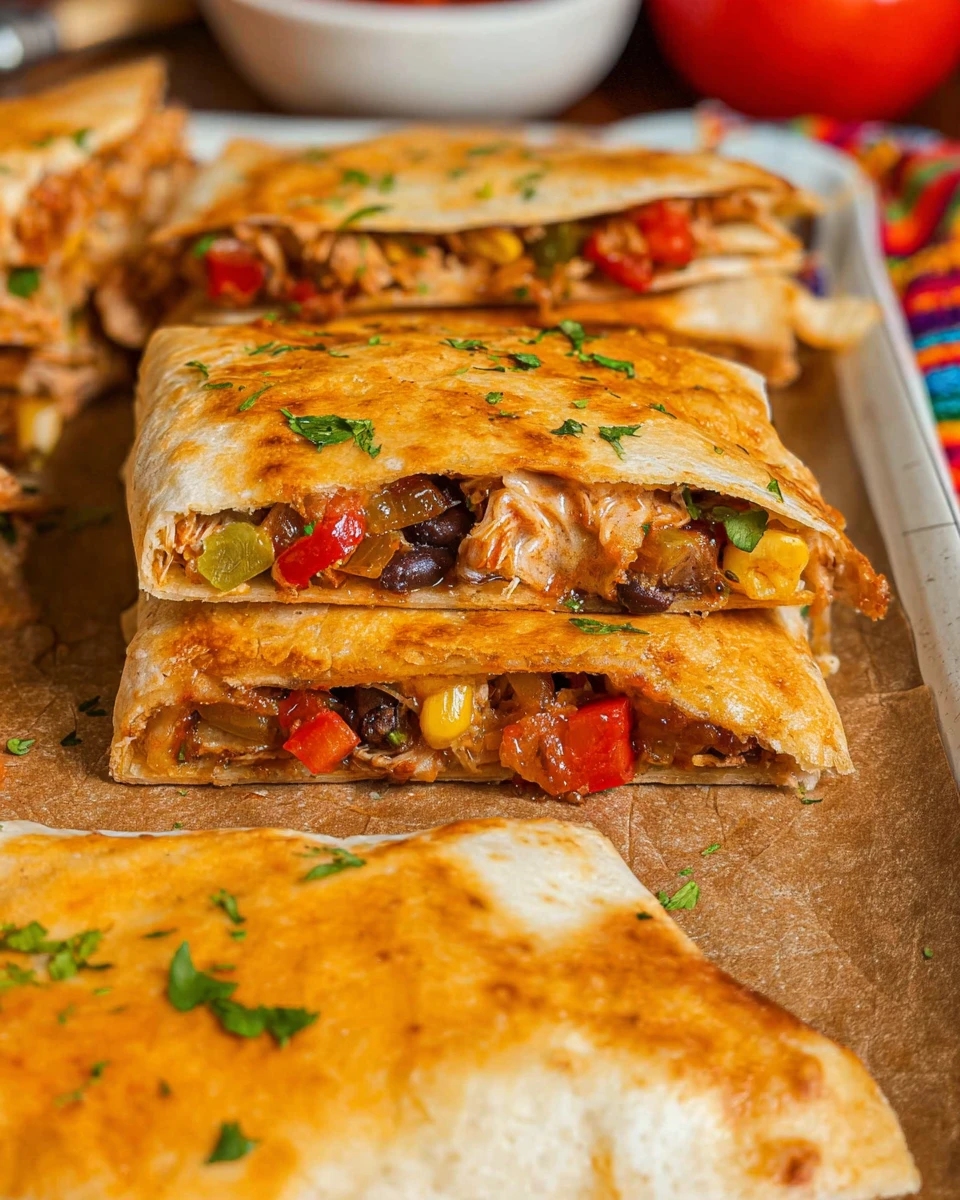
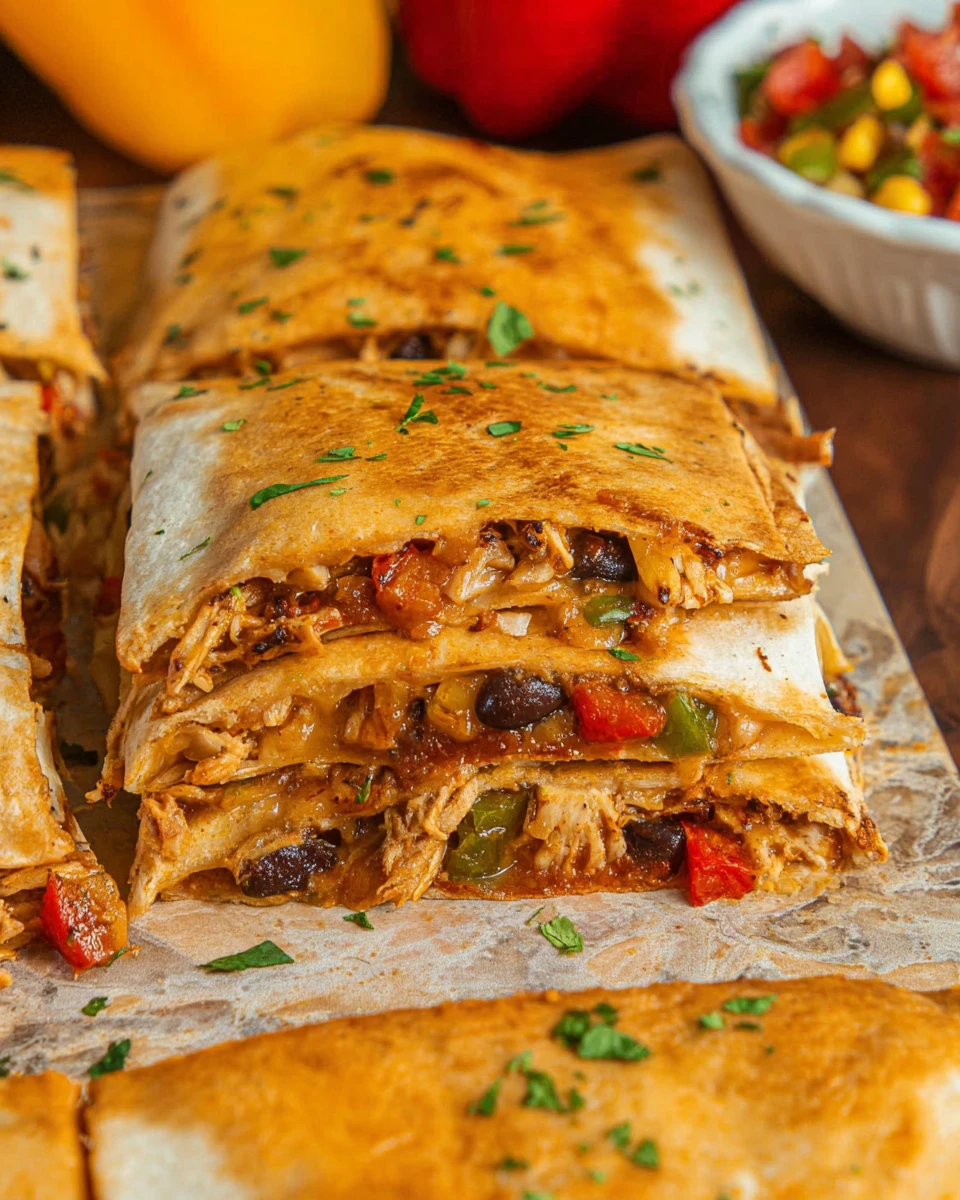
Sheet Pan Quesadillas are a fun and delicious way to enjoy a classic favorite with a twist. Cooking them on a sheet pan means you can easily whip up a big batch, perfect for a busy weeknight or a gathering with friends. You might be wondering how they differ from the usual quesadilla. Well, it’s all about the extra flavor and textures! Imagine crispy tortillas filled with melty cheese, fresh veggies, and savory chicken, all baked to perfection.
Thank you for reading this post, don't forget to subscribe!Making these quesadillas is not only simple but can also become a family activity. Everyone can join in, adding their favorite ingredients to the filling or picking their toppings. Plus, with a blend of spices and fresh produce, these quesadillas promise to keep your taste buds happy. So pull out your baking sheets and let’s get ready for some fun in the kitchen!
Why This Recipe Works
Sheet Pan Quesadillas take the traditional skillet approach and turn it into an efficient, crowd-pleasing method. The sheet pan technique allows for quick assembly and baking, which means fewer dishes and a faster dinner. Not to mention, the combination of flavors and textures creates a delightful bite.
You’ll love how all the ingredients meld together, giving you layers of flavor in each slice. This recipe is not just for feeding a crowd; it’s also fantastic for meal prepping. You can make a large batch and enjoy these quesadillas throughout the week.
Why You’ll Love This Sheet Pan Quesadillas
There are lots of reasons to adore these Sheet Pan Quesadillas. First, they’re super easy to prepare, making them perfect for those busy weeknights when time is tight. You can have dinner on the table in no time!
The versatility of this recipe shines through its customizable nature. Want to add more veggies? Go for it! Prefer a different protein? That’s totally okay too! The best part is it brings everyone to the table, creating a meal that feels like a celebration of flavors and togetherness.
Ingredients
- 1 Tablespoon olive oil
- 1 red bell pepper, diced
- 2 jalapeños, finely diced (adjust to taste)
- 2 cloves garlic, minced
- 1 cup black beans, drained and rinsed
- 1 cup corn (fresh, canned, or thawed from frozen)
- 2 cups shredded rotisserie chicken
- 1 teaspoon chili powder
- 1 teaspoon cumin
- 1 teaspoon smoked paprika
- 1 teaspoon salt
- 1/2 teaspoon black pepper
- 8 large burrito-size flour tortillas
- 2 1/2 cups shredded Monterey Jack cheese
- 2 Tablespoons melted butter
Preparing the Flavorful Filling
Heat the Olive Oil
Let’s get started! First, you’ll want to preheat your oven to 425°F (220°C). While that warms up, grab a large skillet and pour in the olive oil, heating it over medium heat until it’s hot.
Sauté the Vegetables
Next, toss in your diced red bell pepper, finely diced jalapeños, and minced garlic. Sauté this colorful mix for about 3-4 minutes. You’re aiming for soft peppers that will pack lots of flavor into your quesadillas.
Mix in Beans and Chicken
After the veggies soften, it’s time to stir in the black beans, corn, and shredded rotisserie chicken. This step adds a hearty touch and a punch of protein to the filling.
Season the Mixture
Now for the fun part: seasoning! Sprinkle in your chili powder, cumin, smoked paprika, salt, and black pepper. This combination of spices will elevate the whole dish. Allow the mixture to cook for another 2-3 minutes, giving everything time to blend together beautifully. Once it’s done, remove it from the heat and set it aside.
Assembling the Quesadillas
Line the Baking Sheet
Before you start assembling, prepare a baking sheet by lining it with parchment paper. This will help with easy cleanup and prevents any sticking.
Place the Tortillas
Arrange four tortillas on the sheet pan, making sure to let the edges hang over the sides a bit. This will help keep your filling snug inside.
Add Cheese and Filling
Now, sprinkle a generous amount of shredded Monterey Jack cheese over the tortillas. Next, evenly spread your flavorful filling on top of the cheese. This layering will keep everything cheesy and delicious!
Layer and Brush
Finally, place the remaining four tortillas on top. Brush the tops with melted butter to give them a golden, crispy finish. Fold those overhanging edges of the tortillas up and over the top to seal everything in.
Baking for Crispy Perfection
Pressing Down
To ensure your quesadillas bake evenly, cover the stacked tortillas with another sheet of parchment paper. Place a heavy pan or an oven-safe weight on top. This will keep the quesadillas flat and help them become crispy.
Bake to Golden Brown
It’s time to bake! Place your baking sheet in the oven for about 20-25 minutes. You’ll know they’re ready when the tortillas are golden brown and crispy. That’s the magic moment!
Serving the Quesadillas
Slice and Serve
After baking, carefully remove the quesadillas from the oven. Let them cool for a few minutes, then grab a sharp knife and cut them into squares or wedges.
Add Toppings
Serving these warm with toppings adds a final touch. Consider salsa, sour cream, fresh cilantro, diced red onion, or sliced jalapeños. Each dip and sprinkle adds layers of flavor, making each bite even more enjoyable.
Serving Suggestions
- Pair with a fresh garden salad for a light meal.
- Serve alongside guacamole and tortilla chips for that perfect crunch.
Tips for Success
- Drain your beans well before adding. This ensures your quesadillas won’t turn soggy.
- Feel free to experiment with different cheeses like cheddar, pepper jack, or even a blend for unique flavors.
Variations
- For a vegetarian twist, simply substitute the rotisserie chicken with more black beans or some grilled veggies.
- Add diced tomatoes or avocado to your filling for extra freshness and a pop of color.
Storage Tips
- Store any leftovers in an airtight container in the refrigerator for up to 3 days.
- When you’re ready to reheat, place them in the oven to maintain that crispy outside.

FAQs
1. Can I make these quesadillas in advance?
Absolutely! You can prepare the filling and even assemble the quesadillas ahead of time, just bake them right before you want to serve.
2. How can I make these quesadillas spicy?
If you like heat, add more jalapeños or some diced chili peppers into the filling.
3. What’s the best way to store leftovers?
An airtight container in the fridge for 3 days is perfect for keeping your quesadillas fresh.
4. Can I freeze sheet pan quesadillas?
Yes, feel free to freeze them before baking for up to 2 months. Just wrap them tightly to maintain freshness.
5. What should I serve with sheet pan quesadillas?
These quesadillas pair beautifully with salsa, guacamole, or a delightful side of rice.
These Sheet Pan Quesadillas are more than just a meal; they’re a perfect way to bring people together. With lots of options and easy preparation, you’ll find that they can become a regular on your dinner rotation. Gather your family, stir up some fun, and enjoy flavorful bites that will surely delight!
Print
Sheet Pan Quesadillas
These Sheet Pan Quesadillas offer a fun twist on a classic favorite, with layers of delicious flavors and textures. Perfect for busy weeknights or gatherings, they invite everyone to join in the preparation.
- Total Time: 40 minutes
- Yield: 8 servings 1x
Ingredients
- 1 Tablespoon olive oil
- 1 red bell pepper, diced
- 2 jalapeños, finely diced (adjust to taste)
- 2 cloves garlic, minced
- 1 cup black beans, drained and rinsed
- 1 cup corn (fresh, canned, or thawed from frozen)
- 2 cups shredded rotisserie chicken
- 1 teaspoon chili powder
- 1 teaspoon cumin
- 1 teaspoon smoked paprika
- 1 teaspoon salt
- 1/2 teaspoon black pepper
- 8 large burrito-size flour tortillas
- 2 1/2 cups shredded Monterey Jack cheese
- 2 Tablespoons melted butter
Instructions
- Preheat the oven to 425°F (220°C).
- Heat olive oil in a large skillet over medium heat.
- Sauté diced red bell pepper, jalapeños, and garlic for 3-4 minutes.
- Stir in black beans, corn, and shredded chicken. Cook for another 2-3 minutes.
- Season with chili powder, cumin, smoked paprika, salt, and black pepper.
- Prepare a baking sheet with parchment paper and arrange 4 tortillas.
- Sprinkle cheese over the tortillas, layer the filling, and add more cheese.
- Place remaining tortillas on top, brush with melted butter, and fold edges over.
- Cover with another sheet of parchment paper and place a weight on top.
- Bake for 20-25 minutes until golden brown and crispy.
- Cool slightly, then slice and serve with desired toppings.
Notes
Drain beans well to avoid sogginess.
Experiment with different cheeses for variety.
Store leftovers in an airtight container for up to 3 days.
- Prep Time: 15 minutes
- Cook Time: 25 minutes
- Category: Main Course
- Method: Baking
- Cuisine: Mexican
Nutrition
- Calories: 320
- Sugar: 2
- Sodium: 600
- Fat: 15
- Saturated Fat: 7
- Unsaturated Fat: 8
- Trans Fat: 0
- Carbohydrates: 30
- Fiber: 4
- Protein: 18
- Cholesterol: 40