 Skip to content
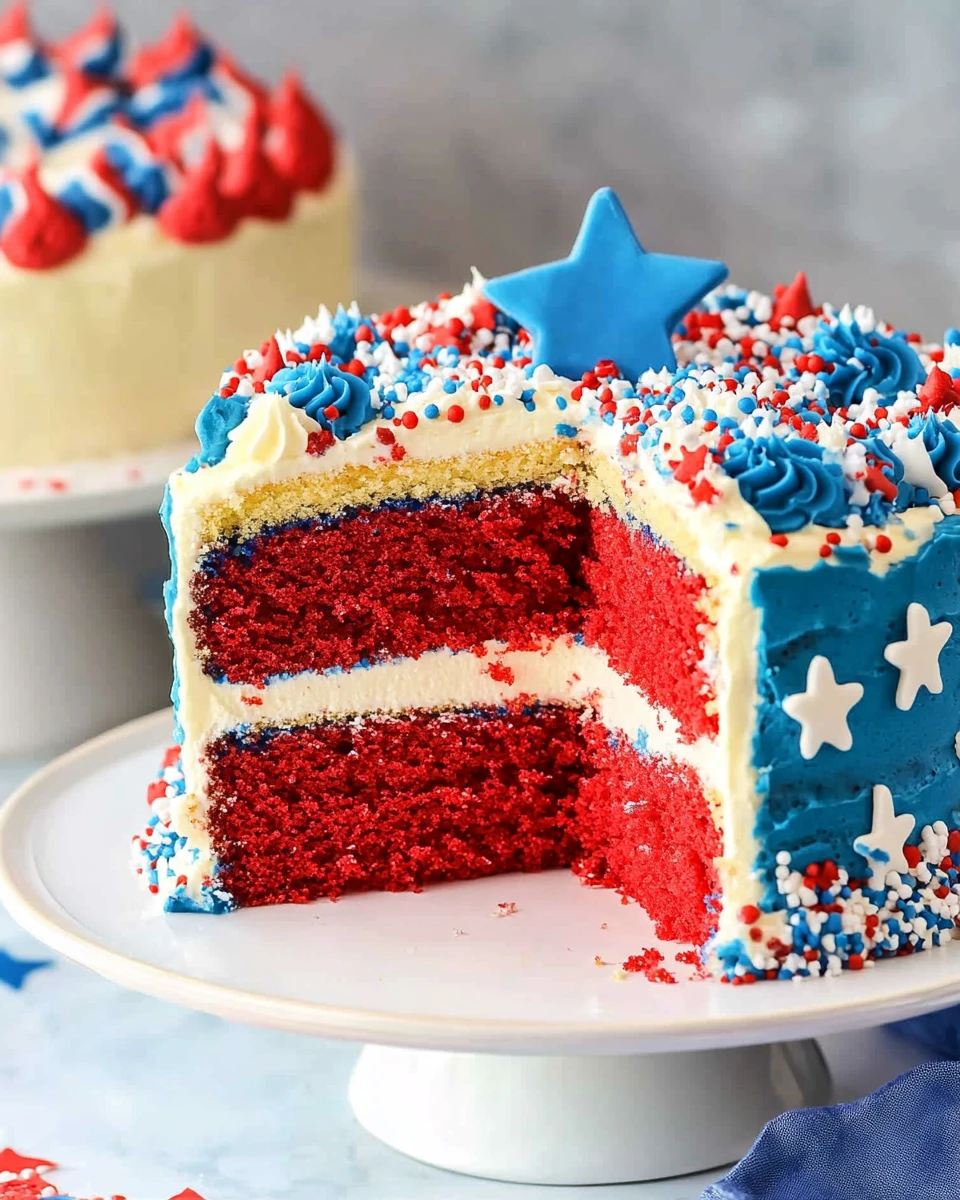
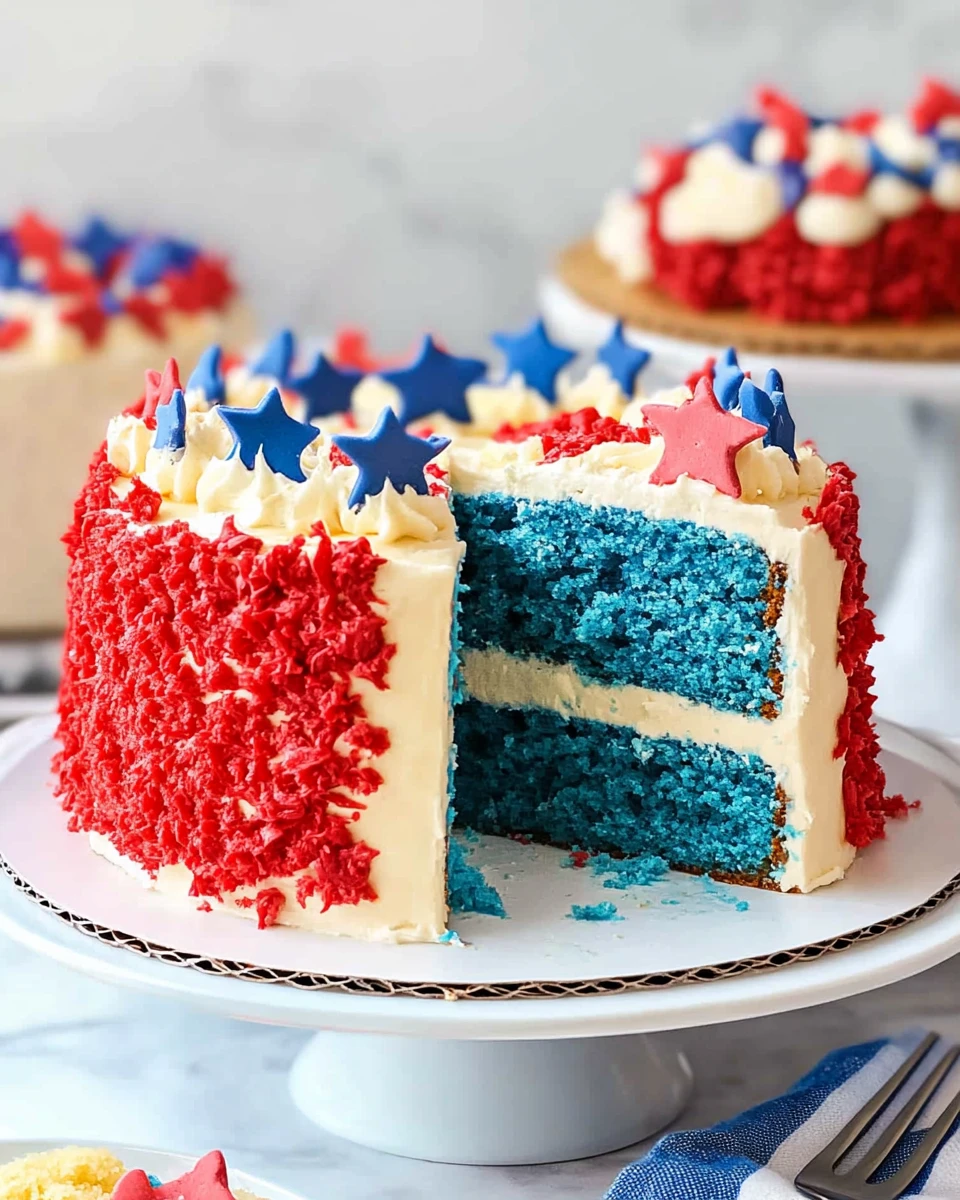
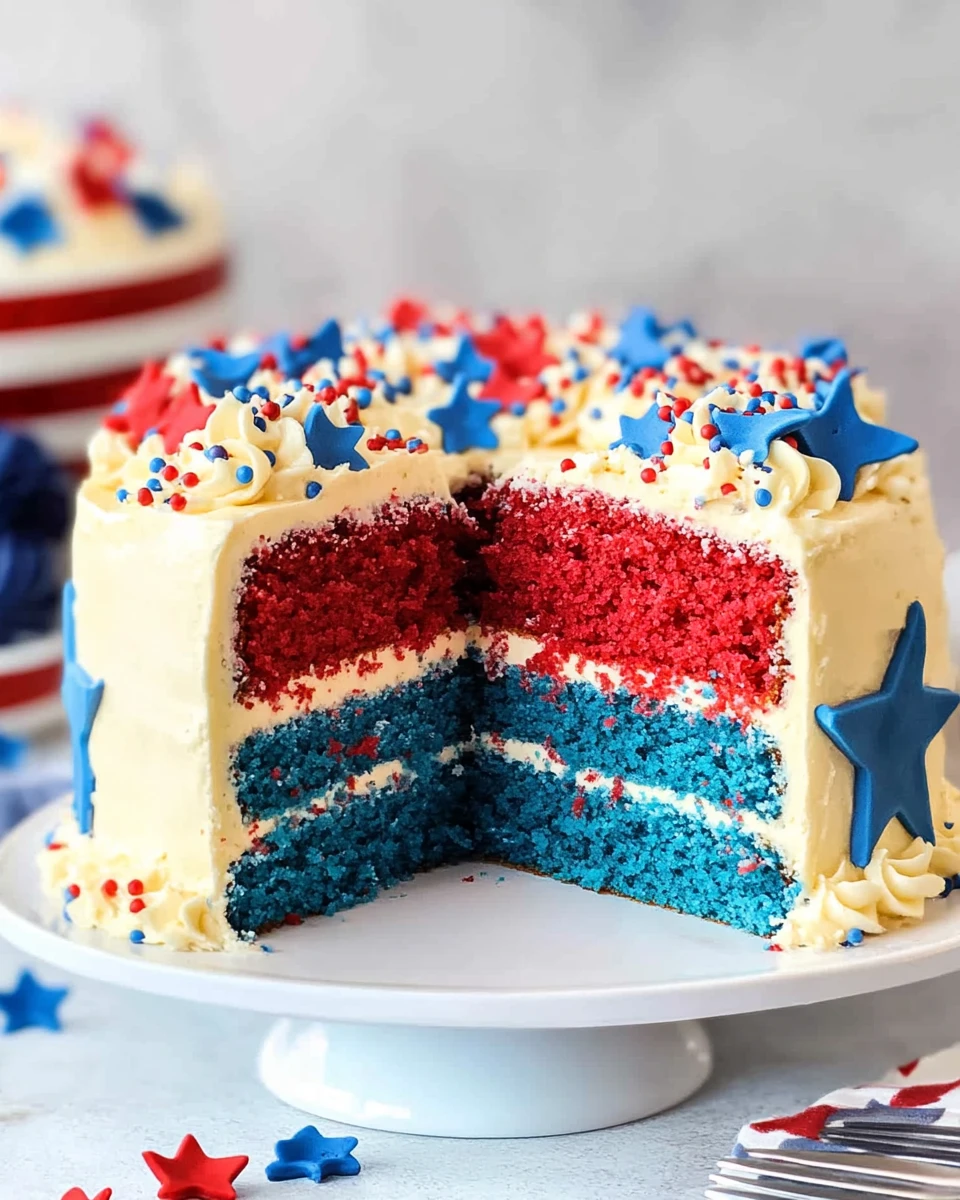
Creating this Red, White and Blue Cake is not just about baking; it’s about coming together and celebrating. Whether you’re hosting a backyard BBQ or need a show-stopper for a holiday party, this cake is a real winner. Imagine layers of fluffy cake in vibrant colors, stacked high and frosted to perfection. Each bite offers a lovely mix of flavors and textures. Plus, it’s such a fun baking project! Kids can get involved with mixing and decorating, making it a great way to share the joy of baking. I can’t wait to share how to create this masterpiece together; it’s as exciting to make as it is delicious to eat! So, let’s start whipping up this patriotic treat.
Thank you for reading this post, don't forget to subscribe!Why This Recipe Works
This recipe shines because it strikes a great balance between sweetness and vanilla richness. That’s right—each slice of the Red, White and Blue Cake presents a delicious flavor profile that everyone will enjoy. Plus, the layering technique is not just for taste; it creates a visually stunning effect. You’ll feel like a pro baker when you serve it!
Additionally, using gel colors allows you to achieve vibrant hues without affecting the cake’s flavor. You will be amazed at how beautifully the colors pop, bringing a festive spirit that’s perfect for any celebration.
Why You’ll Love This Red, White and Blue Cake
You’re going to love this cake for so many reasons! First, it’s ideal for patriotic celebrations like Memorial Day or July 4th. Just picture your family and friends gathering around this stunning cake.
Secondly, this cake offers a fun and interactive baking experience everyone can enjoy, from kids to adults. It becomes an activity everyone can partake in, creating memories while having fun.
Lastly, every slice is a festival of colors and flavors, making each bite delightful. You’ll want to share this cake with everyone!
Ingredients
For the Cake
- 2 cups (380g) granulated sugar
- ½ cup (118 ml) vegetable oil
- 3 large eggs
- 1 tablespoon (15 ml) pure vanilla extract
- ½ cup (118 ml) sour cream
- 2 ½ cups (350 g) all-purpose flour
- 3 teaspoons (11.2 g) baking powder
- 1 teaspoon (5 g) salt
- 1 ¼ cups (296 ml) milk (nonfat recommended)
- Gel colors: super red & royal blue
For the Frosting
- 2 ½ cups (576g) unsalted butter, cold
- 8 cups (1041g) powdered sugar
- 1 tablespoon (15 ml) pure vanilla extract
- 2-3 tablespoons (30-44 ml) heavy whipping cream (or milk)
- Pinch of salt
Preparing the Red, White and Blue Cake
Preheat and Prepare Pans
First things first, preheat that oven to 350°F (175°C). Now, grab three 8-inch round baking pans. Line the bottoms with parchment paper and grease the sides. This step helps prevent any sticky situations later on!
Create the Cake Batter
In a large mixing bowl, combine the granulated sugar, vegetable oil, eggs, and vanilla extract. Beat on medium speed for about 2 minutes and don’t forget to scrape down the bowl as needed! Next, mix in the sour cream until it’s all well integrated.
Combine Dry Ingredients
Grab another bowl and mix the all-purpose flour, baking powder, and salt together. Gradually add half of this dry mix along with half of the milk to your wet batter. Keep that mixer on low speed. Once combined, repeat with the remaining dry ingredients and milk. Make sure to scrape the bowl as needed!
Color the Cake Batter
Now it’s time to bring some color to your cake! Divide the batter into three equal portions, roughly 1 2/3 cups each. Leave one portion undyed, and color the other two with gel colors. Get those vibrant shades just right, and feel free to get creative!
Bake the Cake Layers
Pour the batter evenly into the prepared pans. Bake for 20-23 minutes, rotating the pans halfway through for even baking. Test doneness with a toothpick; when it comes out clean, it’s cake time! Cool the layers completely before frosting.
Prepare the Frosting
While the cake cools, let’s whip up some frosting. Cut the cold butter into pieces and whip it in a mixer for 5-7 minutes. It should look light and fluffy. Gradually add the powdered sugar, alternating with the liquid ingredients, and beat until everything is well combined.
Assemble and Decorate the Cake
Once the layers are cool, level the tops so they’re nice and even. Spread a dollop of frosting on your cake board and add the bottom layer. Pipe frosting on top, layering the blue, white, and red cakes.
Create the Crumb Coat
Fill any gaps between the layers with frosting and then apply a crumb coat. Use an offset spatula to smooth that out perfectly. This little step ensures a clean finish!
Final Decorative Touches
Set aside 1 ¼ cups of frosting for decorating and dye it in red, white, and blue. Get a piping bag ready with all three colors to create a stunning border. Frost the top and sides of the cake, and press sprinkles into the sides for that festive finish.
Serving Suggestions
Consider serving your cake with fresh berries and whipped cream for an added flavor boost. It pairs perfectly with iced tea or lemonade, making it an ideal summer treat.
Tips for Success
To achieve the best mixing results, ensure your ingredients are at room temperature. If you have one, a cake leveler is your friend for uniform layers, ensuring smooth stacking and decoration.
Variations
Feel free to experiment! You can replace vanilla with almond extract for a uniquely different flavor twist. Or try adding citrus zests for a refreshing touch.
Storage Tips
If you have leftovers, store them in an airtight container at room temperature for up to 3 days. Refrigerate for up to a week if you want to keep it fresh longer.
Pairing Ideas
A scoop of vanilla ice cream alongside this cake makes for a delightful dessert experience. Additionally, it pairs nicely with coffee or a sweet dessert wine to elevate the flavors.
FAQs
1. Can I use cake mix for this recipe?
Absolutely! You can swap homemade ingredients with a boxed cake mix and just follow the package instructions.
2. How far in advance can I make this cake?
You can bake the cake layers 1-2 days ahead. Just store them in the refrigerator until you’re ready to frost!
3. Is it necessary to use gel colors?
Not at all! While gel colors give vibrant results, regular food coloring can work too, although it may slightly alter the cake’s texture.
4. How do I prevent my cake from doming?
To reduce doming, use baking strips around the pans while baking, which promotes even baking.
5. What can I do with leftover frosting?
Store any leftover frosting in the refrigerator for up to 2 weeks. Use it to top cupcakes or cookies for an extra treat!
Creating this Red, White and Blue Cake brings a little joy to your summer gatherings and fosters togetherness in celebration. This colorful and flavorful masterpiece is not just for special occasions; it’s a canvas for creativity in the kitchen. Each layer tells a story, and with every bite, you’ll remember the fun and laughter that accompanied its creation. Happy baking, and enjoy this delightful treat!
Print
Red, White and Blue Cake
This colorful cake is perfect for patriotic holidays and gatherings, offering a fun baking experience and a delightful treat with every slice.
- Total Time: 53 minutes
- Yield: 12 servings 1x
Ingredients
- 2 cups (380g) granulated sugar
- ½ cup (118 ml) vegetable oil
- 3 large eggs
- 1 tablespoon (15 ml) pure vanilla extract
- ½ cup (118 ml) sour cream
- 2 ½ cups (350 g) all-purpose flour
- 3 teaspoons (11.2 g) baking powder
- 1 teaspoon (5 g) salt
- 1 ¼ cups (296 ml) milk (nonfat recommended)
- Gel colors: super red & royal blue
- 2 ½ cups (576g) unsalted butter, cold
- 8 cups (1041g) powdered sugar
- 1 tablespoon (15 ml) pure vanilla extract
- 2–3 tablespoons (30–44 ml) heavy whipping cream (or milk)
- Pinch of salt
Instructions
- Preheat the oven to 350°F (175°C) and prepare three 8-inch round pans.
- In a mixing bowl, combine sugar, oil, eggs, and vanilla; beat for 2 minutes, then mix in sour cream.
- In another bowl, mix flour, baking powder, and salt. Gradually add some dry mix and milk to the wet batter, repeating until combined.
- Divide the batter into three portions; leave one portion undyed and color the others with gel colors.
- Pour the batter into prepared pans and bake for 20-23 minutes; cool layers completely before frosting.
- Whip the cold butter until fluffy, gradually mixing in powdered sugar and the liquid ingredients until well combined.
- Level the cooled cake layers and assemble with layers of frosting, applying a crumb coat for a smooth finish.
- Decorate with the remaining colored frosting and top with sprinkles.
Notes
Ingredients at room temperature yield the best mixing results.
A cake leveler helps achieve uniform layers for a professional finish.
Store leftovers in an airtight container for up to 3 days or refrigerate for up to a week.
- Prep Time: 30 minutes
- Cook Time: 23 minutes
- Category: Dessert
- Method: Baking
- Cuisine: American
Nutrition
- Calories: 450
- Sugar: 35
- Sodium: 200
- Fat: 20
- Saturated Fat: 10
- Unsaturated Fat: 5
- Trans Fat: 0
- Carbohydrates: 65
- Fiber: 1
- Protein: 4
- Cholesterol: 50


