Skip to content
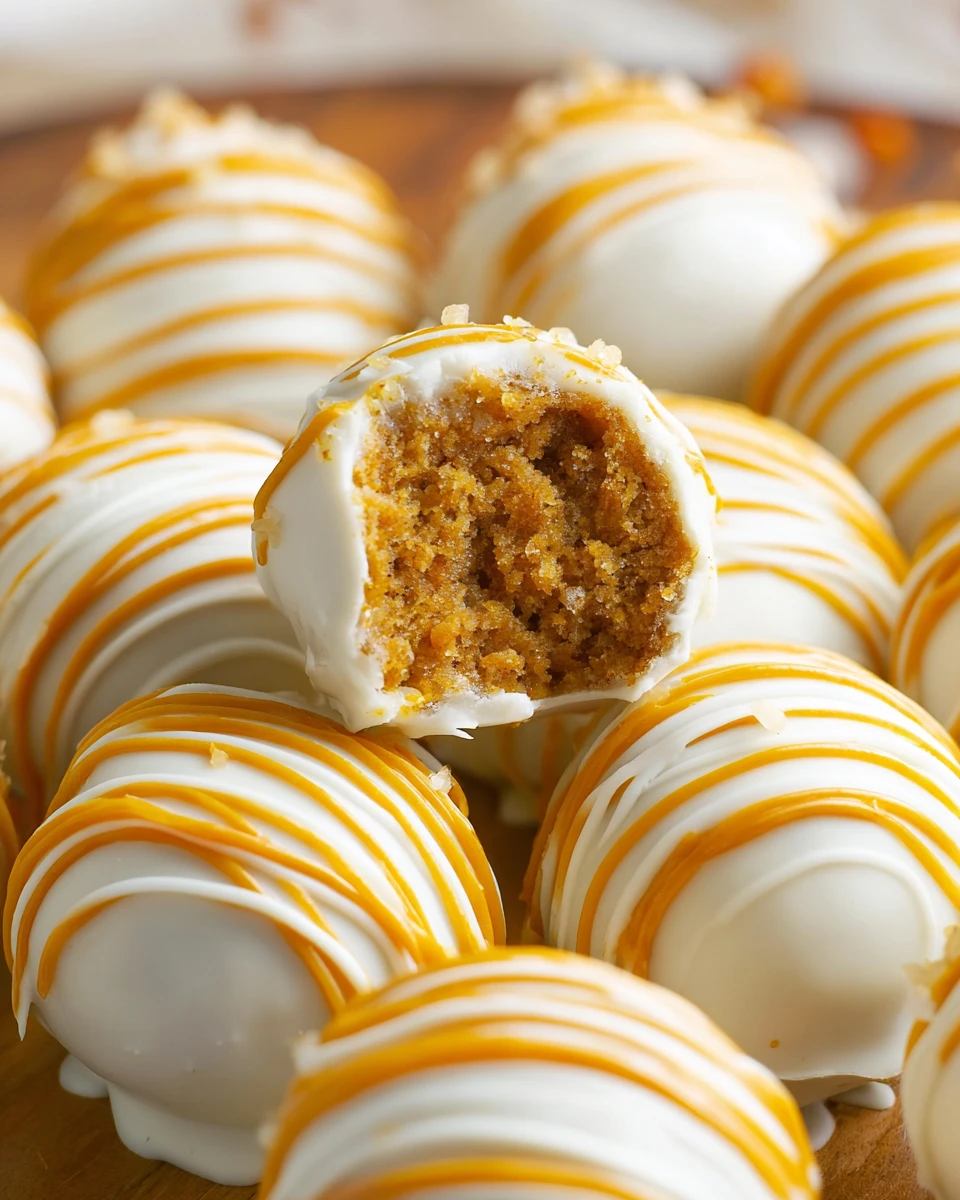
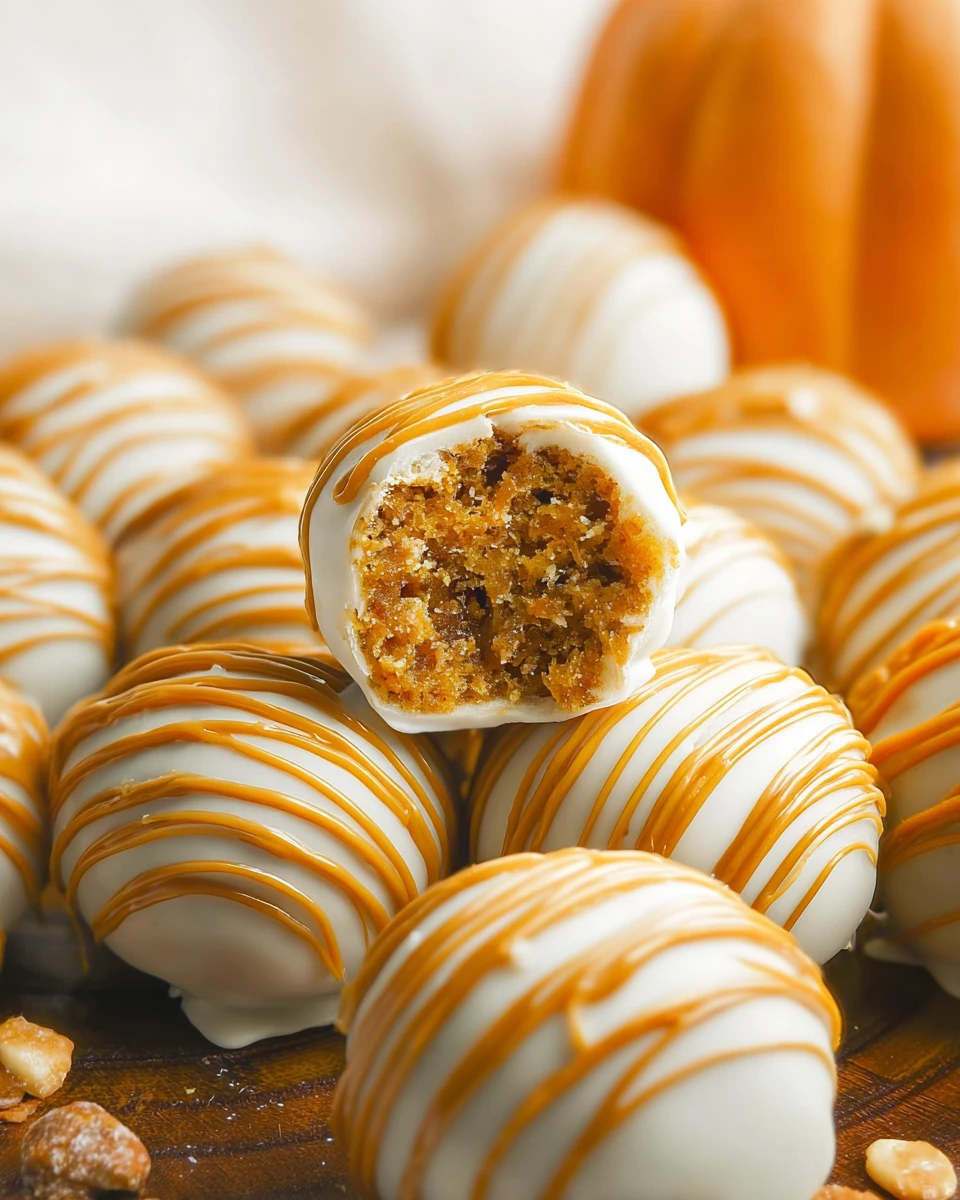
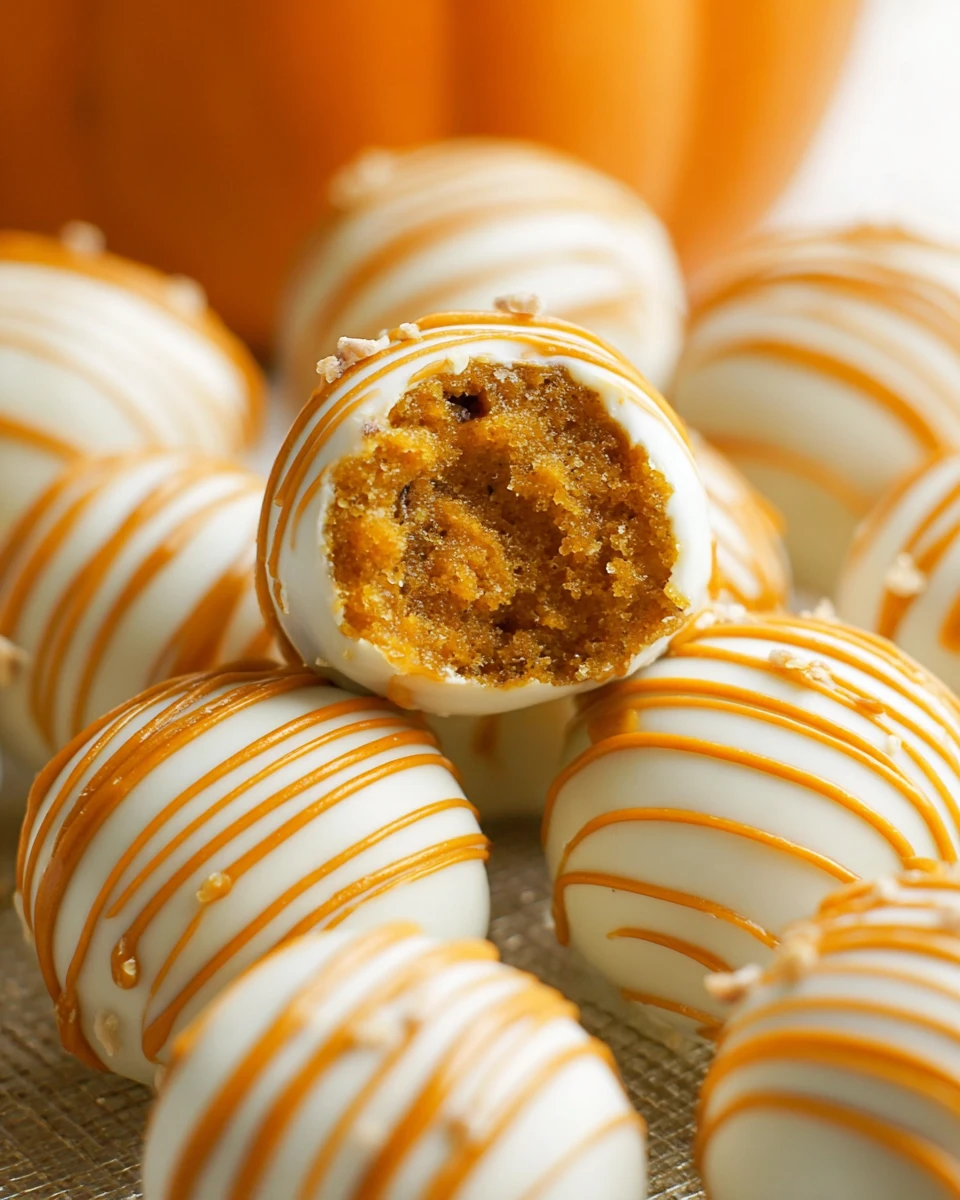
Creating pumpkin cake pops is a fun way to celebrate the flavors of fall. These bite-sized treats perfectly combine the moistness of pumpkin cake with creamy frosting and a crunchy chocolate coating. Whether you’re preparing for Halloween, Thanksgiving, or just want something sweet on a cozy night, pumpkin cake pops are sure to brighten your day! Plus, making them is as simple as it is delightful. Even if you’re new to baking, this recipe is forgiving and will help you create incredible treats that impress friends and family alike. Get ready to roll up your sleeves and enjoy the little baking adventure that is making pumpkin cake pops!
Thank you for reading this post, don't forget to subscribe!Why This Recipe Works
Creating pumpkin cake pops is a delightful blend of flavors and textures that captures the essence of fall. The moistness of the pumpkin cake, combined with the creamy frosting and decadent chocolate coating, not only makes for a tasty treat but also provides the perfect bite-sized indulgence. This recipe works because of its simple method and forgiving nature, allowing even novice bakers to achieve delicious results.
Why You’ll Love This Pumpkin Cake Pops
These pumpkin cake pops are not just desserts; they’re a celebration of the season! With their vibrant orange hue, they scream autumn, making them perfect for Halloween parties, Thanksgiving gatherings, or just a cozy evening at home. The touch of cream cheese frosting adds richness while the chocolate coating brings in that satisfying crunch, making every bite memorable.
Ingredients
- 1 batch Pumpkin Cake (from 9×13 pan)
- 6 ounces cream cheese, at room temperature
- 6 tablespoons butter, at room temperature
- 3 cups confectioners’ sugar
- 12 ounces white or milk chocolate
Making Pumpkin Cake Pops
Baking the Pumpkin Cake
Start with your choice of a homemade pumpkin cake or a convenient cake mix. Whichever you choose, bake it in a 9×13 pan according to the recipe or package instructions. After baking, be sure to let it cool completely on a wire rack. This step is essential as it ensures your cake pops will hold together nicely.
Preparing the Cream Cheese Frosting
In a mixing bowl, combine the softened cream cheese and butter. Using either a stand mixer or a hand mixer, beat them together until the mixture is light and fluffy. Gradually add in the confectioners’ sugar, mixing until everything is fully incorporated and smooth. This frosting will add a delicious creaminess to your cake pops.
Crumbling the Cake
Once the pumpkin cake is completely cool, it’s time to cut it into 12 bars. Crumble each bar into a large mixing bowl until the texture resembles fine crumbs. Use a fork to break apart any large pieces, ensuring that you have an even consistency. This crumbling step is crucial as it creates the base for your cake pops.
Combining Cake and Frosting
Next, spoon the cream cheese frosting into the bowl with the crumbled cake. Using the back of a large metal spoon, mix thoroughly. The goal is to ensure the cake crumbs are fully coated with frosting so that the mixture holds together well when formed into balls. Don’t skip this step; it’s what binds everything together!
Forming the Cake Balls
Now comes the fun part! Roll the cake mixture into 1½-inch balls. Place the formed balls on wax or parchment paper. Once you’ve rolled them all, cover with plastic wrap and freeze for about 10-15 minutes. This helps firm them up, making them easier to handle for the next steps.
Melting the Chocolate Coating
In a microwave-safe bowl, melt your chosen chocolate using short, 30-second intervals, stirring in between until smooth. Alternatively, if you prefer, you can melt the chocolate in a metal bowl over a saucepan of simmering water. Stir occasionally to ensure it melts evenly. Make sure that your chocolate has a nice, glossy finish before proceeding!
Dipping the Cake Pops
Using a toothpick or fork, dip each cake ball in the melted chocolate, ensuring it’s completely coated. Let the excess chocolate drip off before placing them back on the wax paper. If you notice any chocolate pooling around the base, don’t worry too much; you can easily fix this after it sets.
Setting the Cake Pops
Allow the dipped cake pops to set until the chocolate coating is completely firm. You can store them in an airtight container at room temperature for a few days or refrigerate them if you plan to make them in advance. They can last up to a week this way!
Serving Suggestions
Serve these delightful pumpkin cake pops at parties, holiday gatherings, or even as a sweet surprise in lunchboxes. They pair wonderfully with a steaming cup of coffee or a fall-themed tea, creating a cozy experience that everyone will enjoy.
Tips for Success
- Ensure your cream cheese and butter are at room temperature for easy mixing.
- Don’t overmix the crumbled cake with frosting; just enough to combine will yield perfect cake pops.
- Make sure the cake pops are completely chilled before dipping for easier handling.
Variations
- Spiced Pumpkin Cake Pops: Add pumpkin spice to your cake mixture for an extra flavor kick.
- Chocolate Dipped Variations: Get creative and try dark or flavored chocolates for the coating.
- Decorative Toppings: Roll in crushed nuts, sprinkles, or drizzle with contrasting chocolate for a decorative finish that adds flair and fun!
Pairing Ideas
Pair these pumpkin cake pops with apple cider for a quintessential autumn treat, or serve alongside other themed desserts like caramel apples or cinnamon rolls. This will enhance your fall dessert spread and make every gathering a memorable occasion.
FAQs
1. Can I use a store-bought cake mix for this recipe?
Yes, using a store-bought pumpkin cake mix is a great alternative that still yields tasty results.
2. How long can I store the cake pops?
These cake pops can be stored in an airtight container at room temperature for up to 3 days or in the refrigerator for about a week.
3. Can I freeze pumpkin cake pops?
Absolutely! You can freeze them for up to 3 months. Just ensure they are well-wrapped to avoid freezer burn.
4. How do I make cake pops without a mixer?
You can make the frosting by hand; just mix thoroughly until light and fluffy. For the cake, use a fork to crumble it finely.
5. What can I do if the chocolate coating is too thick?
If your chocolate coating is too thick, adding a little bit of coconut oil or shortening can help thin it out, making dipping easier.
These pumpkin cake pops are sure to become a cherished recipe, offering warmth and joy to gatherings across the fall season. Their delightful flavors, easy preparation, and adorable presentation make them an irresistible treat. Embrace the spirit of the season and enjoy every bite!
Print
Pumpkin Cake Pops
These Pumpkin Cake Pops are a delightful treat that combines the moistness of pumpkin cake with creamy frosting and a crunchy chocolate coating, making them perfect for fall celebrations or a sweet indulgence at home.
- Total Time: 1 hour
- Yield: 12 cake pops 1x
Ingredients
- 1 batch Pumpkin Cake (from 9×13 pan)
- 6 ounces cream cheese, at room temperature
- 6 tablespoons butter, at room temperature
- 3 cups confectioners' sugar
- 12 ounces white or milk chocolate
Instructions
- Bake the pumpkin cake in a 9×13 pan and let it cool.
- Mix together cream cheese and butter until fluffy.
- Gradually add confectioners' sugar to the cream cheese mixture.
- Crumble the cooled pumpkin cake into fine crumbs.
- Combine cake crumbs with frosting until fully mixed.
- Roll the mixture into 1½-inch balls and freeze for 10-15 minutes.
- Melt chocolate in a microwave or using a stovetop method.
- Dip cake balls into melted chocolate, ensuring full coating.
- Allow the chocolate coating to set before serving.
Notes
Soften cream cheese and butter before mixing for best results.
Avoid overmixing the cake and frosting mixture to achieve the right texture.
Ensure cake pops are completely chilled before dipping them in chocolate.
- Prep Time: 30 minutes
- Cook Time: 30 minutes
- Category: Dessert
- Method: Baking and Dipping
- Cuisine: American
Nutrition
- Calories: 150
- Sugar: 12
- Sodium: 50
- Fat: 7
- Saturated Fat: 4
- Unsaturated Fat: 2
- Trans Fat: 0
- Carbohydrates: 20
- Fiber: 1
- Protein: 2
- Cholesterol: 20