Skip to content
Old-Fashioned Buttermilk Pie is a Southern classic that wraps you in a warm hug with its creamy filling and flaky crust. This pie is a nostalgic dessert that many fondly remember from family gatherings and potlucks. The perfect blend of tangy buttermilk and sweet sugar creates a delightful taste sensation, while the golden crust offers just the right amount of crisp. There’s an effortless charm about this pie—it’s not overly complicated, yet it makes a statement on any dessert table.
Thank you for reading this post, don't forget to subscribe!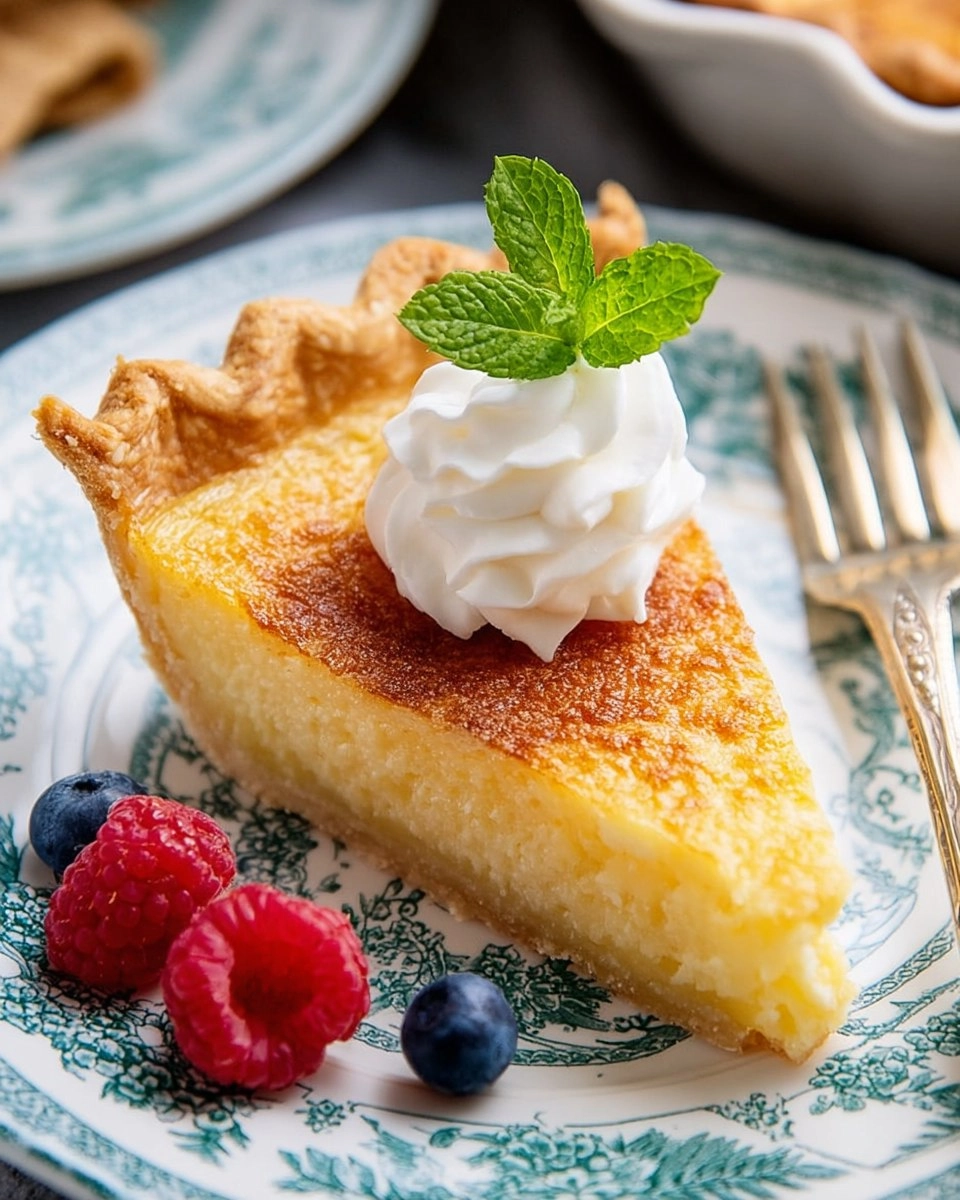
I first stumbled upon this recipe during a sweltering summer in the South when my grandmother decided to whip up something special. Each slice brought back sweet memories of family dinners and friendly laughter around the table. Old-Fashioned Buttermilk Pie not only satisfies that sweet tooth but also brings a comforting sense of tradition to the dining experience. What I love most about this recipe is how economical and easy it is to make, yet it feels special enough for any occasion. I can’t wait for you to try your hand at this recipe!
Why You’ll Love This Recipe
- Simple & Quick: Ready in just about 15 minutes of prep time, with only a few hands-on steps to follow.
- Irresistible Flavor: The combination of sweet, tangy buttermilk and rich butter creates a uniquely delicious pie.
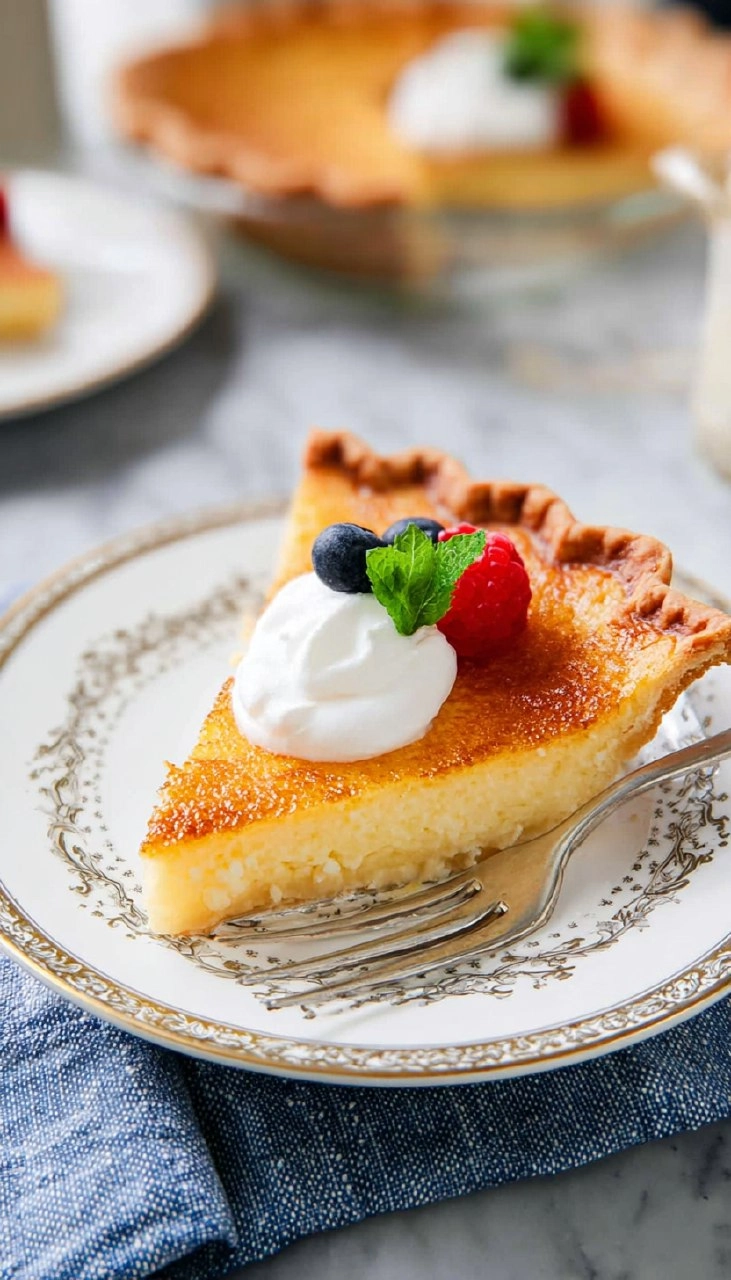
- Eye-Catching Appeal: Its golden, puffy surface and creamy filling make it both rustic and elegant.
- Flexible Serving: Enjoy it as a cozy dessert for family dinners or impress friends at gatherings.
- Diet-Friendly Options: You can easily adapt it to be gluten-free or use dairy-free butter, making it versatile for different diets.
Ingredients You’ll Need
-
1 unbaked 9-inch pie crust: You can use store-bought or make a homemade version (recipe below). A buttery crust complements the rich filling beautifully.
-
3 large eggs, lightly beaten: These bind the filling and give it structure. Use room temperature eggs for best results.
-
1 cup granulated sugar: Adds sweetness that balances the tanginess of buttermilk. If you’re looking for a lower sugar option, consider using coconut sugar instead.
-
2 tablespoons all-purpose flour: It thickens the filling slightly, ensuring it sets properly. For gluten-free adaptation, you could use a 1:1 gluten-free flour blend.
-
½ cup (1 stick) salted butter, melted and slightly cooled: The richness that butter brings is essential to this pie. Unsalted butter can be used if you prefer.
-
1 cup whole buttermilk: This is the star of the show! Its acidity lends a wonderful tang. For a substitute, you can mix 1 tablespoon of vinegar or lemon juice with milk to make a quick buttermilk alternative.
-
2 teaspoons vanilla extract: Enhances the overall flavor profile, adding warmth and depth.
-
Whipped cream and fresh berries: These toppings elevate the presentation and add freshness. Choose your favorites—strawberries, blueberries, or raspberries.
-
Fresh mint: A lovely garnish that brings a pop of color and flavor!
For the Homemade Pie Crust:
-
1 ¼ cups (150 grams) all-purpose flour: The foundation of your crust. Always measure flour correctly for the best results.
-
½ cup (1 stick) cold salted butter, cut into ½-inch cubes: Keep it cold to achieve a flaky texture. If using unsalted butter, you might want to add a pinch of salt.
-
¼ cup ice water, plus more as needed: This helps bring the dough together without overworking it. Use very cold water for a flaky crust.
How to Make Old-Fashioned Buttermilk Pie
-
Make the Pie Crust: In a large bowl, combine 1 ¼ cups all-purpose flour with the cold, cubed butter. Toss to coat, then use your fingers or a pastry cutter to work the butter into the flour until it resembles peas. This will give your crust a flaky texture.
-
Form the Dough: Create a well in the center of the flour mixture and add ¼ cup ice water. Gently mix it with your hands or a fork until the dough comes together. If too crumbly, add more ice water one tablespoon at a time. Avoid kneading it.
-
Chill the Dough: Shape the dough into a 1-inch thick disc, wrap it tightly in plastic wrap, and refrigerate for at least 1 hour, or up to 2 days.
-
Roll Out the Dough: Once chilled, lightly flour a surface and roll the dough into a 12-inch circle. Transfer it to a 9-inch pie plate, tucking excess dough under the edges. Crimp or flute the edges and refrigerate it while you prepare the filling.
-
Prepare the Oven: Preheat your oven to 350°F, ensuring it’s hot when you bake your pie.
-
Prepare the Filling: In a large bowl, whisk together 3 large lightly beaten eggs, 1 cup granulated sugar, and 2 tablespoons all-purpose flour until smooth and free of lumps.
-
Incorporate Butter: Gradually whisk in the ½ cup melted salted butter until fully combined for a rich flavor.
-
Add Buttermilk and Vanilla: Stir in 1 cup whole buttermilk and 2 teaspoons of vanilla extract gently until just combined, making sure not to overmix. It should look creamy and delicious.
-
Pour into Crust: Take your unbaked pie crust from the fridge and pour the luscious filling into it.
-
Bake the Pie: Place in the preheated oven and bake for 50-55 minutes, or until the top is golden brown and just slightly jiggles in the center. Note: If you’re using glass or ceramic cookware, you may need to bake 5-10 minutes longer.
-
Cool the Pie: Remove the pie from the oven and allow it to cool completely at room temperature. The filling will continue to set as it cools.
-
Chill for Clean Slices: For the best texture, refrigerate the pie for a few hours before slicing to ensure clean cuts.
-
Serve: Slice and serve it plain or topped with whipped cream and fresh berries, garnished with mint for a fresh finish.
Storing & Reheating
To keep your Old-Fashioned Buttermilk Pie fresh, store it in an airtight container at room temperature for up to 2 days. For longer storage, refrigerate it, where it will stay good for about a week. If you’d like to freeze it, wrap the pie well and store it for up to 3 months. When you’re ready to enjoy, let it thaw overnight in the fridge. Reheating isn’t necessary, but if you prefer it warm, pop it in a low oven (around 300°F) for about 10 minutes. Note that the texture and flavor may mellow slightly after freezing, but a good chill will refresh its delightful qualities.
Chef’s Helpful Tips
-
Don’t Overwork the Dough: For that perfect flaky crust, mix just until the ingredients come together. Over-kneading toughens the dough.
-
Temperature Matters: Use room temperature eggs and cold butter; this helps achieve the right consistency in the pie filling.
-
Don’t Skip Chilling: Allowing the dough to chill before rolling it out guarantees a tender, flaky crust.
-
Check for Doneness: The pie is done when it’s puffed up and golden on top. A slight jiggle in the center is okay—it will firm as it cools.
-
Experiment with Flavors: Consider adding a pinch of nutmeg or a splash of lemon zest to the filling for extra flavor that compliments the buttermilk beautifully.
-
Make Ahead: This pie is perfect for making a day in advance, as it tastes even better after a night in the refrigerator.
Old-Fashioned Buttermilk Pie is not just a dessert; it’s a slice of Southern heritage that brings comfort and joy to any table. The combination of sweet and tangy flavors makes every bite a nostalgic experience. This pie is wonderfully easy to make and is bound to leave your guests clamoring for seconds! Try your hand at this recipe, and immerse yourself in its rich flavors and traditions.
Recipe FAQs
Can I use a different kind of milk instead of buttermilk?
Absolutely! If you don’t have buttermilk on hand, you can create a substitute by combining 1 cup of milk with 1 tablespoon of vinegar or lemon juice. Let it sit for about 5-10 minutes to curdle, and you’re good to go.
How long does the pie take to bake?
The baking time for Old-Fashioned Buttermilk Pie typically ranges from 50 to 55 minutes at 350°F. However, be mindful that glass and ceramic pie plates may require a few extra minutes.
Can I freeze Old-Fashioned Buttermilk Pie?
Yes, you can! Just wrap the pie tightly in plastic wrap or aluminum foil and store it in the freezer for up to 3 months. Thaw it in the refrigerator overnight before serving, and enjoy the delightful taste that’s still there.
How do I know when my pie is done?
You’ll know your pie is ready when the top is puffed and golden, and the center has a slight jiggle. This indicates that it is set but will continue to firm up as it cools. If you poke the center with a toothpick, it should come out clean when it’s fully cooked.
Print
Old-Fashioned Buttermilk Pie
This old-fashioned buttermilk pie is a creamy, delicious treat with a buttery crust and a rich filling of eggs and buttermilk, ideal for any occasion.
- Total Time: 3 hours 25 minutes
- Yield: 8 servings 1x
Ingredients
- 1 unbaked 9-inch pie crust (store-bought or homemade)
- 3 large eggs, lightly beaten
- 1 cup granulated sugar
- 2 tablespoons all-purpose flour
- ½ cup (1 stick) salted butter, melted and slightly cooled
- 1 cup whole buttermilk
- 2 teaspoons vanilla extract
- whipped cream
- fresh berries (strawberries, blueberries, or raspberries)
- fresh mint
- 1 ¼ cups (150 grams) all-purpose flour
- ½ cup (1 stick) cold salted butter, cut into ½-inch cubes
- ¼ cup ice water, plus more as needed
Instructions
- Preheat the oven to 350°F (175°C).
- Prepare the pie crust as follows: in a large bowl, combine the flour and cold, cubed butter, tossing to coat. Work the butter into the flour until the mixture resembles peas.
- Create a well in the center of the flour mixture. Pour in the ice water and gently mix until the dough just comes together. Add more water if necessary.
- Form the dough into a disc, wrap it in plastic wrap, and refrigerate for 1 hour.
- Roll out the chilled dough on a floured surface into a 12-inch circle, then transfer it to a 9-inch pie plate. Tuck the edges under and crimp as desired. Refrigerate the pie shell while preparing the filling.
- In a mixing bowl, whisk together the eggs, sugar, flour, melted butter, buttermilk, and vanilla extract until smooth.
- Pour the buttermilk filling into the prepared pie crust.
- Bake for 40-50 minutes or until the filling is set and the top is lightly browned. Allow to cool before serving.
Notes
Serve with a dollop of whipped cream for extra flair.
Fresh berries can be added on top for garnish and flavor.
Store any leftovers in the refrigerator for up to 3 days.
- Prep Time: 15 minutes
- Cook Time: 190 minutes
- Category: Desserts
- Method: Baking
- Cuisine: American
Nutrition
- Serving Size: 1 slice
- Calories: 290
- Sugar: 23g
- Sodium: 200mg
- Fat: 15g
- Saturated Fat: 8g
- Unsaturated Fat: 5g
- Trans Fat: 0g
- Carbohydrates: 37g
- Fiber: 1g
- Protein: 4g
- Cholesterol: 105mg