 Skip to content
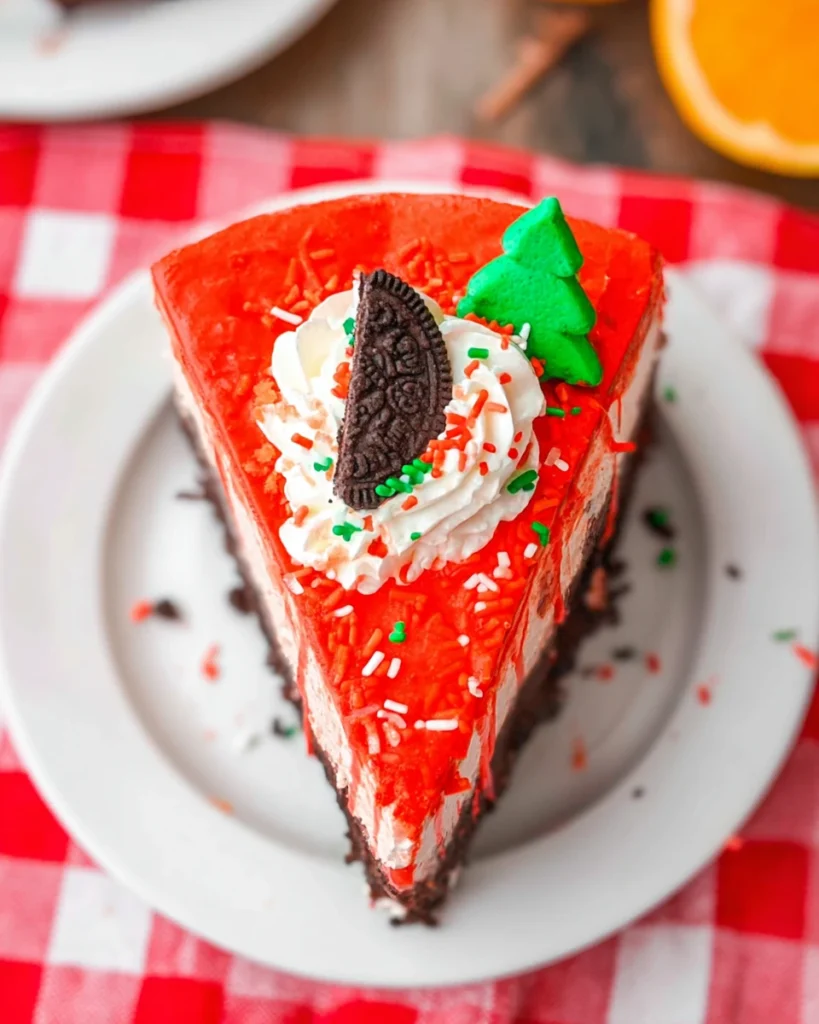
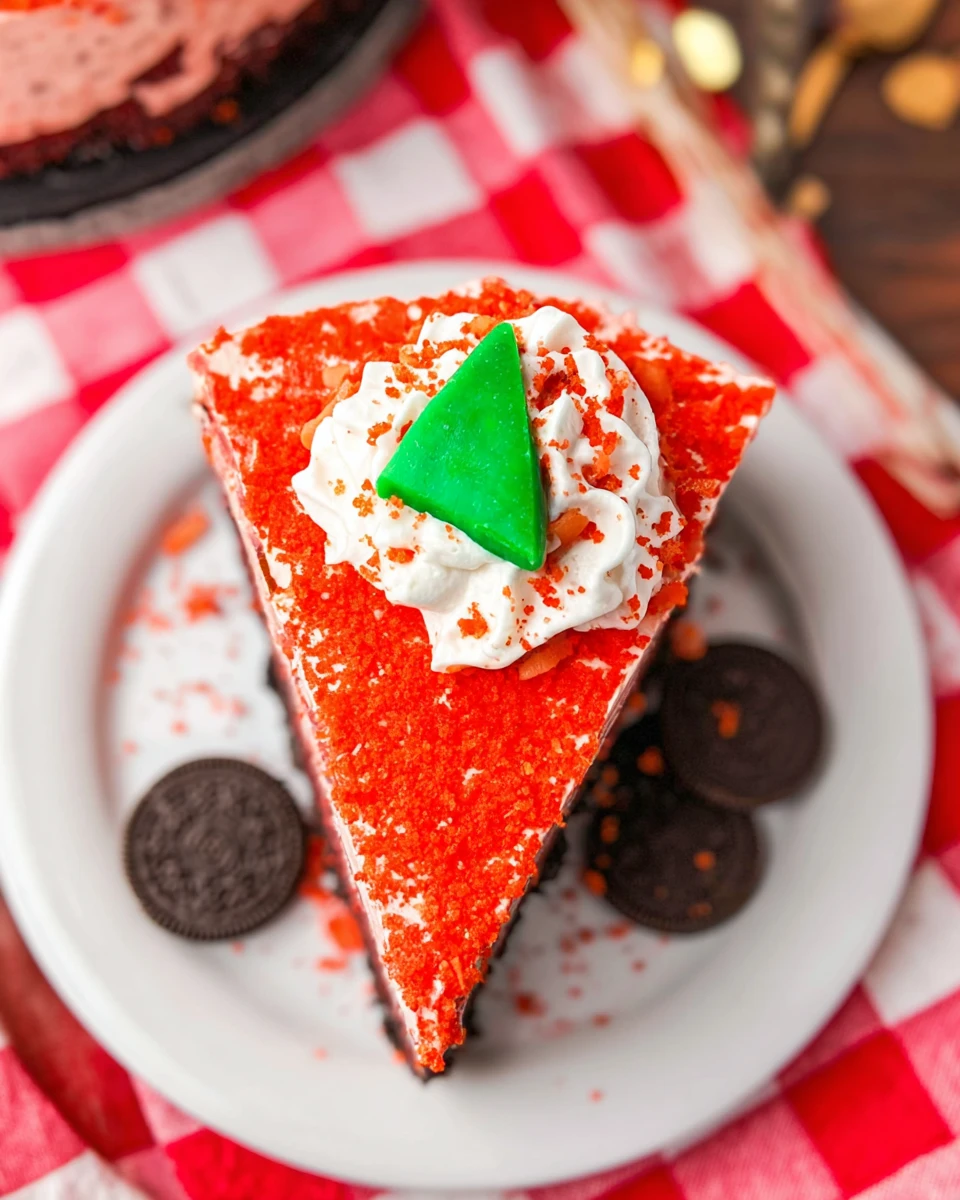
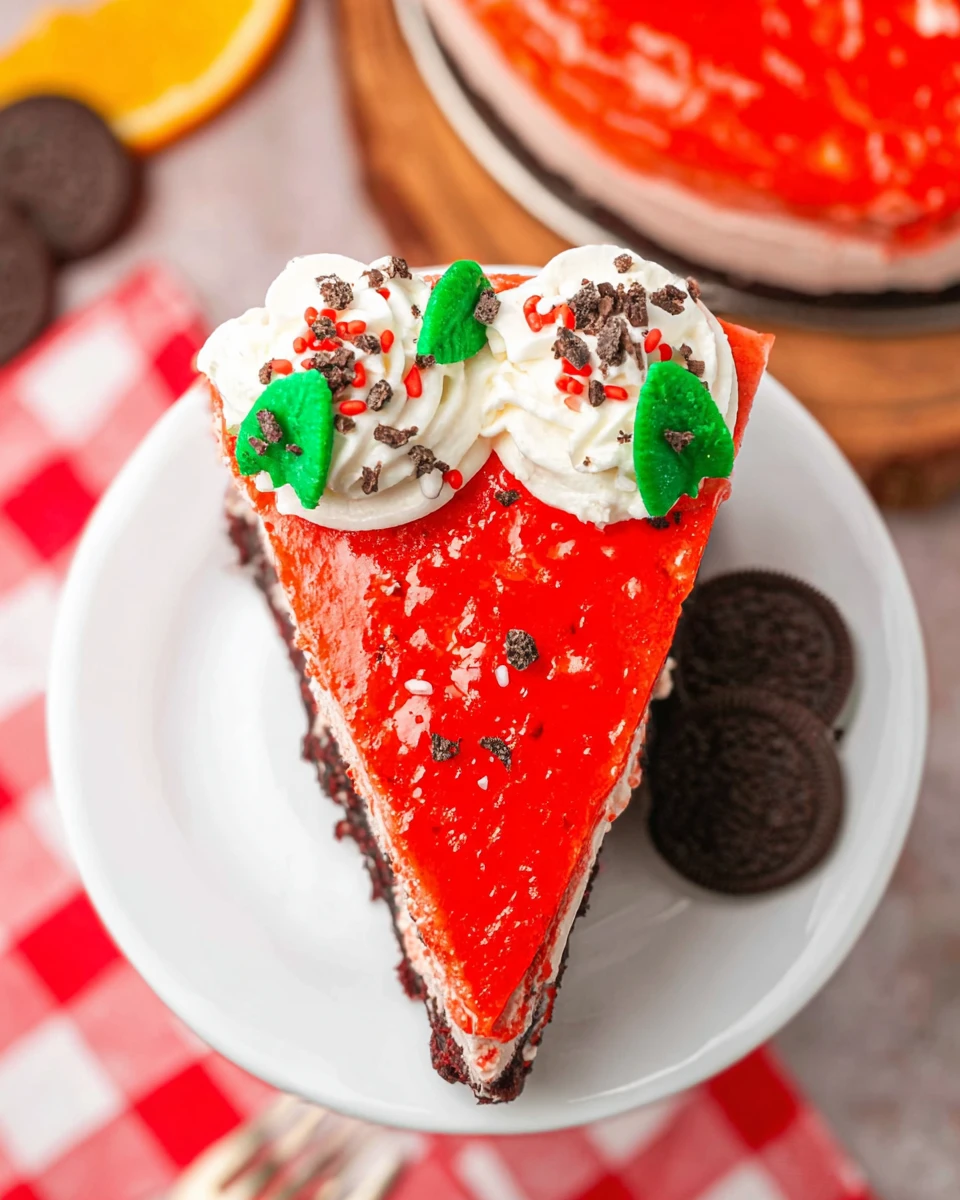
This No Bake Christmas Red Velvet Cheesecake is a showstopper that combines holiday spirit with deliciousness. Imagine walking into a room filled with the aroma of creamy cheesecake and the sight of vibrant red and white layers just beckoning you. Perfectly chilled and adorned with festive toppings, it’s not just a dessert; it’s a celebration on a plate. What’s even better? You don’t need to turn on your oven. Instead, indulge in the easy, breezy joy of making a stunning cheesecake that fits right into your busy holiday schedule. Whether it’s a gathering with friends or a cozy family dinner, this treat will be the center of attention.
Thank you for reading this post, don't forget to subscribe!Let’s get started so you can impress everyone with your baking skills—because a slice of this cheesecake is truly a slice of Christmas cheer!
Why This Recipe Works
This No Bake Christmas Red Velvet Cheesecake combines rich flavors and festive colors without requiring an oven. This makes it an ideal dessert for busy holiday schedules. The creamy layers contrast beautifully with the crunchy Oreo crust, offering a delightful texture that everyone will love. Plus, you won’t need to spend hours in the kitchen, which is always a win!
Why You’ll Love This No Bake Christmas Red Velvet Cheesecake
First off, this cheesecake tastes heavenly. The flavor is rich, creamy, and feels luxurious with each bite, making it a perfect treat for the holidays. But it’s not just about the taste; it’s also a visual centerpiece for any gathering. The vibrant red and white layers are not just eye-catching but are also simple to prepare, ensuring your dessert will be the star of the show. Minimal effort leads to maximum impact—a dream come true for any dessert lover!

Ingredients
- 24 Oreo cookies (about 2 cups crumbs)
- ⅓ cup butter, melted
- 4 (8-ounce) blocks cream cheese, softened to room temperature
- ½ cup white sugar
- 2 cups heavy whipping cream
- 1 teaspoon vanilla extract
- 2 tablespoons cocoa powder
- Red food coloring (as needed for desired shade)
- ¼ cup Christmas sprinkles (for the white batter)
- Whipped cream (for topping)
- Mini Oreos (for topping)
- Extra Christmas sprinkles (for topping)
Make the Crust
Crush Oreo Cookies
To start, add the Oreo cookies (cream and all!) to a food processor. Pulse until you have fine crumbs. The finer the crumbs, the better your crust will hold together.
Combine with Butter
Once you have your crumbs ready, stir them together with the melted butter until everything is evenly coated. The mixture should feel like wet sand. Now, press this mixture firmly into the bottom of an 8–9-inch springform pan, making sure it’s packed down evenly.
Chill the Crust
Now it’s time to pop the pan in the fridge while you work on the filling. This will set the crust and ensure it holds its shape.
Whip the Cream
Prepare the Cream
In a large chilled mixing bowl, beat the heavy cream until stiff peaks form. This will give your cheesecake that light, fluffy, mousse-like texture that everyone loves. Set it aside, and let’s move on to the cheesecake base.
Mix the Cheesecake Base
Beat Cream Cheese and Sugar
In another bowl, beat the softened cream cheese and sugar together until it’s smooth and creamy. The cream cheese should have no lumps at all—just a velvety consistency.
Add Vanilla
Next, add the vanilla extract to the mix. Beat again until everything is fully combined and silky smooth. You’re building the foundation of flavor here!
Fold in Whipped Cream
Now, gently fold the whipped cream into the cream cheese mixture. Do this carefully until it’s fluffy and well combined. The key here is to keep that airiness from the whipped cream.
Create the Colors
Split the Mixture
Now for the fun part! Divide the cheesecake mixture evenly into two bowls. This will allow us to create those gorgeous red and white layers.
Color and Flavor the Mixtures
In one bowl, mix in the cocoa powder and red food coloring until you achieve your desired red velvet shade. You can add more food coloring if you want a deeper red. In the other bowl, gently fold in the Christmas sprinkles for that festive touch.
Assemble the Cheesecake
Layer the Batters
Grab your chilled crust and start alternating spoonfuls of the red velvet and sprinkle-filled batters. Use a spatula to spread it evenly, aiming for pretty layers.
Swirl for Effect
Here comes the artistic part! Use a butter knife or skewer to gently swirl the colors together. This will create a beautiful marbled effect that is sure to impress.
Chill the Cheesecake
Cover and Refrigerate
Cover the pan with plastic wrap and refrigerate for at least 4 hours. If you have the time, letting it set overnight is even better for achieving that dreamy texture.
Decorate and Serve
Top with Whipped Cream
Just before serving, add whipped cream, mini Oreos, and a flurry of Christmas sprinkles on top for that extra festive flair. It’s the finishing touch that makes the dessert pop!
Slice and Enjoy
Now, slice, serve, and prepare for the compliments on your stunning dessert! Watching your friends and family enjoy each bite will be the best part.
Serving Suggestions
Pair this No Bake Christmas Red Velvet Cheesecake with hot cocoa or a glass of eggnog for a truly festive experience. The flavors complement each other perfectly, making your holiday celebration even sweeter!
Tips for Success
- Ensure all ingredients are at room temperature for easy mixing and a smoother texture.
- Chill the cheesecake overnight for the best flavor and texture. Trust me, it’s worth the wait!
Variations
- For a more traditional cheesecake flavor, you can omit the cocoa and food coloring, focusing solely on the cream cheese and vanilla.
- If you’re feeling adventurous, substitute chocolate Oreo cookies for a deeper chocolate flavor.
Storage Tips
Store any leftovers in an airtight container in the fridge for up to 3 days. This cheesecake can also be frozen for up to one month; just make sure to thaw it in the refrigerator before serving.
Pairing Ideas
This dessert pairs beautifully with a light fruit salad or a scoop of vanilla ice cream. The freshness of the fruit will balance the richness of the cheesecake nicely.
FAQs
Q1: Can I use regular cream cheese instead of whipped cream?
A1: Yes, but the texture won’t be as light and fluffy.
Q2: How do I ensure my cheesecake sets well?
A2: Be sure to chill it for adequate time, ideally overnight.
Q3: Can I make this cheesecake a day in advance?
A3: Absolutely! Making it a day ahead enhances the flavors and sets the texture perfectly.
Q4: What can I use instead of Oreos for the crust?
A4: You can use graham crackers or chocolate chip cookies as alternatives.
Q5: Is this recipe suitable for a gluten-free diet?
A5: You can make it gluten-free by using gluten-free cookies for the crust.
This No Bake Christmas Red Velvet Cheesecake is a festive and delightful addition to any holiday gathering. With its easy preparation and stunning presentation, it’s guaranteed to impress your guests. This creamy dessert strikes the perfect balance between rich and light, making it a memorable treat for everyone. So gather your ingredients, embrace the holiday spirit, and get ready to serve up a slice of joy this Christmas!
Print
No Bake Christmas Red Velvet Cheesecake
This No Bake Christmas Red Velvet Cheesecake is a festive treat with a vibrant presentation and creamy texture, making it an ideal centerpiece for holiday celebrations. It’s easy to prepare without turning on the oven, allowing you to enjoy time with family and friends.
- Total Time: 30 minutes
- Yield: 12 servings 1x
Ingredients
- 24 Oreo cookies (about 2 cups crumbs)
- ⅓ cup butter, melted
- 4 (8-ounce) blocks cream cheese, softened to room temperature
- ½ cup white sugar
- 2 cups heavy whipping cream
- 1 teaspoon vanilla extract
- 2 tablespoons cocoa powder
- Red food coloring (as needed for desired shade)
- ¼ cup Christmas sprinkles (for the white batter)
- Whipped cream (for topping)
- Mini Oreos (for topping)
- Extra Christmas sprinkles (for topping)
Instructions
- Crush Oreo cookies in a food processor until fine crumbs; mix with melted butter and press into the base of a springform pan.
- Chill the crust in the fridge.
- Beat heavy cream in a cold bowl until stiff peaks form.
- In a separate bowl, blend softened cream cheese and sugar until smooth; add vanilla.
- Fold whipped cream into the cream cheese mixture carefully.
- Divide mixture in half; color one half with cocoa powder and red food coloring, and fold sprinkles into the other half.
- Layer the red and white batter into the chilled crust, swirling them together for a marbled effect.
- Cover and refrigerate for at least 4 hours, or preferably overnight.
- Top with whipped cream, mini Oreos, and additional sprinkles before serving.
Notes
Make sure all ingredients are at room temperature for better mixing.
Chilling overnight maximizes flavor and texture.
Store leftovers in an airtight container in the fridge for up to three days.
- Prep Time: 30 minutes
- Cook Time: 0 minutes
- Category: Dessert
- Method: No Bake
- Cuisine: American
Nutrition
- Calories: 350
- Sugar: 20
- Sodium: 200
- Fat: 25
- Saturated Fat: 15
- Unsaturated Fat: 5
- Trans Fat: 0
- Carbohydrates: 30
- Fiber: 1
- Protein: 4
- Cholesterol: 70


