 Skip to content
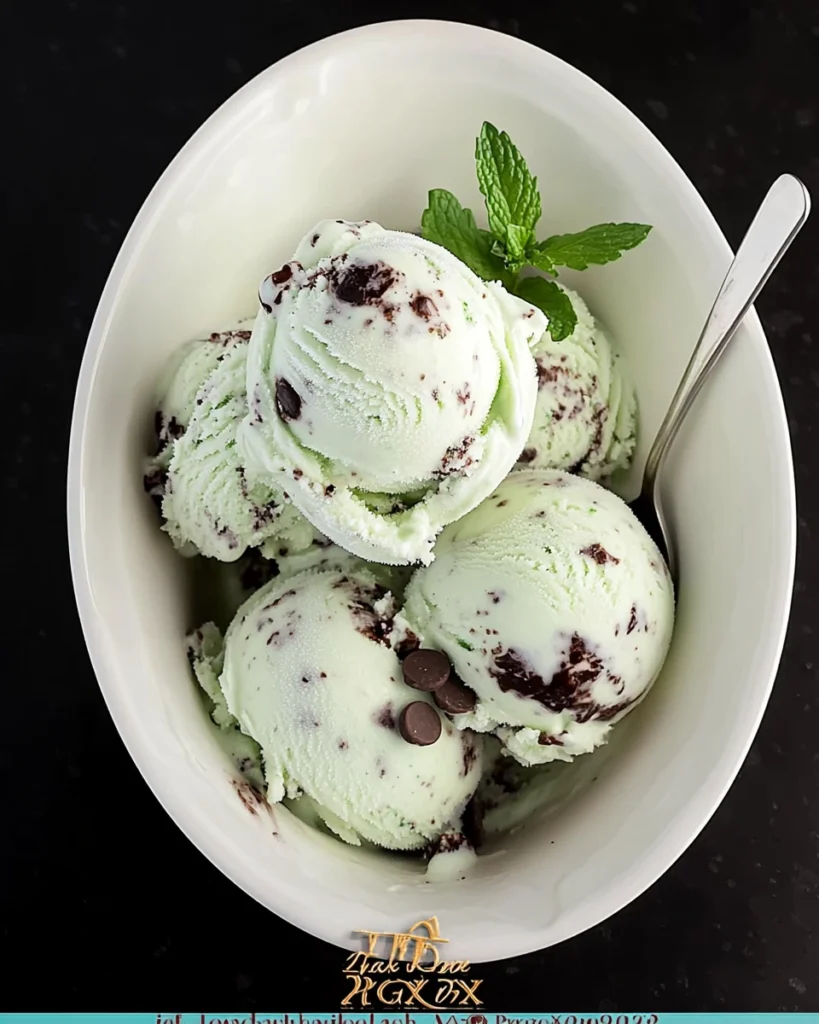
Why This Recipe Works
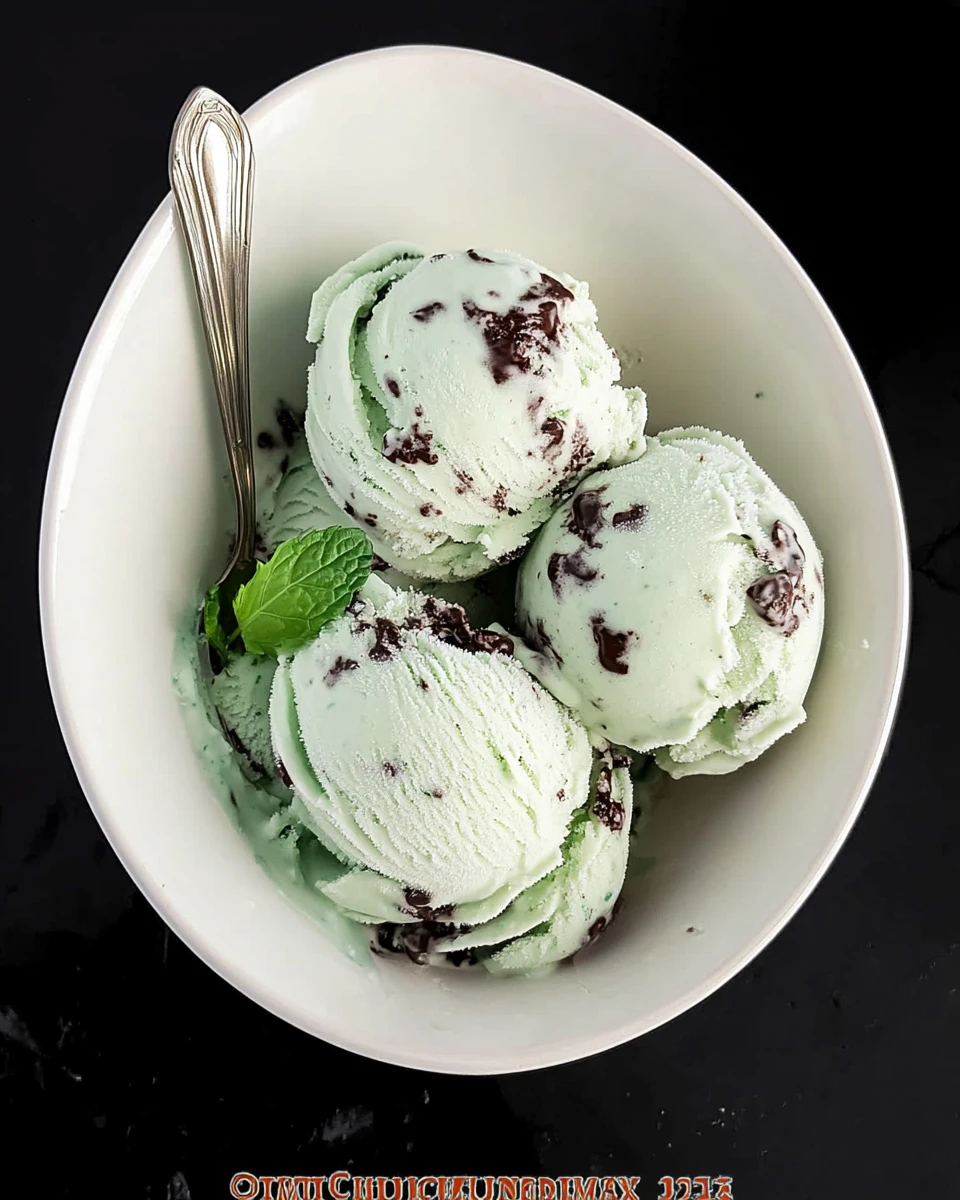
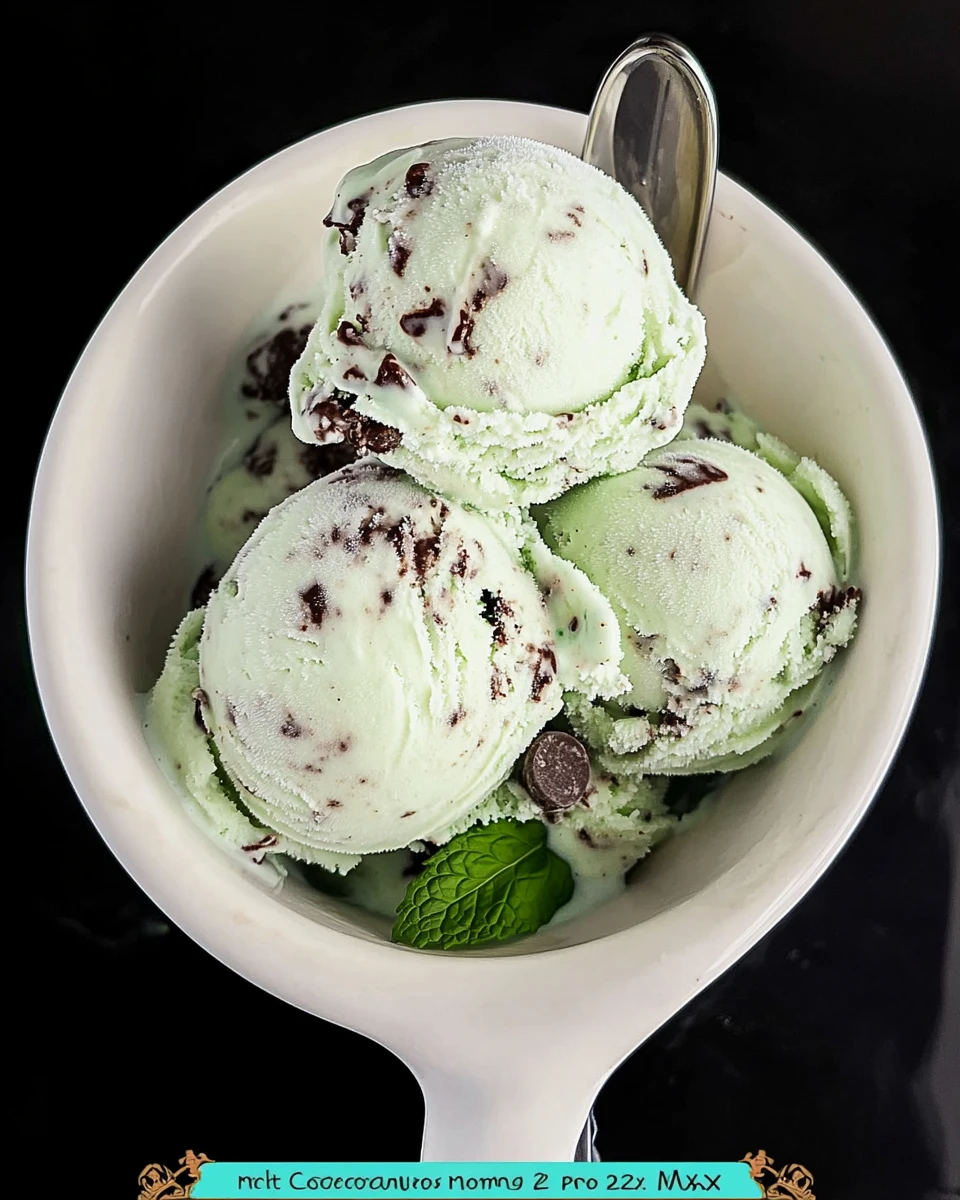
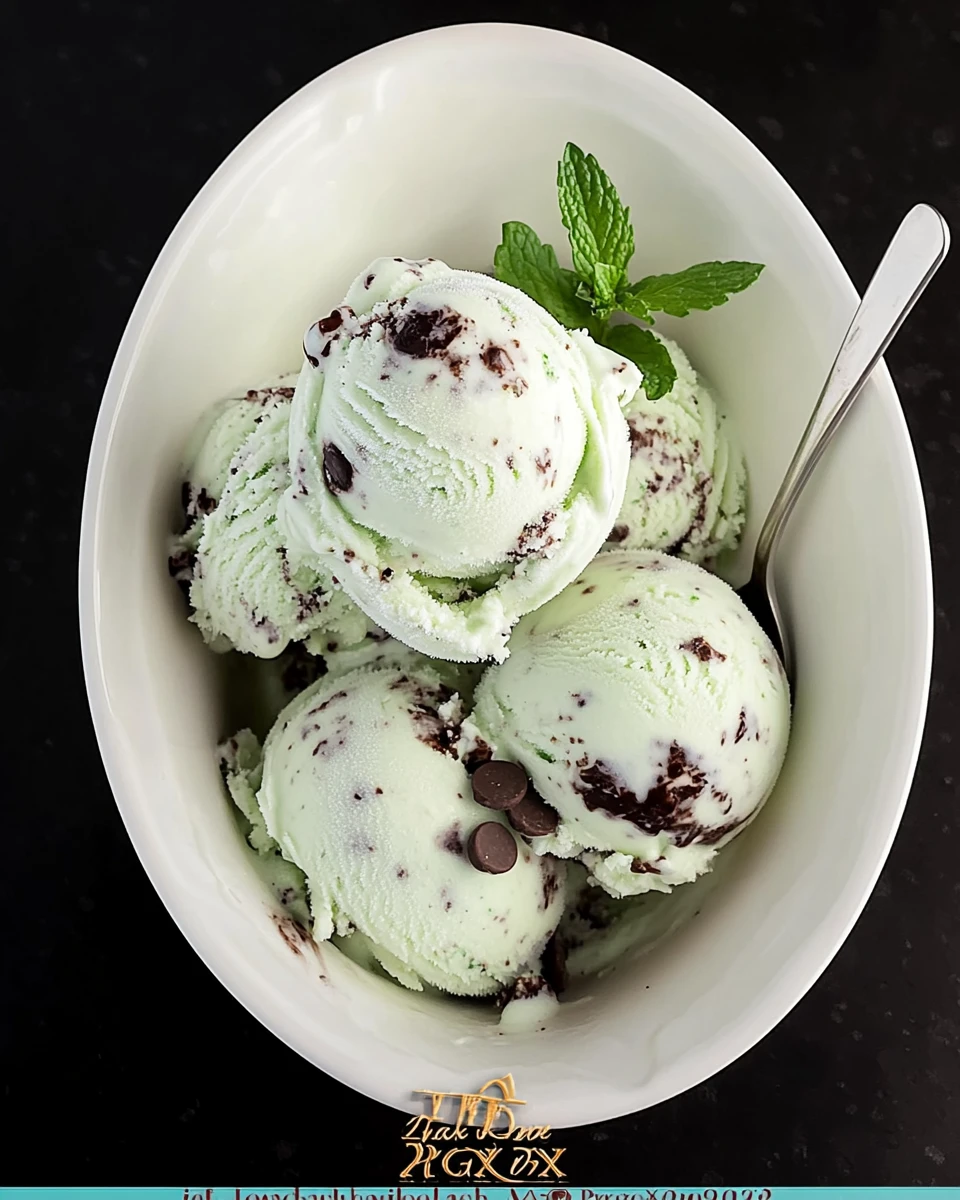
Mint Chocolate Chip Ice Cream strikes the perfect balance between refreshing mint and rich chocolate. The use of cream cheese creates a smooth, creamy base that enhances the overall texture, while the heavy cream ensures the ice cream remains rich and decadent. When these ingredients blend together, they create a flavor profile that sings of summer afternoons. Each scoop will delight your taste buds with its combination of refreshing mint and luscious chunks of chocolate. Plus, making it at home allows you to adjust the flavors and textures to your liking. Easy to whip up, this recipe guarantees satisfaction with every creamy bite.
Thank you for reading this post, don't forget to subscribe!Why You’ll Love This Mint Chocolate Chip Ice Cream
This homemade mint chocolate chip ice cream is not only simple to make but also customizable for your taste. With bright minty flavor and delicious chocolate chunks, it’s the ultimate treat for mint lovers. You can control how minty it is or how much chocolate you want. Impress friends and family with your ice cream-making skills, and they will think you’ve been doing this for years! Whether it’s a warm day or a special occasion, there’s no better way to enjoy a classic favorite than with a scoop of this mint chocolate chip delight.
Ingredients
- 3/4 cup granulated sugar
- 4 oz cream cheese, softened
- Pinch of salt
- 1 cup cold milk
- 2 cups cold heavy cream
- 1 1/2 tsp mint/peppermint extract
- 4 oz semi-sweet chocolate, chopped
- 2 drops green food coloring (optional)
- Fresh mint leaves for garnish
Preparing the Mint Chocolate Chip Ice Cream Base
Cream Together Cream Cheese and Sugar
Begin by creaming the softened cream cheese with granulated sugar until the mixture is smooth and free of lumps. Using an electric mixer makes this step easier and faster. This creates a base that will hold all the flavors well, ensuring your final ice cream isn’t too icy. A good, creamy mix sets the right tone for the deliciousness ahead!
Incorporate Food Coloring, Mint Extract, and Salt
Next, add the green food coloring (if using), mint extract, and a pinch of salt to the cream cheese mixture. Combine everything thoroughly until the mixture is smooth and vibrant. The food coloring is optional but gives that signature mint look. The salt, though small in amount, helps highlight the flavors and keeps things from being too sweet.
Combine with Milk and Heavy Cream
Pour in the cold milk and cold heavy cream, stirring gently until everything is well combined. This combination creates a rich and creamy base for your ice cream. Remember, having all your ingredients cold is key here. It helps in achieving that perfect soft-serve consistency once you start churning!
Churning Your Ice Cream
Transfer to Ice Cream Maker
Pour the combined mixture into your ice cream maker and churn according to the manufacturer’s instructions. The churning process typically takes about 25-30 minutes. You’ll notice it changing texture; the mixture will start to thicken and turn fluffy. Keep an eye on it, as this is one of the most exciting parts!
Add Chocolate Chunks
In the final minutes of churning, add in the chopped semi-sweet chocolate. This will distribute the chocolate evenly throughout your ice cream, adding texture and flavor. Just sprinkle the chocolate in and watch it get mixed in with that green goodness. It should feel like a celebration of flavors in your bowl!
Freezing and Serving
Freeze the Ice Cream
Once churning is complete, transfer the ice cream mixture to an airtight container or metal loaf pan lined with parchment paper. Freeze for at least a few hours or overnight for best results. This step is crucial because it helps the ice cream firm up and develops the flavors even more. The joy is in making it worth the wait.
Garnish and Enjoy
Scoop the mint chocolate chip ice cream into bowls and garnish with fresh mint leaves. Serve immediately and relive those childhood memories of sweet treats. Each bowl is not just dessert; it’s a moment of joy. The combination of cool mint with rich chocolate will surely please everyone at your table.
Serving Suggestions
- Serve with chocolate syrup drizzled on top for added flavor.
- Pair with a slice of warm brownie for a decadent dessert experience.
These little touches can turn your ice cream into a spectacle worthy of any gathering. Just think about how amazing that warm brownie will be with the cool mint chocolate chip ice cream on top!
Tips for Success
- Ensure all ingredients are cold for the best texture.
- Don’t skip the salt; it enhances the flavors significantly.
- Use high-quality chocolate for the best results.
Following these simple tips can take your ice cream from good to unforgettable. It’s the little things that make a big difference!
Variations
- Experiment with different flavor extracts, such as vanilla or almond.
- Substitute white chocolate for a sweeter twist.
These variations can take your Mint Chocolate Chip Ice Cream to entirely new levels. Feel free to get creative!
Storage Tips
- Keep the ice cream sealed tightly to avoid freezer burn.
- This ice cream can be stored in the freezer for up to two weeks for optimal flavor.
Proper storage is essential for maintaining that creamy goodness. Nobody wants freezer burn ruining their homemade masterpiece.
FAQs
What type of mint extract should I use?
Use pure peppermint extract for a strong mint flavor.
Can I make this ice cream without an ice cream maker?
Yes! Pour the mixture into a shallow dish and stir every 30 minutes until it reaches a creamy texture.
How can I make this recipe dairy-free?
Substitute cream cheese and heavy cream with coconut cream and dairy-free cream cheese.
Is it safe to consume raw cream cheese in this recipe?
Yes, as it is blended with other ingredients and frozen.
How long does it take to churn ice cream in a maker?
Typically 25-30 minutes, but it varies by machine.
Making Mint Chocolate Chip Ice Cream at home is truly rewarding. The process is as enjoyable as the result. You’ll find smiles all around as this creamy, sweet treat makes its way to the table. Enjoy the crafting, the flavors, and the memories!
Print
Mint Chocolate Chip Ice Cream
This homemade mint chocolate chip ice cream offers a balance of refreshing mint and rich chocolate in a creamy base. Simple to make and perfect for any occasion.
- Total Time: 45 minutes
- Yield: Serves 6-8 1x
Ingredients
- 3/4 cup granulated sugar
- 4 oz cream cheese, softened
- Pinch of salt
- 1 cup cold milk
- 2 cups cold heavy cream
- 1 1/2 tsp mint/peppermint extract
- 4 oz semi-sweet chocolate, chopped
- 2 drops green food coloring (optional)
- Fresh mint leaves for garnish
Instructions
- Cream together cream cheese and sugar until smooth.
- Incorporate food coloring, mint extract, and salt until well combined.
- Add milk and heavy cream, stirring gently until mixed.
- Pour mixture into ice cream maker and churn according to instructions for 25-30 minutes.
- In the final minutes of churning, add chopped chocolate.
- Transfer to an airtight container or loaf pan and freeze for at least a few hours.
- Garnish with fresh mint leaves and serve.
Notes
Ensure all ingredients are cold for best texture.
Do not skip the salt; it enhances flavors significantly.
Use high-quality chocolate for the best results.
- Prep Time: 15 minutes
- Cook Time: 30 minutes
- Category: Dessert
- Method: Churning
- Cuisine: American
Nutrition
- Calories: 250
- Sugar: 24
- Sodium: 65
- Fat: 15
- Saturated Fat: 9
- Unsaturated Fat: 4
- Trans Fat: 0
- Carbohydrates: 28
- Fiber: 1
- Protein: 3
- Cholesterol: 45


