Skip to content
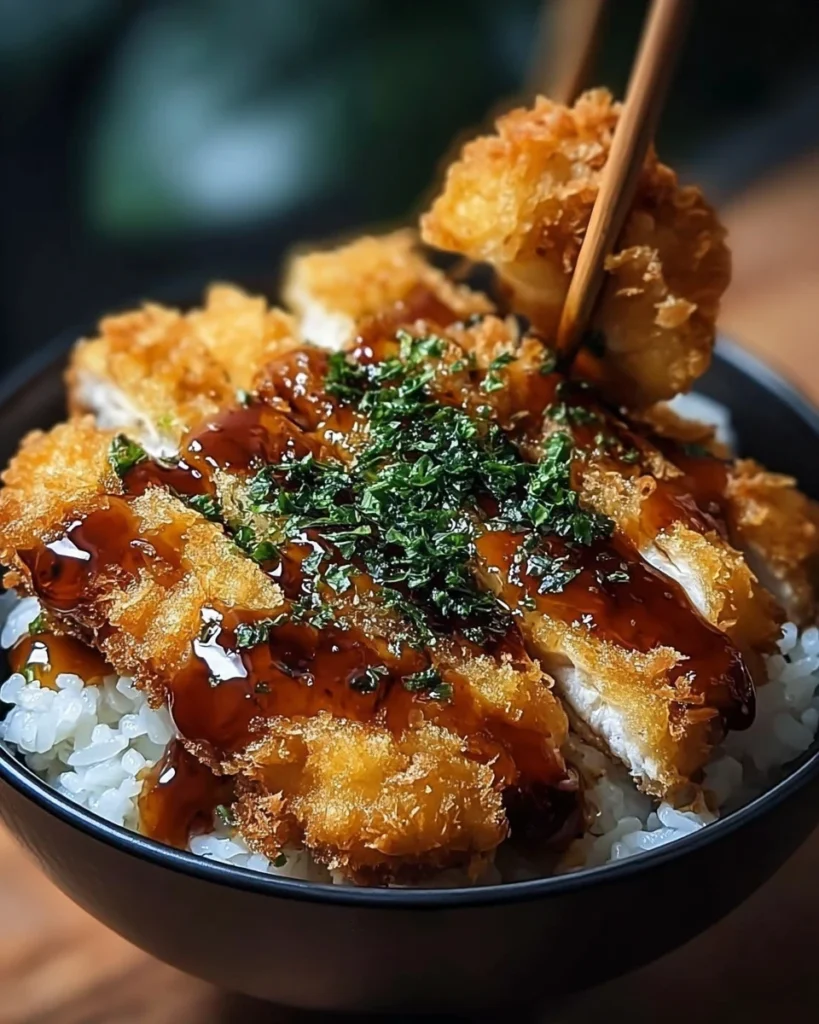
Japanese Katsu Bowls are a delightful meal that brings a taste of Japan right into your home. Imagine crispy, golden-brown katsu served over fluffy rice, topped with fresh veggies, and drizzled with a savory sauce. It’s the kind of dish that’s perfect for sharing with friends and family or enjoying on a cozy night in. With a unique blend of textures and flavors, this recipe is not only easy to follow but also incredibly satisfying. Whether you’re a seasoned chef or a beginner in the kitchen, these bowls can help you whip up something truly special. Let’s create a dish that showcases both the heart and soul of Japanese cooking while keeping things fun and straightforward!
Thank you for reading this post, don't forget to subscribe!Why This Recipe Works
Japanese Katsu bowls epitomize the harmony of flavors and textures—crispy, succulent katsu paired perfectly with seasoned rice and fresh toppings. This recipe breaks down the process to ensure that you achieve that authentic crunch and taste without the need for takeout. You won’t just cook; you’ll create a moment that’s rich in flavor and creativity.
Why You’ll Love This Japanese Katsu Bowls
You’ll fall in love with Japanese Katsu Bowls for their heartwarming, comfort-food qualities. The balance of crunchy katsu with simmered rice and zesty sauce creates a satisfying meal that brings a touch of Japanese tradition to your kitchen. It’s fun to make, delicious to eat, and feels like a warm hug on a plate.

Ingredients for Japanese Katsu Bowls
- 2 boneless chicken breasts (or pork loin, if preferred)
- Salt and pepper, to taste
- 1 cup all-purpose flour
- 2 large eggs
- 1 cup panko breadcrumbs
- Vegetable oil, for frying
- 2 cups Japanese short-grain rice
- 2 ½ cups water
- 1 tablespoon rice vinegar
- 1 tablespoon sugar
- ½ teaspoon salt
- ¼ cup tonkatsu sauce (or store-bought if you prefer)
- 1 tablespoon soy sauce
- 1 teaspoon Worcestershire sauce
- 1 teaspoon ketchup
- 1 cup shredded cabbage
- 2 green onions, sliced
- Sesame seeds, for garnish
- Pickled ginger (optional)
Preparing the Rice

Rinse the Rice
Begin by rinsing the 2 cups of Japanese short-grain rice under cold water until the water runs clear. This helps to remove excess starch, ensuring fluffy rice. It’s a simple step, but it makes a world of difference!
Soak the Rice
Transfer the rinsed rice to a saucepan, add 2 ½ cups of water, and let it soak for 30 minutes. Soaking enhances the texture and flavor. While you wait, you can prep other ingredients—keeping things productive and fun.
Cook the Rice
Cover the saucepan and bring to a boil over medium heat. Once boiling, reduce the heat and let it simmer for about 15 minutes without lifting the lid. That’s the secret to perfectly cooked rice!
Let the Rice Rest
After 15 minutes, turn off the heat but keep the lid on. Allow the rice to sit for another 10 minutes to finish cooking gently. This resting time allows for even fluffiness, so don’t rush it.
Season the Rice
In a bowl, mix together 1 tablespoon of rice vinegar, 1 tablespoon of sugar, and ½ teaspoon of salt until dissolved. Gently fold this mixture into the cooked rice. This step adds a subtle tang that takes your rice to another level!
Preparing the Katsu
Season the Chicken
Pound 2 boneless chicken breasts to an even thickness of about ½ inch. Season both sides generously with salt and pepper. This old-school method ensures your katsu cooks evenly and absorbs flavor beautifully.
Set Up the Breading Station
Prepare three shallow dishes: one with 1 cup of all-purpose flour, another with 2 beaten large eggs, and the last with 1 cup of panko breadcrumbs. Having everything ready makes breading quick and easy!
Bread the Chicken
First, dredge each chicken piece in flour, shaking off excess. Then, dip into the beaten eggs, followed by coating thoroughly with panko breadcrumbs. This triple-layer process gives it that signature crunch—yum!
Fry the Chicken
In a skillet, heat vegetable oil over medium-high heat. Carefully add the breaded chicken and fry for 4-5 minutes on each side, or until golden brown and fully cooked. The sound of sizzling is simply music to your ears.
Drain and Rest
Once cooked, transfer the chicken to paper towels to drain the excess oil. Allow it to rest before slicing into strips. This resting time lets the juices redistribute for a juicy bite.
Making the Sauce
Combine the Sauce Ingredients
In a bowl, whisk together ¼ cup of tonkatsu sauce, 1 tablespoon of soy sauce, 1 teaspoon of Worcestershire sauce, and 1 teaspoon of ketchup until well combined. This simple sauce injects an explosion of flavor into your dish.
Assembling Your Katsu Bowl
Plate Your Dish
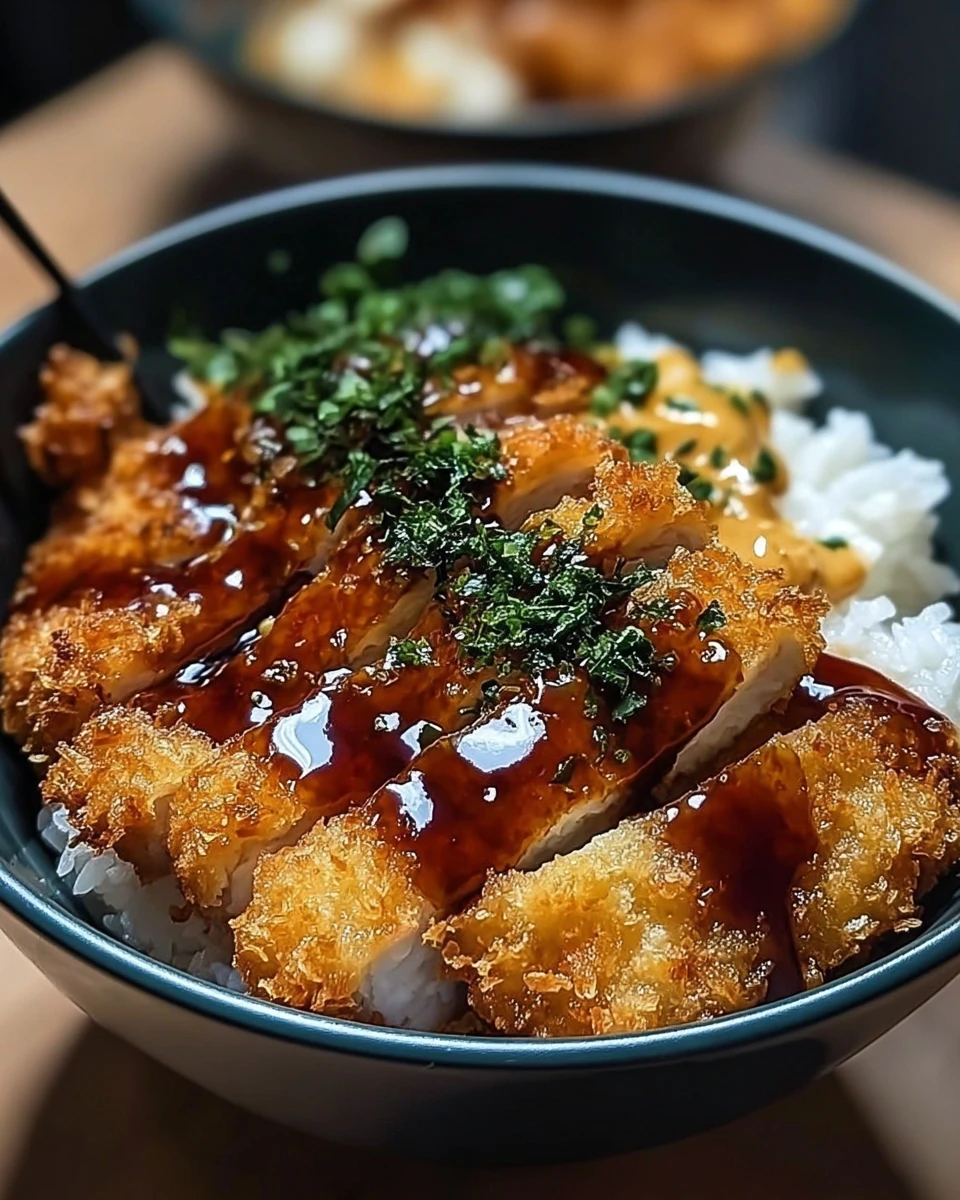
Start by placing a generous serving of seasoned rice on each plate. Top with sliced katsu, a mound of shredded cabbage, and sprinkle with sliced green onions and sesame seeds. The colors and textures make this visually appealing and downright inviting!
Drizzle with Sauce
Finally, drizzle the prepared sauce over the top of your katsu and finish with pickled ginger if desired. This adds a pop of flavor that complements the whole bowl.
Serving Suggestions
Explore pairing your Katsu Bowl with a side of miso soup or a fresh salad for a well-rounded meal. These sides elevate your dining experience without complicating things.
Tips for Success
- Ensure oil is hot enough before frying the chicken for that perfect crunch. Too cool oil can lead to soggy results!
- Use a meat thermometer to check for doneness (165°F internally). A reliable gauge guarantees juicy chicken every time.
Variations
- Try using eggplant or tofu as a vegetarian alternative for a plant-based Katsu Bowl. It’s a delicious twist!
- Experiment with different sauces, like a spicy mayo or garlic ponzu for added flavor. Mix it up to suit your mood!
Storage Tips
Store any leftovers in an airtight container in the refrigerator for up to three days. Reheat in the oven for crispiness or in the microwave for convenience. This dish can be just as good the next day!
Pairing Ideas
This dish pairs well with a light green tea or a crisp lager beer for a delightful contrast to the savory katsu. It enhances your meal with minimal effort.
FAQs
What is the best cut of meat for Katsu?
While chicken breasts are common, pork loin is also traditional for a richer flavor. Both are tasty!
Can you make Katsu in advance?
Yes, you can bread the chicken ahead of time and refrigerate it until you are ready to fry. Meal prepping made simple!
What if I can’t find panko breadcrumbs?
Regular breadcrumbs can be used, but they may not provide the same crunch. Just keep that in mind!
Is Katsu gluten-free?
To make a gluten-free version, use gluten-free breadcrumbs and flour. Easy swaps can accommodate your dietary needs.
How can I make Katsu spicier?
Add a touch of chili powder or serve with a spicy sauce on the side. Spice it up as you like!
Japanese Katsu Bowls are not just a meal; they are an experience steeped in comforting flavors and convivial ambiance. With this guide, you can recreate this cherished dish right in your kitchen, tailored to your taste and preferences. Enjoy the satisfying crunch and rich flavors, and share this warm dish with family and friends, making memories that last.
Print
Japanese Katsu Bowls
Japanese Katsu Bowls combine crispy katsu with seasoned rice and fresh toppings, creating a delicious comfort food that’s easy to prepare and share.
- Total Time: 55 minutes
- Yield: 4 servings 1x
Ingredients
- 2 boneless chicken breasts (or pork loin, if preferred)
- Salt and pepper, to taste
- 1 cup all-purpose flour
- 2 large eggs
- 1 cup panko breadcrumbs
- Vegetable oil, for frying
- 2 cups Japanese short-grain rice
- 2 ½ cups water
- 1 tablespoon rice vinegar
- 1 tablespoon sugar
- ½ teaspoon salt
- ¼ cup tonkatsu sauce (or store-bought if you prefer)
- 1 tablespoon soy sauce
- 1 teaspoon Worcestershire sauce
- 1 teaspoon ketchup
- 1 cup shredded cabbage
- 2 green onions, sliced
- Sesame seeds, for garnish
- Pickled ginger (optional)
Instructions
- Rinse the rice under cold water until clear.
- Soak the rinsed rice in 2 ½ cups of water for 30 minutes.
- Cook the rice, bringing it to a boil, then simmer for 15 minutes.
- Prepare the rice seasoning mixture and fold it into the cooked rice.
- Pound chicken to even thickness, season with salt and pepper.
- Set up a breading station with flour, eggs, and panko.
- Bread the chicken by dredging in flour, coating in eggs, and covering with panko.
- Fry the chicken in heated oil until golden brown on both sides.
- Drain excess oil and let the chicken rest before slicing.
- Whisk together sauce ingredients in a bowl.
- Assemble the bowl with rice, katsu, cabbage, green onions, and sauce.
Notes
Ensure oil is hot enough before frying for optimal crispiness.
Using a meat thermometer helps guarantee perfectly cooked chicken.
- Prep Time: 30 minutes
- Cook Time: 25 minutes
- Category: Main
- Method: Frying
- Cuisine: Japanese
Nutrition
- Calories: 670
- Sugar: 2
- Sodium: 800
- Fat: 30
- Saturated Fat: 5
- Unsaturated Fat: 20
- Trans Fat: 0
- Carbohydrates: 70
- Fiber: 3
- Protein: 25
- Cholesterol: 150