Skip to content
Freezing corn (on the cob and kernels) is one of those kitchen skills that can bring a little summer sunshine into your winter meals. Think of biting into a sweet, juicy ear of corn in the bleak midwinter—that’s the kind of magic we’re talking about! Whether you’ve just come home from the farmer’s market with a colorful haul or you’ve got a garden overflowing with corn, knowing how to preserve that goodness can really elevate your cooking game. Plus, it’s super simple to do! With just a few steps, you can enjoy the flavors of the season all year long, making your soups, salads, and casseroles sing with that fresh corn goodness. So, if you’re ready to learn how to freeze corn, let’s jump into the sweet and satisfying world of preserving summer’s favorite veggie!
Thank you for reading this post, don't forget to subscribe!Why This Recipe Works
Freezing corn is a fantastic way to preserve the sweet, juicy flavor of summer for enjoyment during the colder months. By following the right techniques, you ensure that the taste and texture remain intact. Whether you prefer on-the-cob or kernels, these methods will help maintain the corn’s freshness, allowing you to savor summer’s bounty long after the season has passed.
Why You’ll Love This How to Freeze Corn (on the Cob and Kernels)
You’ll love these methods for freezing corn not just for their simplicity, but because they allow for versatile use in various recipes throughout the year. Imagine adding that delicious corn flavor to soups, salads, or your favorite casseroles during winter! Plus, it’s a fun, economical way to stock up on seasonal produce.

Ingredients
- Fresh ears of corn (any size)
- Ice for ice bath
- Water for ice bath
How to Freeze Corn on the Cob
Preparing the Corn
Begin by removing the outer husks and silks from each ear of corn. Make sure to take your time; you want to get every little strand!
Boiling the Corn
Now, fill a large pot about halfway with water, and set it over medium heat. While that’s warming up, prepare a large bowl filled with ice and water for your ice bath. This step is key to help stop the cooking process.
Cooking the Corn
Once the water reaches a rolling boil, carefully add the peeled ears of corn. Let the corn cook for approximately 3 to 4 minutes. Turn the ears every 1 to 2 minutes, ensuring they cook evenly. You’ll want to watch the timer; don’t overcook!
Transferring to Ice Bath
After cooking, use tongs to transfer the corn from the boiling water to the ice bath. This chilly soak should last about 4 to 5 minutes. It’s crucial to stop the cooking—this will keep your corn crisp and tender.
Drying the Corn
Once cooled, take the corn out of the ice bath and pat it dry with a clean towel. You don’t want excess moisture when you freeze it!
Freezing the Corn
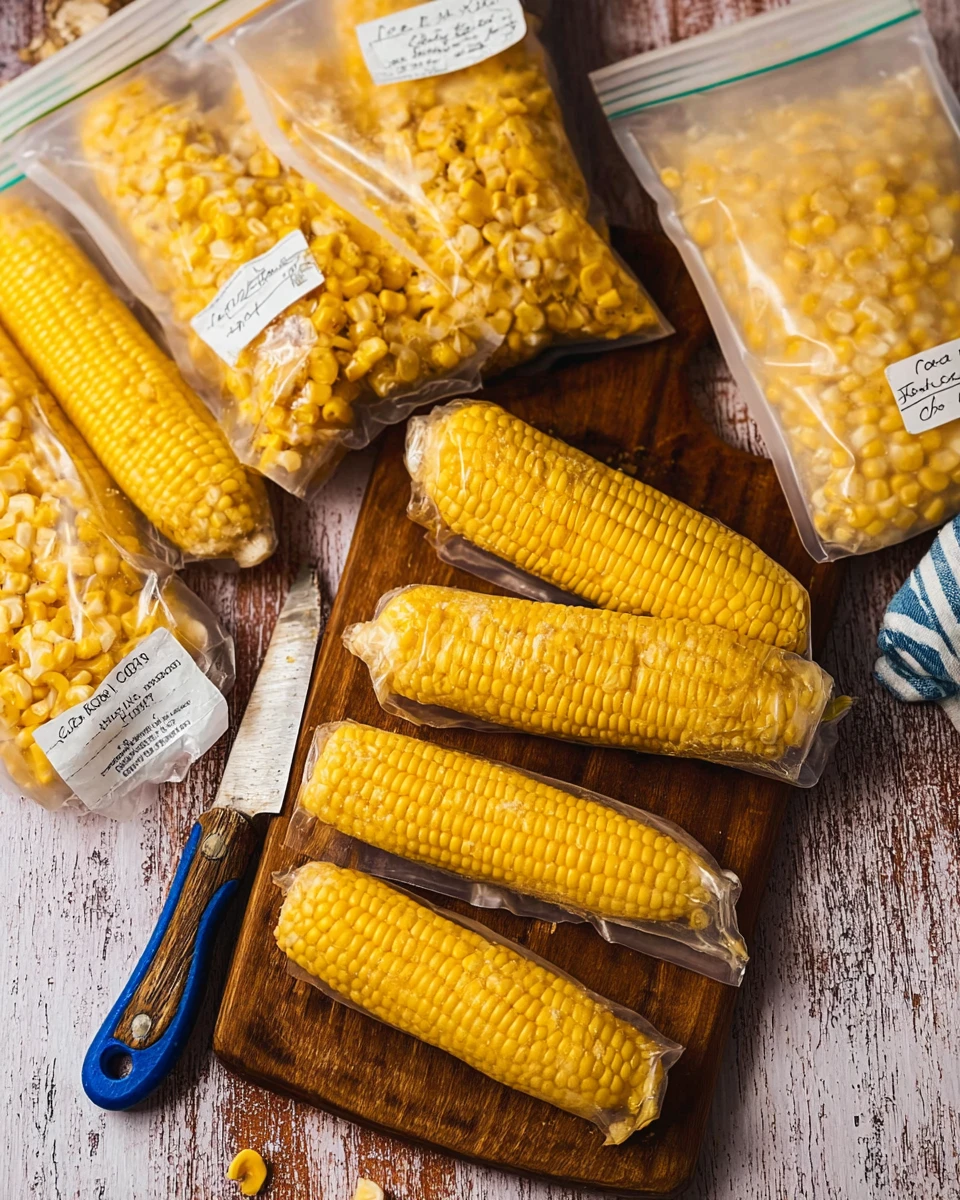
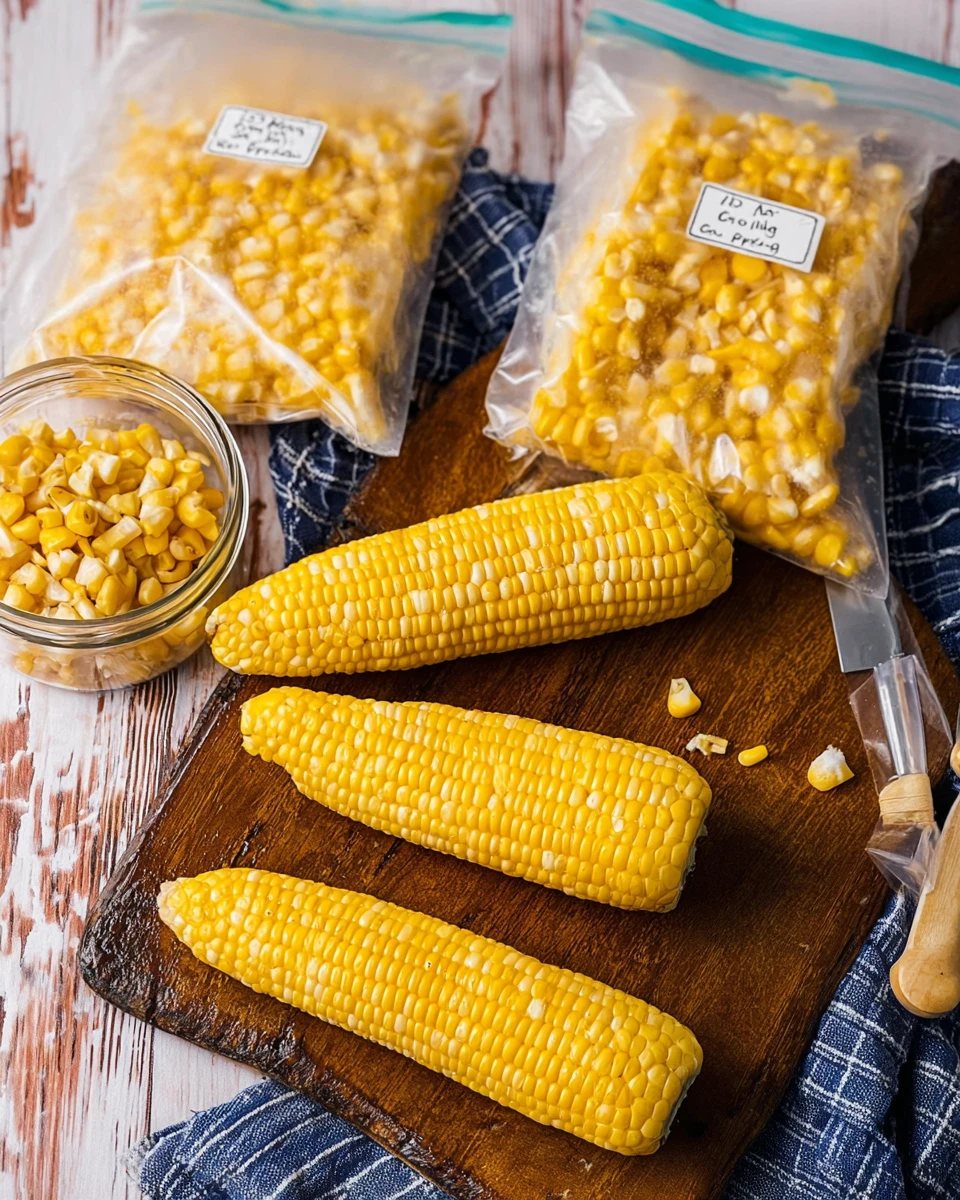
Now, place the dried ears of corn on a baking sheet and pop it into the freezer for 1 to 2 hours. You’re looking for a firm freeze. Once frozen solid, remove the baking sheet and tightly wrap each ear of corn in plastic wrap. Finally, place the wrapped corn into a sealable plastic freezer bag. Remember to seal the bag almost all the way, pressing out any air before sealing it completely. Your corn is now ready for the freezer!
How to Freeze Uncooked Corn Kernels
Preparing the Corn
Again, remove the husks and silks from the corn. Fresh corn is key for great results!
Slicing Off the Kernels
Hold the ear of corn vertically, bottom end on a cutting board or in a bowl. With a sharp knife, slice the raw kernels off the cob, beginning from the top end and cutting straight down. Take care to make clean cuts!
Storing the Kernels
After slicing, break any large pieces apart, if needed, and transfer the loose kernels into sealable freezer bags. Seal the bags almost completely, squeezing out as much air as possible before sealing them entirely. Now it’s time to place them in the freezer.
How to Freeze Cooked (Blanched) Corn Kernels
Preparing the Corn
Start by removing outer husks and silks from the corn; it’s a repeat process, but one that sets you up for success.
Cooking the Corn
Fill a large pot with water, set it to medium heat, and prepare another bowl for the ice bath. Once your water begins to boil, add the corn and let it cook for about 3 to 4 minutes. Remember to turn the ears as needed for even cooking.
Transferring to Ice Bath
After cooking, use tongs to move the corn to the ice bath for 2 to 3 minutes. Cool them until they are touchable!
Slicing Off the Kernels
Once cool, hold an ear vertically again and slice off the cooked kernels as close to the cob as possible.
Storing the Kernels
Put the kernels into sealable freezer bags. Press out much of the air before sealing them. Your precooked corn is now ready for the freezer!
Tips for Success
- Use fresh corn for the best taste and texture. It makes a big difference.
- Make sure all the air is removed from your freezer bags; this prevents freezer burn.
- Label each bag with the date for easy tracking. It helps keep things organized!
Variations
- Consider seasoning the corn before freezing. Simple salt or herbs can amp up the flavor!
- You might also freeze corn with herbs or spices already mixed in for a unique twist.
Serving Suggestions
Frozen corn can be used in countless dishes such as soups, casseroles, or even as a side dish. Simply defrost and toss it into your favorite recipes for that tasty summer touch!
FAQs
1. How long can I keep frozen corn?
Frozen corn can be stored for up to 8-12 months if kept at 0°F.
2. Can I freeze corn without cooking it?
Yes, you can freeze raw corn kernels directly after cutting them off the cob.
3. What’s the best way to thaw frozen corn?
For best results, thaw in the refrigerator overnight or use a microwave for quick results.
4. Can frozen corn be used in cooking without thawing?
Absolutely! You can add frozen corn directly to dishes like soups or stir-fries.
5. Is it necessary to blanch corn before freezing?
Blanching is recommended as it helps preserve corn’s flavor, color, and nutritional value.
Freezing corn is not only a fantastic way to enjoy the season’s bounty throughout the year, but it’s also a rewarding culinary endeavor. With these straightforward methods, you can preserve that sweet, crisp flavor and add a touch of summer to your meals anytime. Just gather your corn, follow the steps, and soon your freezer will be stocked with delightful treats ready to be used in a myriad of dishes!
Print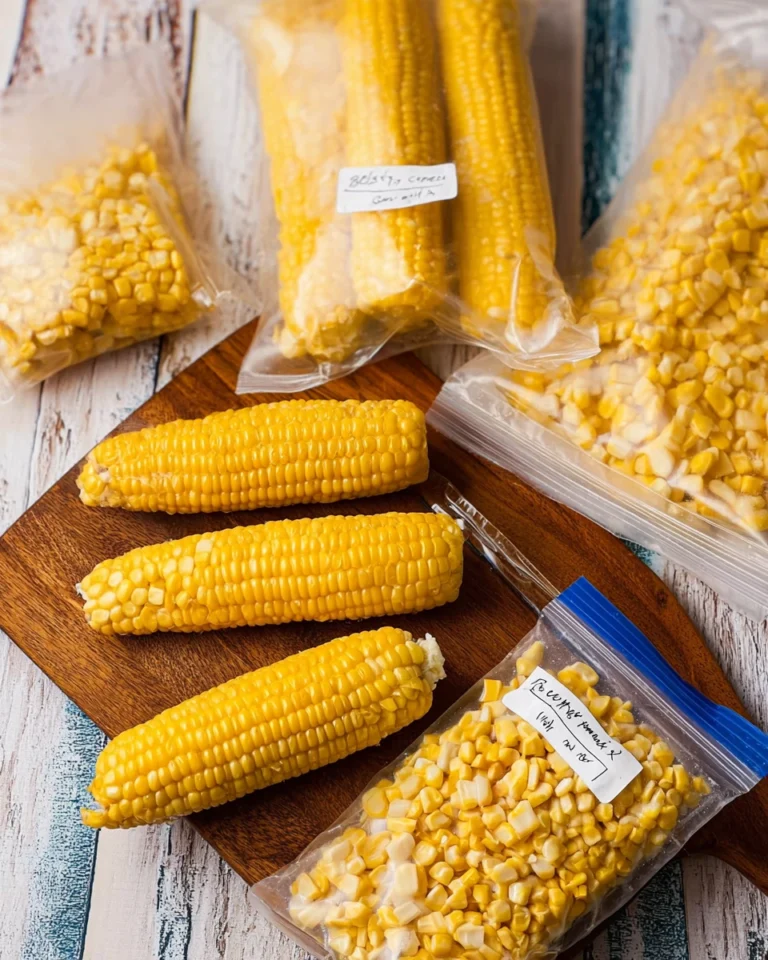
How to Freeze Corn on the Cob and Kernels
Freezing corn allows you to savor summer’s sweet flavor all year. This simple guide gives you easy methods for freezing both on-the-cob and kernels.
- Total Time: 20 minutes
- Yield: Varies
Ingredients
- Fresh ears of corn (any size)
- Ice for ice bath
- Water for ice bath
Instructions
- Remove husks and silks from corn.
- Heat water in a large pot over medium heat.
- Prepare an ice bath in a separate bowl.
- Boil corn for 3-4 minutes, turning occasionally.
- Transfer corn to ice bath for 4-5 minutes.
- Dry corn with a towel.
- Freeze on a baking sheet for 1-2 hours.
- Wrap corn in plastic wrap and place in a freezer bag.
Notes
Use fresh corn for the best flavor.
Make sure to remove as much air as possible from bags to prevent freezer burn.
Label freezer bags with the date for easy reference.
- Prep Time: 10 minutes
- Cook Time: 10 minutes
- Category: Preservation
- Method: Freezing
- Cuisine: N/A
Nutrition
- Calories: 77
- Sugar: 6
- Sodium: 0
- Fat: 1.5
- Saturated Fat: 0.2
- Unsaturated Fat: 1.3
- Trans Fat: 0
- Carbohydrates: 17
- Fiber: 2
- Protein: 3
- Cholesterol: 0