Skip to content
These Back to School Pencil Wafer Cookies are a fantastic way to kick off the new school year! Imagine the smiles on the faces of your kids and their friends as they see these adorable, pencil-shaped treats. Not only are they super easy to make, but each cookie also offers a delightful mix of flavors and textures that will impress everyone. Plus, they’re an excellent opportunity for you to bond with your little ones in the kitchen as they help out with the fun decorating. So, let’s channel our inner bakers and get ready for some delicious fun!
Thank you for reading this post, don't forget to subscribe!Why This Recipe Works
This Back to School Pencil Wafer Cookies recipe shines because it combines simplicity with creativity. Using basic ingredients you likely have at home, you can turn a regular baking session into a fun project for the whole family. The crispy vanilla wafers serve as the base, while the smooth melted chocolate adds a sweet touch that makes each bite irresistible. Whether you’re a seasoned baker or a novice, this recipe welcomes everyone with open arms. You can enjoy a delightful afternoon of baking, and the end result is not just tasty; it’s also a feast for the eyes!
Why You’ll Love This Back to School Pencil Wafer Cookies
These cookies aren’t just any treat; they’re a whimsical addition to your back-to-school celebrations. They’re perfect for school gatherings, as fun lunch box surprises, or simply as a sweet afternoon snack. The charming pencil shape will surely catch the attention of children and adults alike. Moreover, making these cookies together can create lasting memories. It’s a chance to engage little hands in the kitchen, sparking their creativity as they help shape and decorate the cookies.
Ingredients
- 12 Vanilla Wafers
- 1/4 cup White Chocolate Chips, melted
- 12 Mini Chocolate Chips
- 1/4 cup Pink Melting Wafers, melted
How to Make Back to School Pencil Wafer Cookies
Prepare Your Workspace
Start by laying down a piece of parchment paper on your clean counter. This simple step prevents your cookies from sticking and makes clean-up easier. Plus, it’s a great way to catch any drips from the melted chocolate later on!
Shape the Wafer Cookies
Now, for the fun part—shape the cookies! Carefully cut the ends of each vanilla wafer cookie into a point. This creates the perfect pencil tip look. Make sure to do this gently so they don’t break; it keeps things tidy and ensures each cookie looks its best.
Melt the White Chocolate
Next, grab a microwave-safe bowl and put in your white chocolate chips. Heat them in the microwave in 30-second intervals, stirring after each time. Keep going until the chocolate becomes smooth and creamy. This step makes it easier to coat the cookie tips later on.
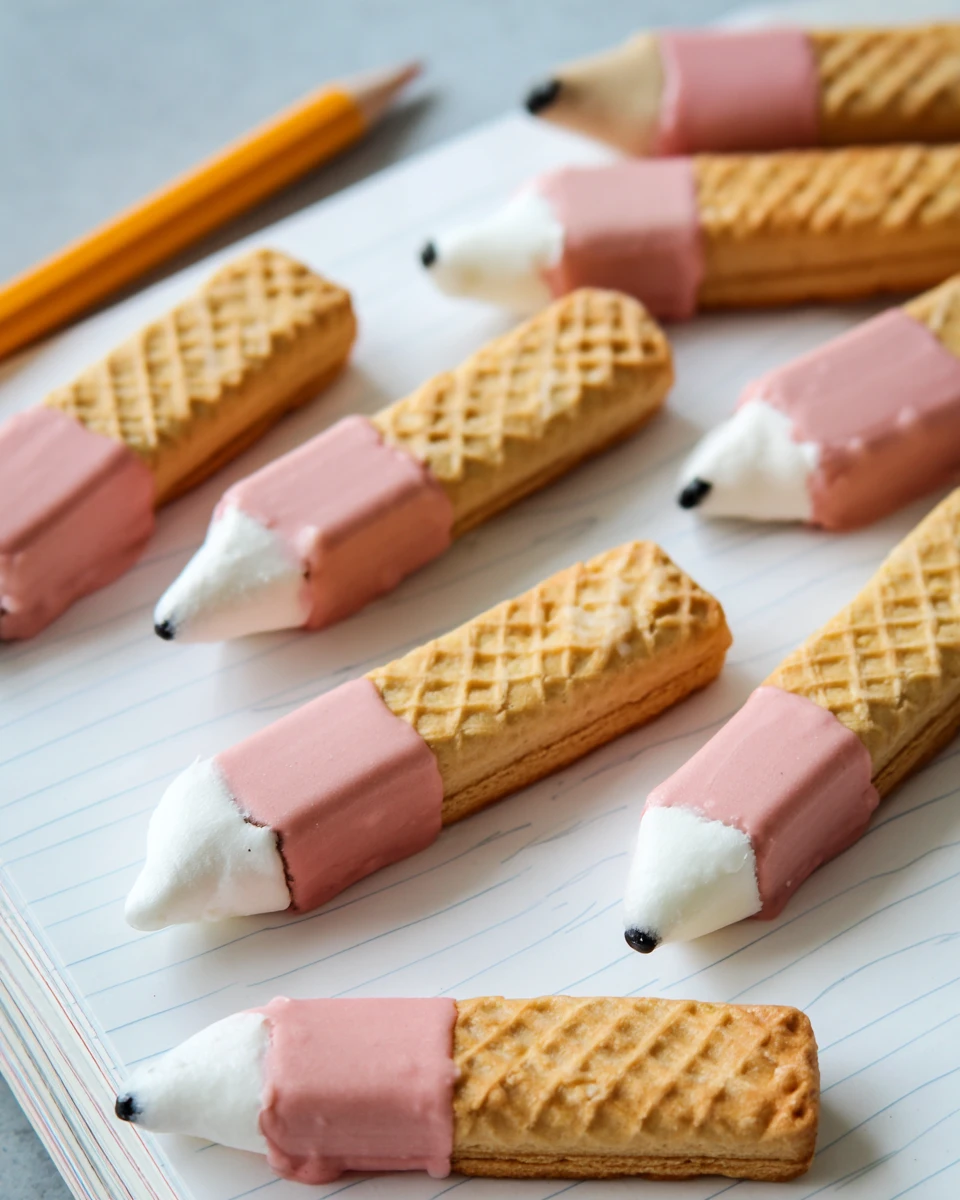
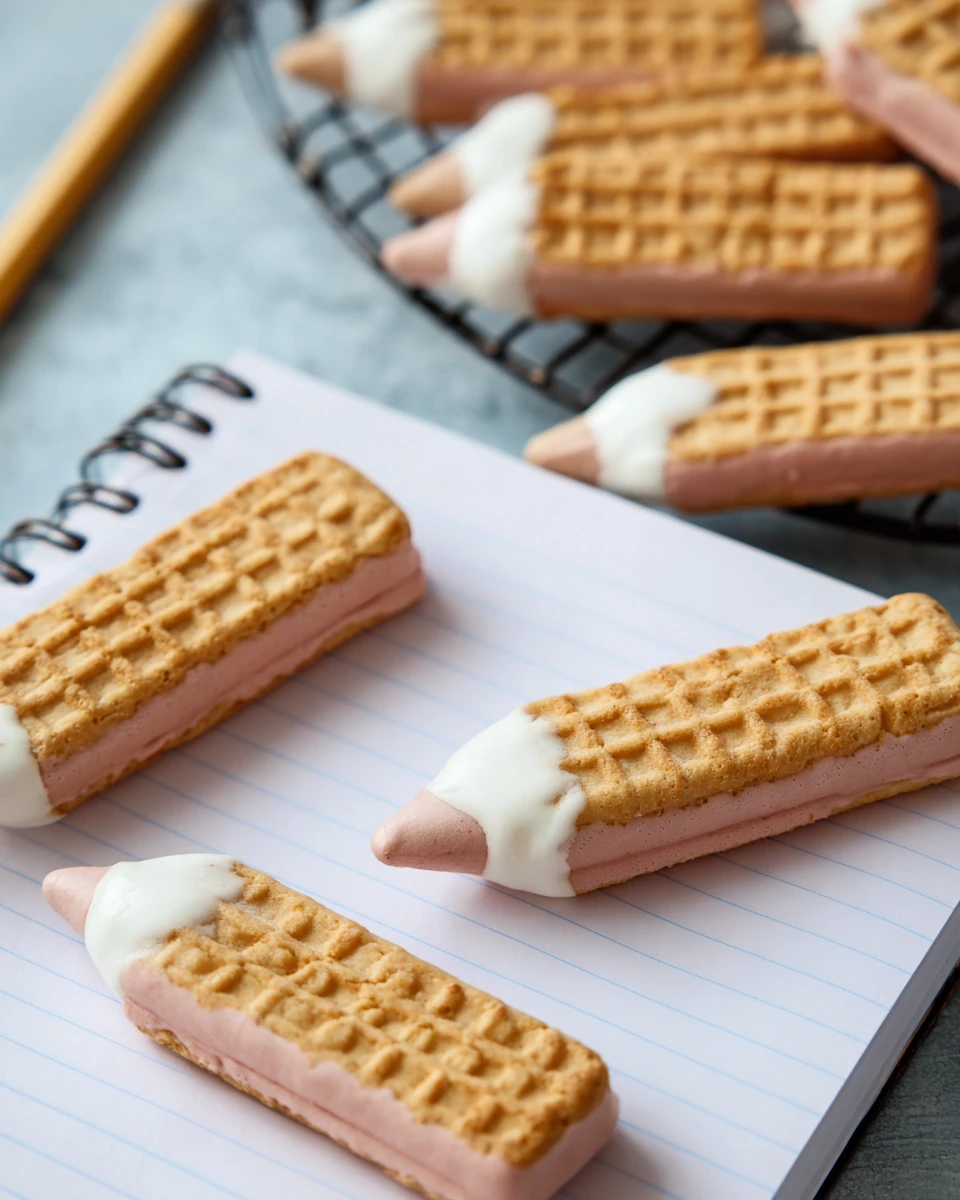
Create the Pencil Tips
With the white chocolate ready, it’s time to assemble the pencil tips! Dunk the pointed ends of your shaped wafer cookies into the melted white chocolate. You just need to coat the tips. Then, place them on the parchment paper. To give them that classic pencil look, pop a mini chocolate chip at the tip to resemble pencil lead.
Allow to Harden
Let those chocolate-coated tips harden completely. You can opt for room temperature for a bit of patience, or speed things along by placing them in the refrigerator. Either way, waiting is essential for that perfect finish!
Melt the Pink Wafers
In a separate microwave-safe bowl, melt the pink melting wafers using the same method. Heat them in 30-second intervals until nice and smooth, just like the white chocolate.
Create the Pencil Erasers
Once your pink melting wafers are ready, dip the opposite ends of the wafer cookies into the pink chocolate. This coats the ends and gives them that unmistakable eraser look. Place them back on the parchment paper to allow them to set.
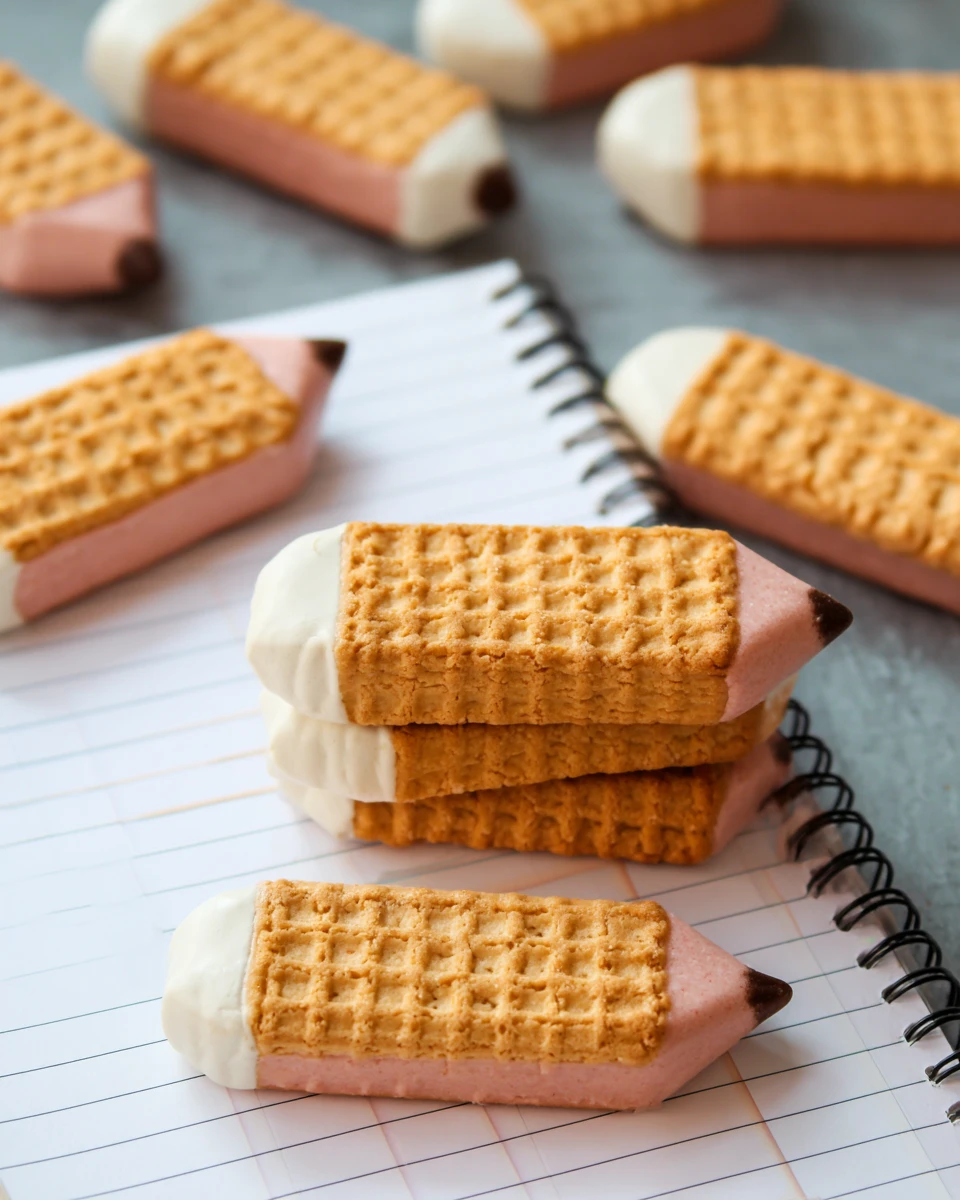
Final Presentation
Once everything is set, arrange your Back to School Pencil Wafer Cookies on a decorative platter. A fun display adds to the festive atmosphere and makes for a wonderful centerpiece.
Serving Suggestions
For serving, you can showcase your cookies on a fun, themed plate that matches the back-to-school vibe. Alternatively, package them in cute cellophane bags tied with a ribbon for an easy treat to bring to school. Everyone will appreciate the thought you put into their presentation!
Tips for Success
- Always choose high-quality chocolate. It melts better and tastes fantastic.
- Ensure that your wafer cookies are cut evenly. This consistency helps maintain an appealing shape.
- Be patient and wait for the chocolate to harden completely before digging in. It will be worth the wait!
Variations
- If you want to get creative, consider using different colors of melting chocolate for various occasions. They can become holiday-themed or birthday treats!
- A fun twist is to swap vanilla wafers for chocolate wafers, adding a unique flavor and a darker base for your cookies.
- Sprinkle some colorful sprinkles on the chocolate tips for added decoration and a fun crunch!
Storage Tips
To keep your cookies fresh, store them in an airtight container at room temperature. This way, they’ll last for up to a week. However, avoid refrigeration, as it can make the chocolate too hard and less enjoyable to eat.
Pairing Ideas
These Back to School Pencil Wafer Cookies pair perfectly with a chilled glass of milk or refreshing apple juice. The sweet, creamy taste complements the cookies beautifully, making snack time even more enjoyable!
FAQs
1. Can I use regular chocolate instead of white chocolate?
Absolutely! You can switch to regular chocolate, but keep in mind it may change the overall look of your pencils.
2. How can I make these cookies colorful?
You can use colored melting wafers or even add food coloring to the white chocolate for vibrant decorations.
3. How long do these cookies take to make?
Making these cookies usually takes about 30 minutes for preparation and assembly, not including the time for the chocolate to harden.
4. Are these cookies suitable for allergy-friendly diets?
It’s best to check ingredient labels for any allergy-related concerns. Make sure your chocolate and wafers match your dietary needs.
5. Can kids help with this recipe?
Definitely! This recipe is perfect for kids, especially during the decorating stages where they can let their creativity shine.
With the Back to School Pencil Wafer Cookies, you’re not just making a tasty snack. You’re creating a fun and engaging experience that brings joy to baking. So gather your supplies, invite your little chefs to help, and enjoy both the process and the sweet treats at the end! Happy baking and here’s to a wonderful school year ahead!
Print
Back to School Pencil Wafer Cookies
These whimsical Back to School Pencil Wafer Cookies combine crispy vanilla wafers and smooth melted chocolate, making them a delightful treat for kids and adults alike. Perfect for school gatherings, they’re easy to make and a fun activity to do together in the kitchen.
- Total Time: 30 minutes
- Yield: 12 cookies 1x
Ingredients
- 12 Vanilla Wafers
- 1/4 cup White Chocolate Chips, melted
- 12 Mini Chocolate Chips
- 1/4 cup Pink Melting Wafers, melted
Instructions
- Prepare your workspace with parchment paper.
- Shape the wafer cookies by cutting ends into points.
- Melt the white chocolate chips until smooth.
- Dunk the pointed ends of cookies into white chocolate and add mini chocolate chips.
- Let the chocolate harden at room temperature or in the refrigerator.
- Melt pink melting wafers until smooth.
- Dip the opposite ends of cookies into pink chocolate for the erasers.
- Arrange cookies on a decorative platter for serving.
Notes
Use high-quality chocolate for better melting and flavor.
Ensure cookies are cut evenly for a consistent shape.
Let chocolate completely harden before enjoying.
- Prep Time: 15 minutes
- Cook Time: 15 minutes
- Category: Dessert
- Method: Baking
- Cuisine: American
Nutrition
- Calories: 100
- Sugar: 6g
- Sodium: 30mg
- Fat: 5g
- Saturated Fat: 3g
- Unsaturated Fat: 2g
- Trans Fat: 0g
- Carbohydrates: 12g
- Fiber: 0g
- Protein: 1g
- Cholesterol: 5mg