Skip to content
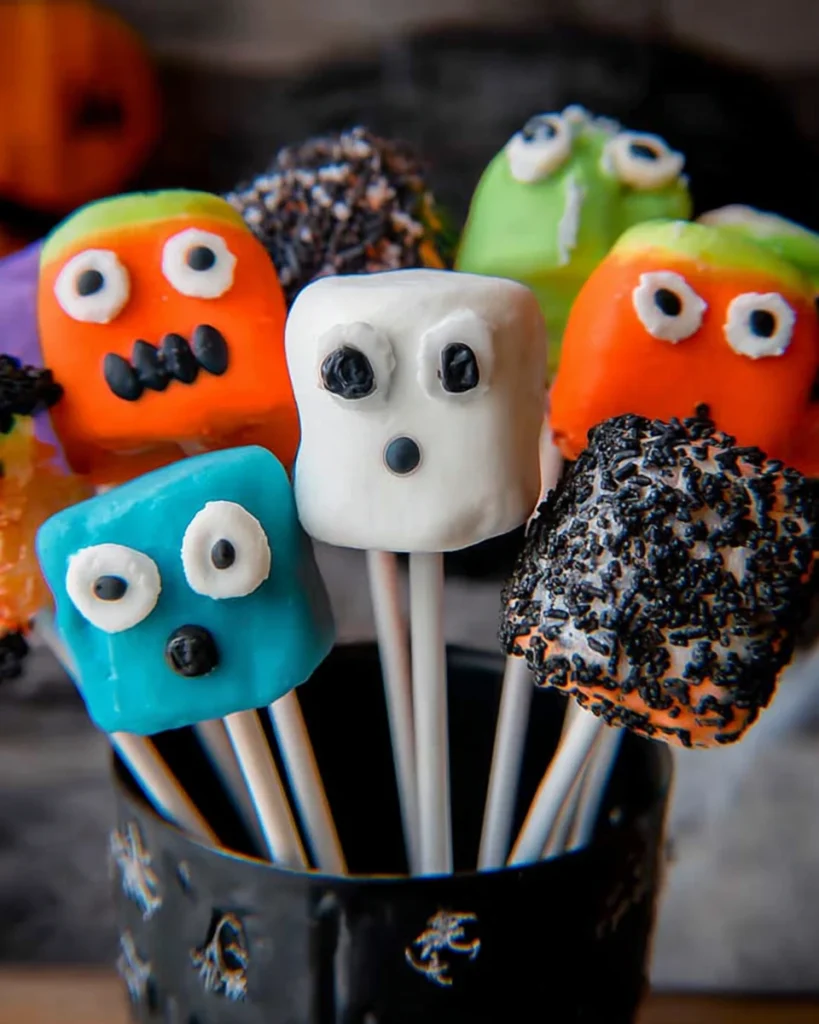
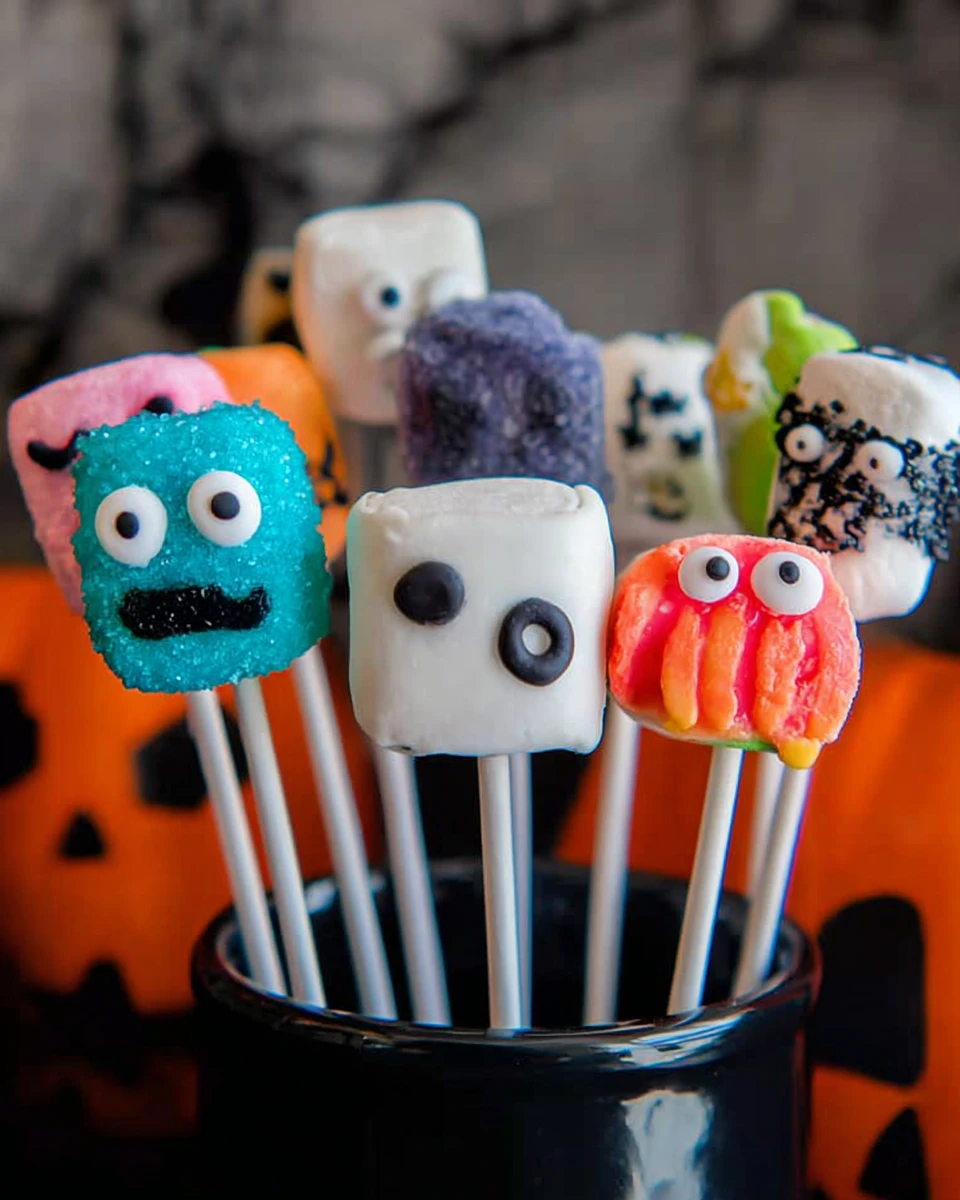
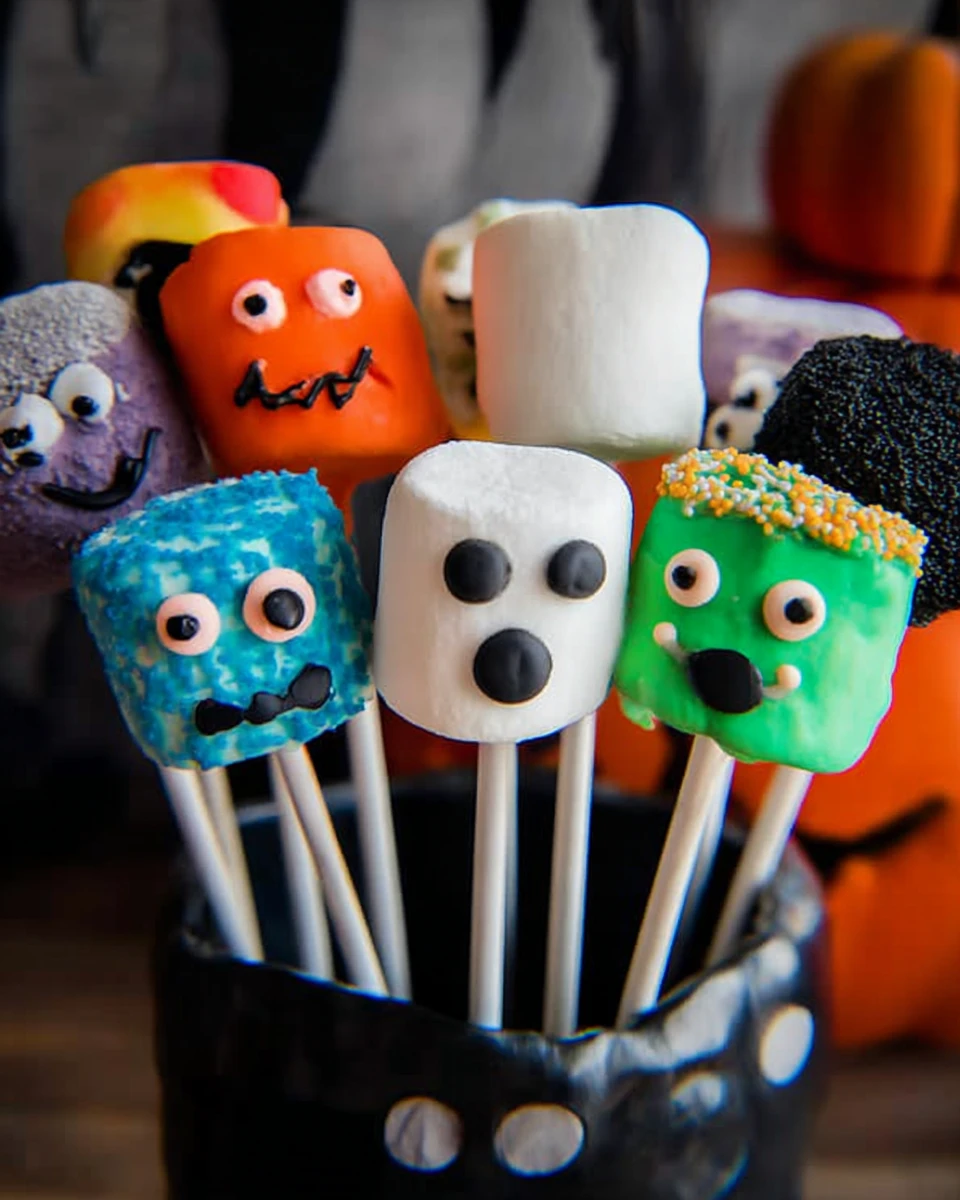
Creating Halloween Marshmallow Pops is a fantastic way to enjoy the festive spirit of Halloween while letting your creativity shine in the kitchen. These treats are not only delicious but also fun to make alongside family and friends. Imagine transforming simple marshmallows into spooky, colorful creations that can be enjoyed as party favors or used as decorations. The best part? You can customize each pop to match your Halloween theme perfectly. Whether you’re whipping up Frankenstein, mummies, or pumpkins, each design tells its own story and adds to the spooky atmosphere. So gather those ingredients and let’s get started on crafting these delightful Halloween Marshmallow Pops that everyone will love!
Thank you for reading this post, don't forget to subscribe!Why This Recipe Works
This Halloween Marshmallow Pops recipe balances simplicity and creativity, making it perfect for both novice and experienced cooks. The combination of melted candy and marshmallows creates a treat that’s visually appealing and delicious. Plus, it’s adaptable for various Halloween themes! You can easily tweak colors and decorations, enabling you to craft a unique creation every time.
Why You’ll Love This Halloween Marshmallow Pops
These Halloween Marshmallow Pops are not just sweets; they’re a fun activity for the entire family. Engaging children in the kitchen fosters creativity and teamwork. The finished pops can make for delightful decorations or party favors. Their colorful and spooky designs add a festive vibe to any Halloween celebration, inviting everyone to join in the fun and festivities!

Ingredients
Here’s a list of what you’ll need for these sweet pops:
- 10 lollipop sticks
- 10 large or extra-large marshmallows
- 1 small bucket or basket (for display)
- 1 block of styrofoam (optional, for stability)
- Black paper shred (to cover styrofoam)
- Small plastic cellophane bags and ribbons/twist ties (optional)
- 1 cup green candy melts
- 1 cup black sanding sugar
- 1 pack candy eyes
- 1 tube black decorating icing (small tip #2, 3, or 4)
- 1 tube white decorating icing
- 1 cup black nonpareils
- 1 cup blue and/or purple candy melts
- 1 cup blue and/or purple sanding sugar
- 1 cup orange candy melts
- 1 cup yellow candy melts
- 1 cup yellow sanding sugar
- 1 cup orange sanding sugar
- Green candy (e.g., leaf-shaped candy, M&Ms, Mike and Ike, etc.)
- Black edible marker
Creating Frankenstein Marshmallow Pops
Melt and Dip the Marshmallow
Start by melting green candy melts in a microwave-safe bowl. Dip one end of a lollipop stick into the melted candy, then gently insert it into the bottom of a marshmallow. This step is crucial as it helps the marshmallow stay attached.
Coat the Marshmallow
Now, immerse the marshmallow into the green candy melts until it’s entirely covered. Afterward, gently tap off any excess candy. This ensures an even coating for your pops!
Add the Details
While the candy is still wet, dip the top of the marshmallow into black sanding sugar. Press two candy eyes into the side for that adorable Frankenstein look. Lastly, use black decorating icing to draw a mouth, giving it some character.
Making Mummy Marshmallow Pops
Stick and Icing
Insert the lollipop stick straight into a marshmallow. While holding it, apply white decorating icing around the marshmallow in a messy wrap effect. The idea is to create an illusion of mummy bandages.
Add the Texture
Once you’ve coated the marshmallow with icing, sprinkle black nonpareils over the top. Set aside to dry, preferably in the fridge for a few minutes. This will help the icing firm up.
Crafting Monster Marshmallow Pops
Prepare the Stick
Dip one end of your lollipop stick into the candy melt color of your choice. Push it into the marshmallow, anchoring it.
Coat and Decorate
Next, cover the marshmallow entirely with your selected candy melt. After tapping off excess coating, you can sprinkle sanding sugar if desired. Finally, complete the look by adding candy eyes for a fun, monster-like vibe.
Creating Candy Corn Marshmallow Pops
Layer the Candy
Press the stick into a marshmallow. Then dip 2/3 of the marshmallow into melted orange candy melts. Roll the sides in orange sanding sugar for added sweetness.
Top it Off
Once the orange layer has dried, dip the top quarter of the marshmallow into yellow candy melts and roll it in yellow sanding sugar. This colorful topping gives it that classic candy corn look!
Making Pumpkin Marshmallow Pops
Dip to Create the Base
Dip the end of a lollipop stick into orange melts and gently insert it into the bottom of the marshmallow. This creates a sturdy base and vibrant pumpkin color.
Add the Leaf
To make your pumpkin pop, top the marshmallow with a leaf-shaped candy or any green candy that resembles a leaf. It’s the perfect finishing touch!
Creating Ghost Marshmallow Pops
Draw the Face
For a ghostly appearance, use a black edible marker to draw two eyes and a mouth on the marshmallow. This simple step instantly gives your treat a spooky character.
Crafting BOO and RIP Marshmallow Designs
Write the Words
Use a black edible marker or icing with a small tip to write spooky phrases like “BOO” or “RIP” on individual marshmallows. Personalizing each pop adds to the Halloween spirit!
Assembly
Prepare the Display
Find a decorative bucket and place a block of styrofoam inside. Cover it with black paper shred for a spooky effect. Insert the marshmallow pops into the styrofoam to display them upright. This visually enhances your treat presentation.
Wrap for Party Favors
If you’re planning to give them out as gifts, wrap each pop in cellophane bags. Tie them with ribbons or twist ties to create festive party favors.
Serving Suggestions
Serve these festive treats on a spooky platter. They pair wonderfully with Halloween-themed drinks or snacks during your party! Imagine how great they’d look on your dining table!
Tips for Success
- Make sure that the candy melts are fully melted for an even coating. This ensures your pops look great and taste fantastic!
- Allow ample drying time before handling the pops to avoid smudging decorations. Being patient now makes all the difference later!
Variations
Feel free to experiment with different color combinations and decorations to create unique designs! Consider using flavored candy melts for added taste. This way, each batch can be a surprise!
Storage Tips
Store leftover marshmallow pops in an airtight container in a cool, dry place for up to a week. If wrapped individually, they can last even longer! This means you can enjoy your creations for days.
FAQs
1. Can I use different types of candy melts?
Absolutely! You can choose any colors or flavors that match your theme, making this recipe versatile.
2. How do I prevent the marshmallows from sticking to each other?
Ensure they are thoroughly dried before stacking or storing. Alternatively, keep them in a single layer to avoid sticking.
3. What can I use instead of lollipop sticks?
You could use sturdy pretzel sticks or skewers for a fun twist! They add an extra crunch.
4. Are these treats suitable for parties?
Definitely! They make fantastic party favors and can be a fun activity for kids during Halloween gatherings.
5. Can I make these ahead of time?
Yes, you can prepare them a few days in advance; just store them properly to maintain freshness.
These Halloween Marshmallow Pops are an enjoyable and creative treat that will excite both kids and adults alike. With their spooky designs and delicious flavors, they’re not just fun to make; they’re a festive addition to any Halloween celebration. Get ready to share smiles and sweet treats this Halloween!
Print
Halloween Marshmallow Pops
These Halloween Marshmallow Pops are an exciting way to engage with family while creating delicious treats. Each design adds a festive flair to your celebration!
- Total Time: 45 minutes
- Yield: 10 pops 1x
Ingredients
- 10 lollipop sticks
- 10 large or extra-large marshmallows
- 1 small bucket or basket (for display)
- 1 block of styrofoam (optional, for stability)
- Black paper shred (to cover styrofoam)
- Small plastic cellophane bags and ribbons/twist ties (optional)
- 1 cup green candy melts
- 1 cup black sanding sugar
- 1 pack candy eyes
- 1 tube black decorating icing (small tip #2, 3, or 4)
- 1 tube white decorating icing
- 1 cup black nonpareils
- 1 cup blue and/or purple candy melts
- 1 cup blue and/or purple sanding sugar
- 1 cup orange candy melts
- 1 cup yellow candy melts
- 1 cup yellow sanding sugar
- 1 cup orange sanding sugar
- Green candy (e.g., leaf-shaped candy, M&Ms, Mike and Ike, etc.)
- Black edible marker
Instructions
- Melt green candy melts and dip one end of a lollipop stick into it before inserting into a marshmallow.
- Coat the marshmallow with green candy melts and tap off excess.
- Dip in black sanding sugar and add candy eyes. Use black icing for a mouth.
- For mummies, coat marshmallows with white icing and sprinkle with black nonpareils.
- Create monster pops by dipping marshmallows in chosen candy melts and adding eyes.
- For candy corn, dip 2/3 of marshmallow in orange melts, then top quarter with yellow melts.
- For pumpkins, add a green candy top and dip stick in orange melts.
- Draw ghost faces with a black marker and write phrases on marshmallows.
- Display in a decorated bucket and optionally wrap for party favors.
Notes
Ensure candy melts are fully melted for best results.
Allow enough drying time before handling to avoid smudging.
Store pops in an airtight container for up to a week.
- Prep Time: 30 minutes
- Cook Time: 15 minutes
- Category: Dessert
- Method: No-bake
- Cuisine: American
Nutrition
- Calories: 150
- Sugar: 15
- Sodium: 5
- Fat: 5
- Saturated Fat: 3
- Unsaturated Fat: 2
- Trans Fat: 0
- Carbohydrates: 25
- Fiber: 0
- Protein: 1
- Cholesterol: 0