Skip to content
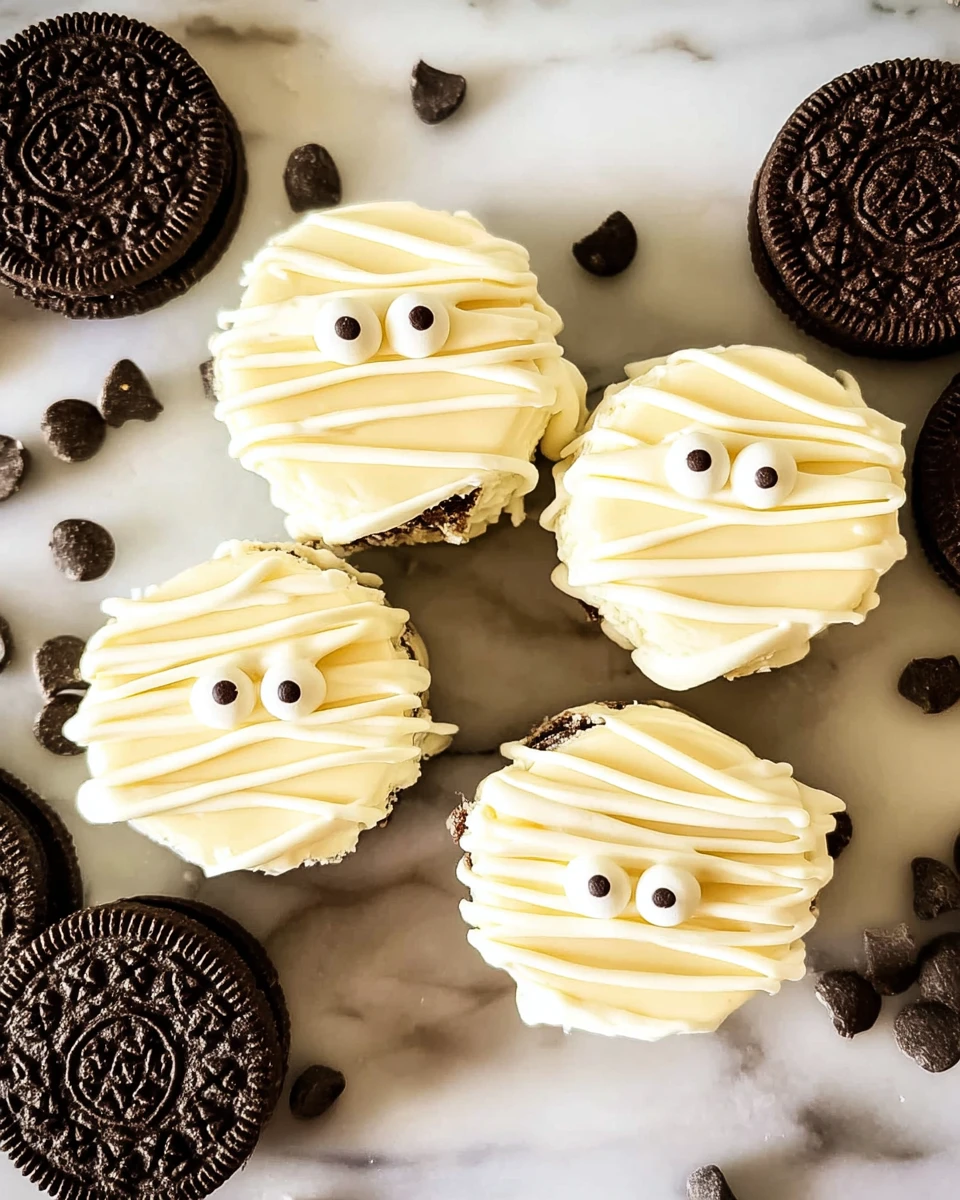
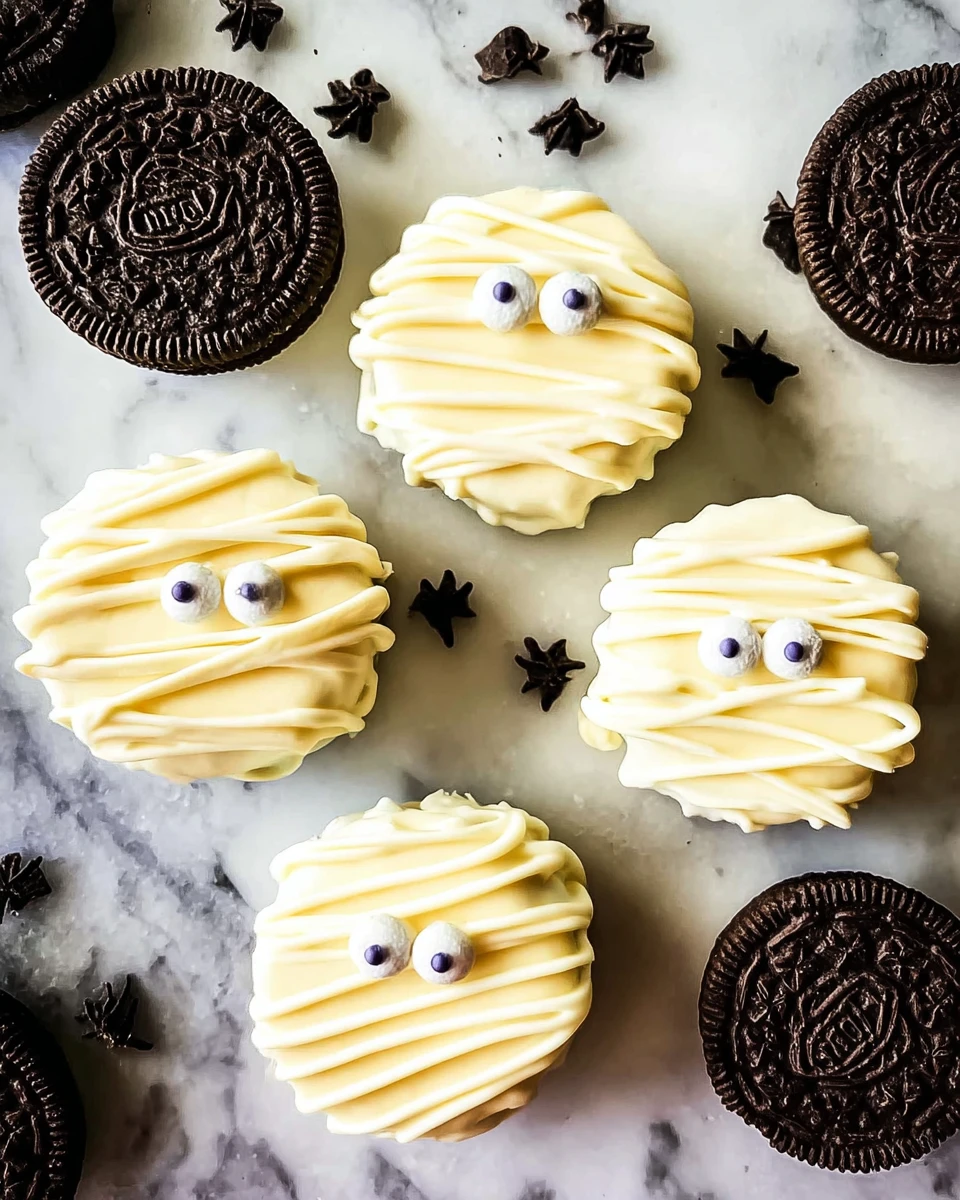
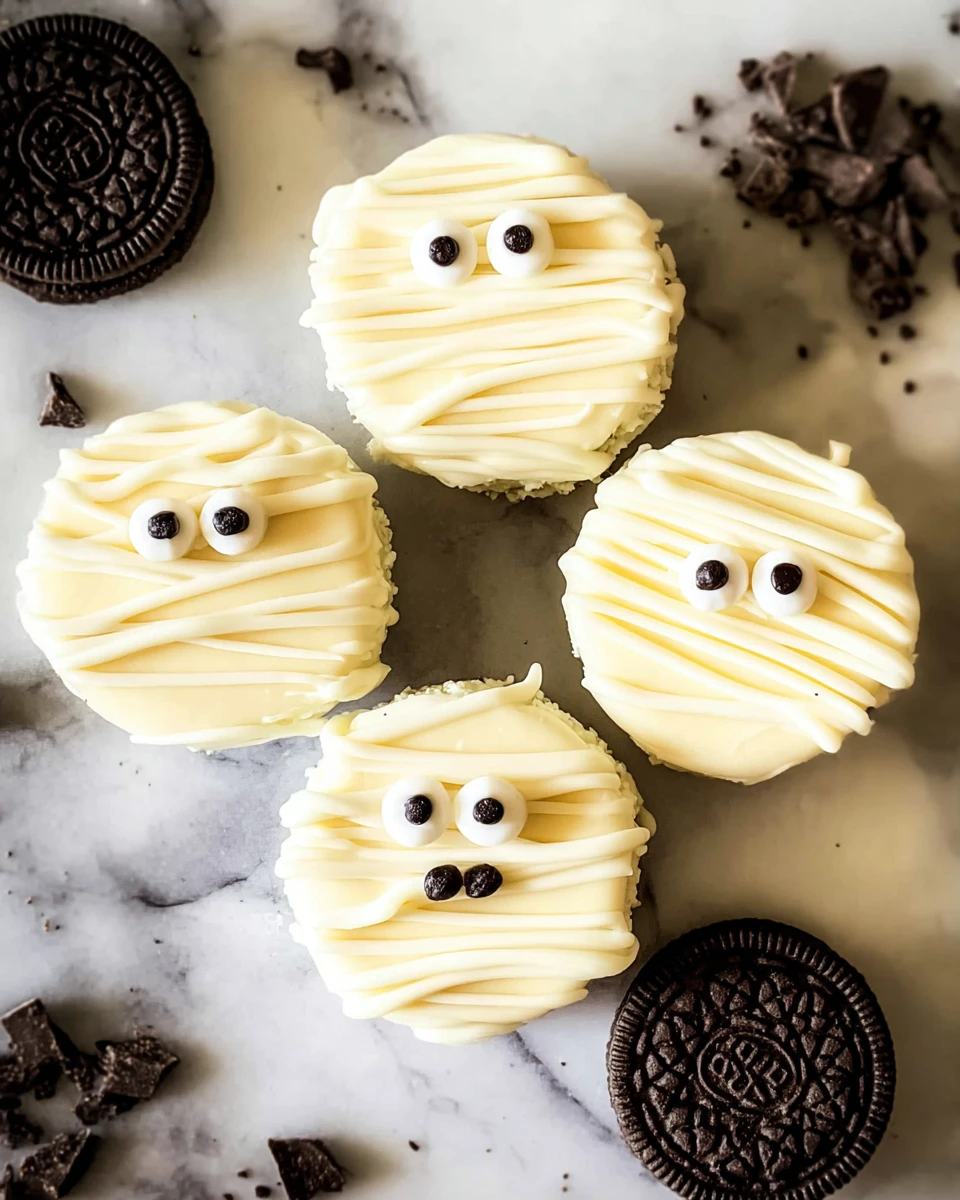
Mummy Chocolate Covered Oreos are an absolute must-try for Halloween! These delightful treats combine the classic crunch of Oreos with the sweet creaminess of chocolate. They’re not just delicious; they’re also a fun way to get into the Halloween spirit. Picture this: you’re in the kitchen, melting chocolate, and decorating cookies that look like friendly mummies. It’s an activity the whole family can enjoy, making memories while whipping up spooky snacks. Imagine sharing these with friends at a Halloween gathering or giving them out as festive treats. With a simple recipe that’s easy to follow, you’ll have a batch of Mummy Chocolate Covered Oreos ready in no time. Let’s get started on creating these cute and tasty spooky snacks!
Thank you for reading this post, don't forget to subscribe!Why This Recipe Works
This recipe brings together a wonderful balance of flavors. The sweet white chocolate pairs perfectly with the classic Oreo cookie, creating a tasty experience that’s hard to resist. Plus, the process is super straightforward. Melting the chocolate and shaping the cookies is so easy that even kids can join in on the fun. There’s something satisfying about creating your spooky treats that adds to the excitement of Halloween. You don’t just end up with delicious snacks; you get the joy of cooking together, making this an activity that everyone will remember.
Why You’ll Love This Mummy Chocolate Covered Oreos
These Mummy Chocolate Covered Oreos aren’t just treats; they’re little works of art. They’re perfect for embracing your creativity while making something delicious. Each cookie can tell a story! Their spooky appearance adds an element of fun to your celebrations. You can serve these at Halloween parties, school events, or even enjoy them during family movie nights. Imagine the smiles on everyone’s faces when they see these cute, spooky cookies. They’re not just desserts; they’re a way to bring joy and a touch of Halloween magic to any gathering.
Ingredients
- 12 ounces white candy melts (reserve ½ cup for piping)
- 1 teaspoon vegetable shortening or coconut oil
- 6 regular Oreos
- 12 candy eyeballs
Melting the Candy Melts
Melting the Candy
Start by melting your white candy melts. The easiest way is to use a microwave. Place the candy melts in a microwave-safe bowl, set your microwave to medium power, and heat in 30-second intervals. After each interval, take the bowl out and stir the melts until they are smooth. This simple process ensures even melting, so keep an eye on it to avoid burning!
Preparing the Cookie Mold
Next, it’s time to prepare the cookie mold. Pour about ¼ cup of the melted chocolate into each section of your candy mold. Gently place one Oreo in the center of these sections, pressing down slightly to secure the cookie. This will help create a nice shape and ensure that the chocolate covers the cookie completely.
Filling the Mold
Now, cover each Oreo with more melted chocolate until the mold is filled. Don’t forget to tap the mold on the counter a couple of times; this helps release any air bubbles that might be trapped. Once everything is nicely filled, let the chocolate set for about an hour until it hardens completely. Once ready, you’ll have a delicious batch of Mummy Chocolate Covered Oreos to decorate!
Drizzling the Chocolate
Preparing the Drizzle
While you’re waiting for your cookies to set, prepare the drizzle. Melt the remaining ½ cup of candy melts, adding 1 teaspoon of vegetable shortening to thin it out a bit. This will make it easier to drizzle over the cookies. Again, use the microwave in 30-second intervals to achieve a smooth consistency.
Creating Mummy Strips
Transfer the thinned chocolate to a piping bag. Snip off a small hole at the tip to control the drizzle. Now comes the fun part! Drizzle the chocolate over the set cookies in a back-and-forth motion to create delightful mummy “strips.” Let your imagination run wild as you create each mummy’s unique look.
Adding Candy Eyes
While the chocolate drizzle is still wet, it’s time to place the candy eyes on the top third of each cookie. This little detail definitely brings these mummies to life! Allow the chocolate to fully set again before serving. Once done, your Mummy Chocolate Covered Oreos will be ready to impress!
Serving Suggestions
These spooky treats are perfect for Halloween parties. Serve them on a festive platter for a delightful presentation. They’re also great for school functions, where kids can enjoy a sweet, spooky snack. Planning a cozy family movie night? These mummies will make the perfect companion alongside your favorite Halloween flicks. Get creative with how you present them to add even more fun to your gathering!
Tips for Success
To ensure perfect Mummy Chocolate Covered Oreos, make sure the candy melts are completely smooth before you start drizzling. If the chocolate is too thick, it won’t drizzle well, and that could take away from their mummy-like appearance. Also, feel free to experiment with different types of edible decorations beyond just candy eyeballs. Your creativity knows no bounds here!
Variations
If you’re feeling adventurous, consider creating “Frankenstein” Oreos! Just switch out the white chocolate for green candy melts and use black icing for details. Alternatively, you can use dark or milk chocolate for a different flavor profile. There are endless possibilities, so have fun with it!
Storage Tips
To keep your Mummy Chocolate Covered Oreos fresh, store them in an airtight container at room temperature. They’ll stay delicious for up to a week. However, we have a feeling they won’t last that long since they’re so tasty!
Pairing Ideas
These Mummy Chocolate Covered Oreos pair wonderfully with warm apple cider or a spooky punch to complete the Halloween vibe. They also taste fantastic alongside classic Halloween movies for a cozy night in. Imagine munching on these treats while watching your favorite scary movie!
FAQs
1. Can I use chocolate chips instead of candy melts?
Yes, but remember, candy melts provide a smoother finish and are easier to work with.
2. How do I store leftover Mummy Chocolate Covered Oreos?
Keep them in an airtight container at room temperature to maintain freshness.
3. Can I make these ahead of time?
Absolutely! You can make them a few days in advance, saving time on the big day.
4. What can I use instead of candy eyes?
Small chocolate chips or edible silver balls can make for fun alternatives!
5. How do I make these gluten-free?
Look for gluten-free Oreos available at your local grocery store.
Mummy Chocolate Covered Oreos are a playful and tasty way to celebrate Halloween. With simple ingredients and straightforward steps, these treats are enjoyable to make and even more fun to eat. So gather your family or friends, and enjoy a unique cooking experience that blends creativity and deliciousness. These spooky snacks are sure to be a seasonal favorite you’ll want to make year after year!
Print
Mummy Chocolate Covered Oreos
These Mummy Chocolate Covered Oreos are not only delicious but also fun to make. Perfect for Halloween, they bring joy and creativity to your celebrations.
- Total Time: 1 hour 20 minutes
- Yield: 12 cookies 1x
Ingredients
- 12 ounces white candy melts (reserve ½ cup for piping)
- 1 teaspoon vegetable shortening or coconut oil
- 6 regular Oreos
- 12 candy eyeballs
Instructions
- Melt white candy melts in a microwave until smooth.
- Pour melted chocolate into candy mold and add Oreos, pressing down slightly.
- Fill the mold with more melted chocolate and tap to release air bubbles.
- Let the chocolate set for about an hour.
- Melt remaining candy melts with shortening for drizzle.
- Drizzle chocolate over set cookies and add candy eyes.
- Allow to set completely before serving.
Notes
Ensure candy melts are smooth for easy drizzling.
Experiment with different decorations for unique designs.
Store in an airtight container at room temperature.
- Prep Time: 20 minutes
- Cook Time: 1 hour
- Category: Dessert
- Method: No-Bake
- Cuisine: American
Nutrition
- Calories: 150
- Sugar: 12
- Sodium: 50
- Fat: 7
- Saturated Fat: 4
- Unsaturated Fat: 3
- Trans Fat: 0
- Carbohydrates: 22
- Fiber: 1
- Protein: 1
- Cholesterol: 0