Skip to content
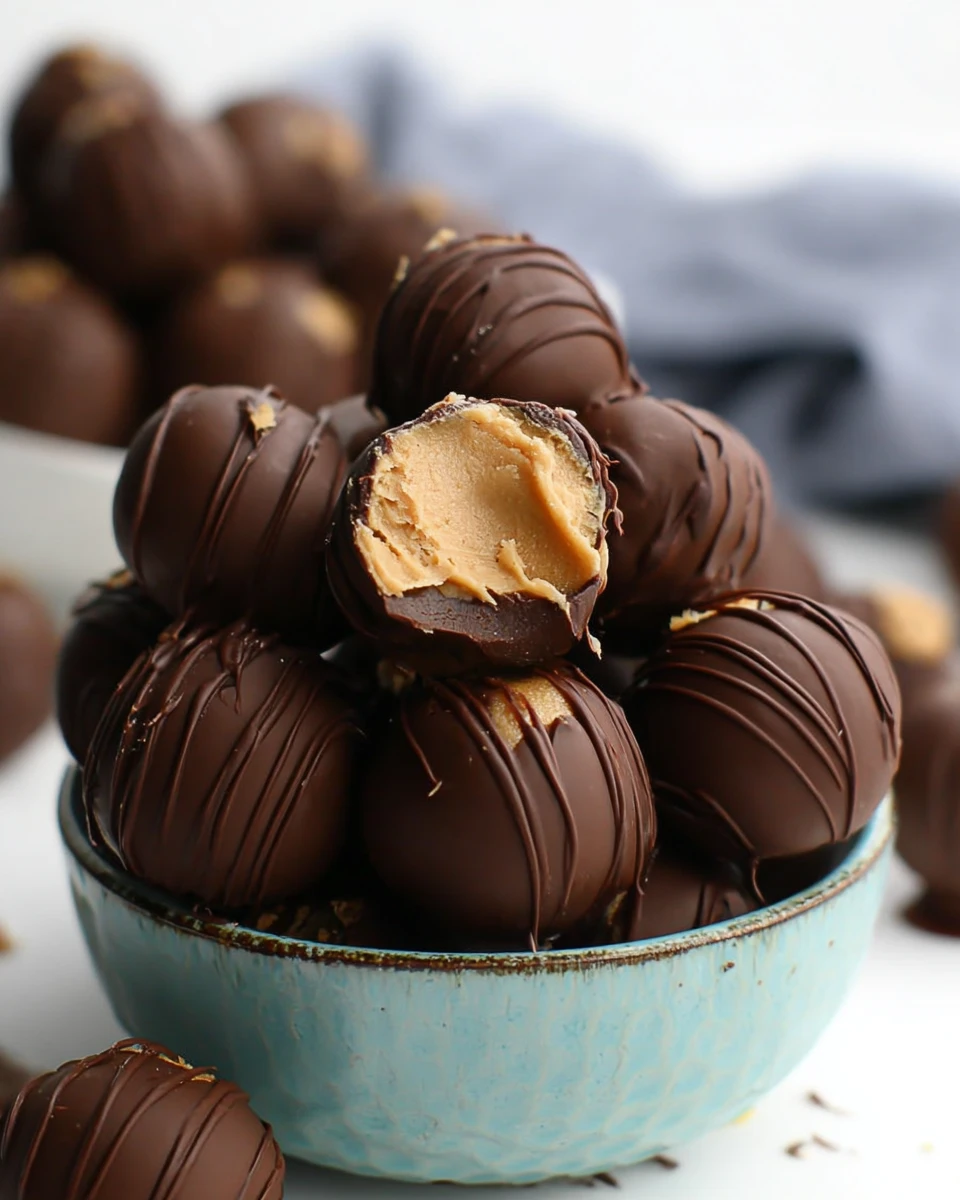
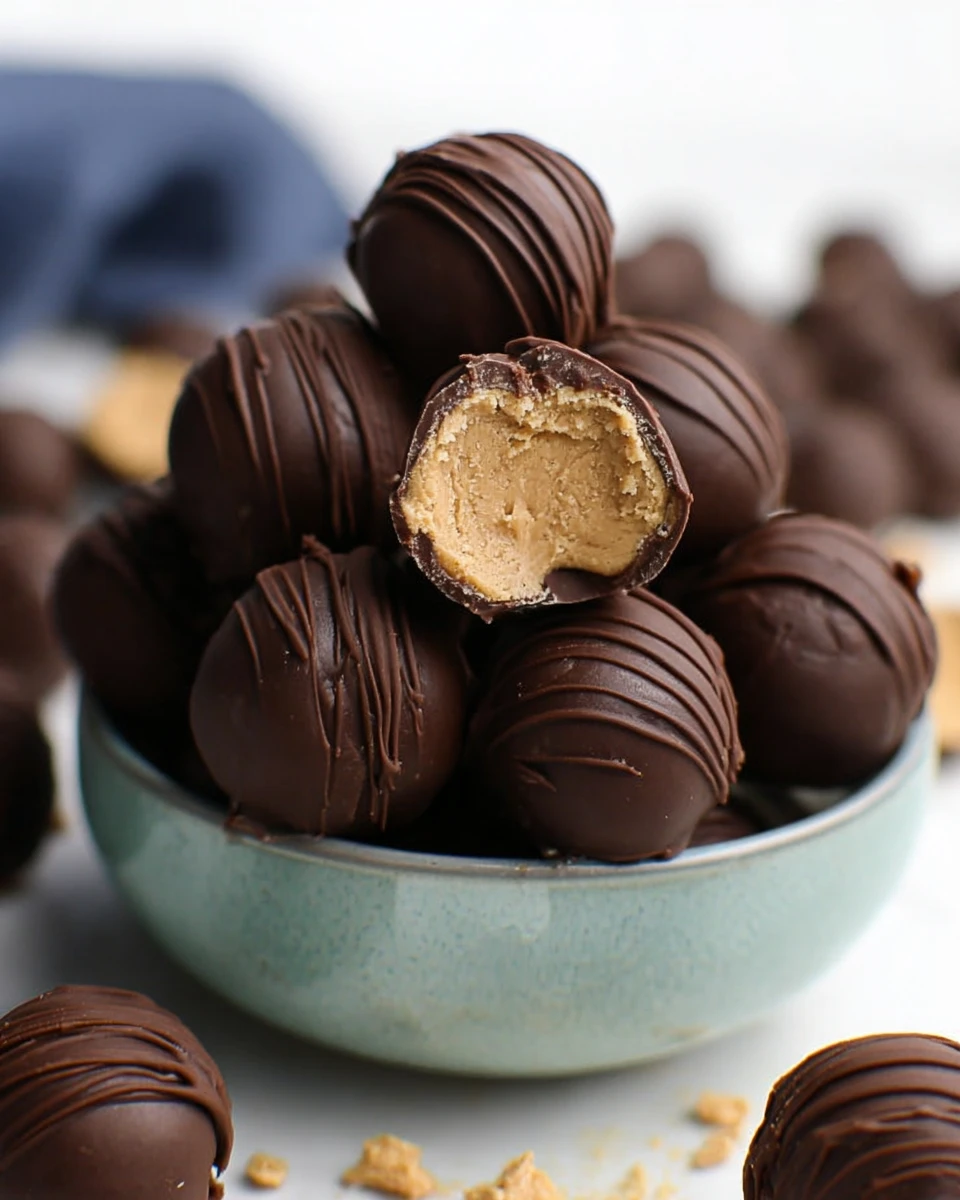
These 4-ingredient Peanut Butter Balls are the perfect answer to your cravings for something sweet yet simple. Imagine sinking your teeth into a creamy peanut butter center enveloped in rich chocolate. Yum! With just four ingredients and minimal prep time, this recipe is great for busy folks or anyone looking for an easy dessert. There’s no need for fancy tools or complicated steps, which is why it’s a crowd-pleaser—both for kids and adults alike. Whether you’re prepping for a holiday gathering or needing a quick snack, these little bites will hit the spot. Plus, you can customize them however you like! So, gather your ingredients, and let’s get started on making these delectable treats that are sure to impress.
Thank you for reading this post, don't forget to subscribe!Why This Recipe Works
First off, the beauty of these treats lies in their simplicity. With just four ingredients, you won’t be juggling too many items. It makes for a quick, hassle-free experience in the kitchen, leaving you more time to enjoy your sweet creations. Additionally, the combination of creamy peanut butter and rich chocolate creates a delightful balance of flavors that’s hard to resist. In a time when easy, no-bake desserts are increasingly popular, this recipe steps right in, catering to those who may feel less confident in their kitchen skills.
Why You’ll Love This 4-ingredient Peanut Butter Balls
You’ll find that these peanut butter balls are perfect for various occasions. They shine at holiday gatherings, parties, or just satisfy those sweet cravings without demanding a lot of prep time. And guess what? They are an ideal snack for both kids and adults, ensuring everyone is happy. The adaptability of this recipe allows you to put your personal spin on it. You can add a variety of ingredients for extra flavor or use different coatings for a unique touch.
Ingredients
- 1/2 cup creamy peanut butter
- 3 tablespoons salted butter, softened
- 1 cup powdered sugar
- 1 cup semi-sweet chocolate chips
- 1 tablespoon vegetable shortening or coconut oil (optional)
Mixing Peanut Butter and Butter Together

Start off by grabbing a mixing bowl. Add the creamy peanut butter and softened butter. Using a spoon or spatula, blend these two together until they’re smooth and well combined. This step sets the creamy base for your peanut butter balls.
Incorporating Powdered Sugar
Next, gradually stir in the powdered sugar. Take your time with this step. Mixing it in slowly helps create a thick dough that’s easy to work with. Once fully incorporated, you should notice the mixture becoming denser and easier to mold.
Chilling the Mixture
Now that you have your dough, cover the bowl with plastic wrap or a clean kitchen towel. Set it in the refrigerator for about 15 minutes. This chilling time allows the mixture to firm up, making it much easier for you to handle when shaping later.
Shaping the Peanut Butter Balls
After chilling, it’s shaping time! Using your hands, take small portions of the chilled dough and roll them into 1-inch balls. Keep them uniform in size so they look great and are easy to manage when you’re ready to dip them in chocolate.
Placing the Balls on a Baking Sheet
Take a baking sheet and arrange your peanut butter balls on it. Make sure they have space in between so they don’t stick together. Cover the tray and pop it back into the fridge for an additional 20 minutes. This extra chilling time ensures they maintain their shape.
Melting the Chocolate
While your peanut butter balls are chilling, it’s time to melt the chocolate. Pour the semi-sweet chocolate chips into a microwave-safe bowl. Heat them according to the package instructions, stirring occasionally. If you want an even smoother texture, you can add vegetable shortening or coconut oil. This addition creates a lovely sheen and improves the dip.
Dipping Peanut Butter Balls in Chocolate
Now that your chocolate is melted and smooth, grab a fork. One by one, dip each peanut butter ball into the melted chocolate, rolling it around until fully coated. Let any excess chocolate drip off before placing them back on the wax paper. This way, you avoid globs of chocolate sticking out.
Setting the Chocolate Coating
Once all your balls are dipped, it’s time to set the chocolate. Cover them again and place the baking sheet back in the refrigerator. Let them chill until the chocolate coating hardens perfectly. This usually takes about 30 to 60 minutes.
Serving Suggestions
When ready to serve, you can make them even more special. Try adding a sprinkle of sea salt or some crushed nuts on top for an extra crunch. These peanut butter balls are delightful on their own, but small touches can elevate the experience.
Tips for Success
To ensure your peanut butter balls turn out great, make sure your butter is softened first. Soft butter blends in easily, leading to a smoother dough. Also, remember to chill the dough well before shaping it. This will make it much easier to handle. Lastly, investing in high-quality chocolate can enhance the richness of your treat.
Variations
Feel free to get creative! You can add a pinch of sea salt or a splash of vanilla extract to the mixture for extra flavor. Want to switch things up? Substitute the semi-sweet chocolate chips with white or dark chocolate according to your preference.
Storage Tips
To keep your peanut butter balls fresh, store any leftovers in an airtight container in the refrigerator for up to a week. If you’re making a big batch, you can also freeze them for longer storage. Just make sure to thaw them before serving for the best taste.
Pairing Ideas
These 4-ingredient Peanut Butter Balls pair perfectly with a refreshing glass of milk or a warm cup of coffee for that afternoon pick-me-up. For a balanced dessert platter, consider serving them alongside fresh fruit. The combination of flavors creates a delightful experience.
FAQs
Can I make these peanut butter balls vegan?
Yes, definitely! Just use plant-based butter and dairy-free chocolate chips. It’s simple and still tastes amazing.
How long will these peanut butter balls last?
In the fridge, they can last up to a week. If you freeze them, they can stay good for about a month.
What can I use instead of powdered sugar?
If you’re looking for alternatives, try coconut sugar blended into a powder. Just be aware it might slightly change the taste.
Can I customize the chocolate coating?
Absolutely! You can go for white chocolate, dark chocolate, or even add some crushed nuts or coconut flakes for texture.
Is it necessary to chill the mixture?
Yes, chilling the mixture is key! It helps firm up the dough, making shaping and dipping much easier, plus it improves the overall texture.
With just four easy-to-find ingredients, these 4-ingredient Peanut Butter Balls will soon become your go-to treat for any occasion. Their creamy, chocolate-covered exterior hides a rich, peanut buttery center that’s utterly irresistible. Perfect for sharing, these treats embody simplicity and satisfaction, capturing the essence of homemade delights while allowing for personal twists. Whether you’re including them in a dessert spread or enjoying them solo, they promise to be a sweet hit that’s rich in flavor and charm.
Print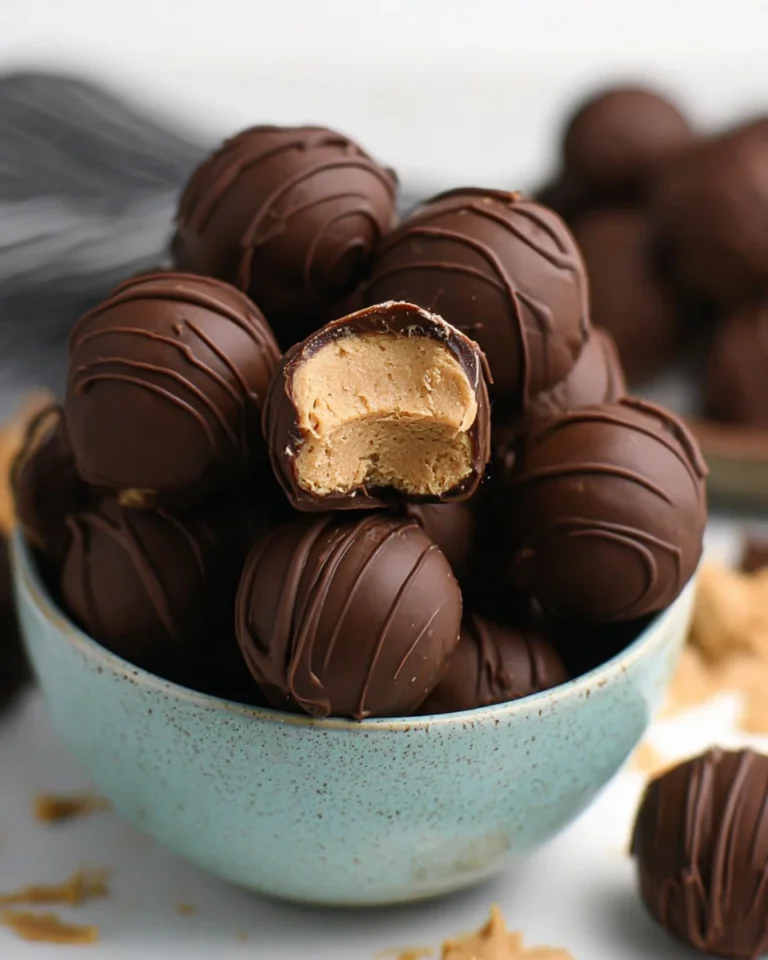
Peanut Butter Balls
These 4-ingredient Peanut Butter Balls are an easy and delightful treat, featuring a creamy peanut butter center covered in rich chocolate. Ideal for snacking or gatherings!
- Total Time: 25 minutes
- Yield: 12 servings 1x
Ingredients
- 1/2 cup creamy peanut butter
- 3 tablespoons salted butter, softened
- 1 cup powdered sugar
- 1 cup semi-sweet chocolate chips
- 1 tablespoon vegetable shortening or coconut oil (optional)
Instructions
- Blend creamy peanut butter and softened butter in a bowl until smooth.
- Slowly stir in powdered sugar until a thick dough forms.
- Chill the mixture for 15 minutes in the refrigerator.
- Roll dough into 1-inch balls and place on a baking sheet.
- Chill the balls for another 20 minutes.
- Melt semi-sweet chocolate chips in a microwave-safe bowl.
- Dip each peanut butter ball in melted chocolate until fully coated.
- Refrigerate dipped balls until the chocolate hardens.
Notes
Use softened butter for easier mixing.
Experiment with different chocolate coatings.
Store leftovers in an airtight container in the fridge.
- Prep Time: 15 minutes
- Cook Time: 10 minutes
- Category: Dessert
- Method: No-bake
- Cuisine: American
Nutrition
- Calories: 150
- Sugar: 14
- Sodium: 60
- Fat: 7
- Saturated Fat: 3
- Unsaturated Fat: 4
- Trans Fat: 0
- Carbohydrates: 20
- Fiber: 1
- Protein: 3
- Cholesterol: 15