 Skip to content
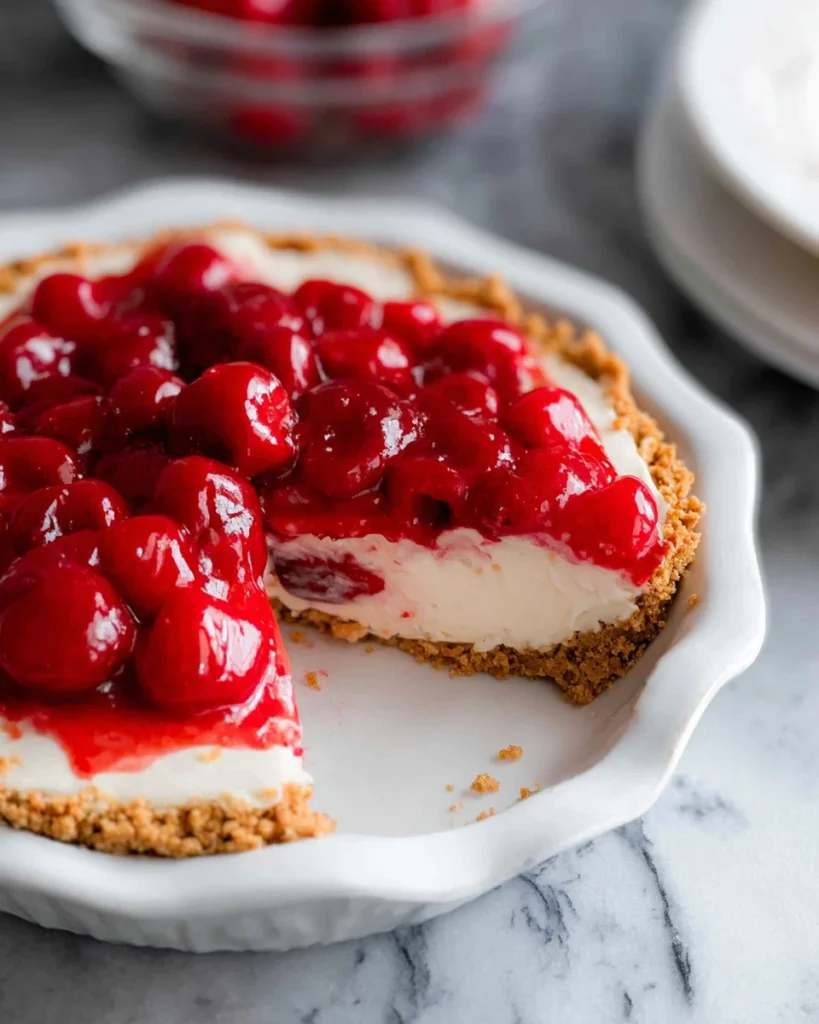
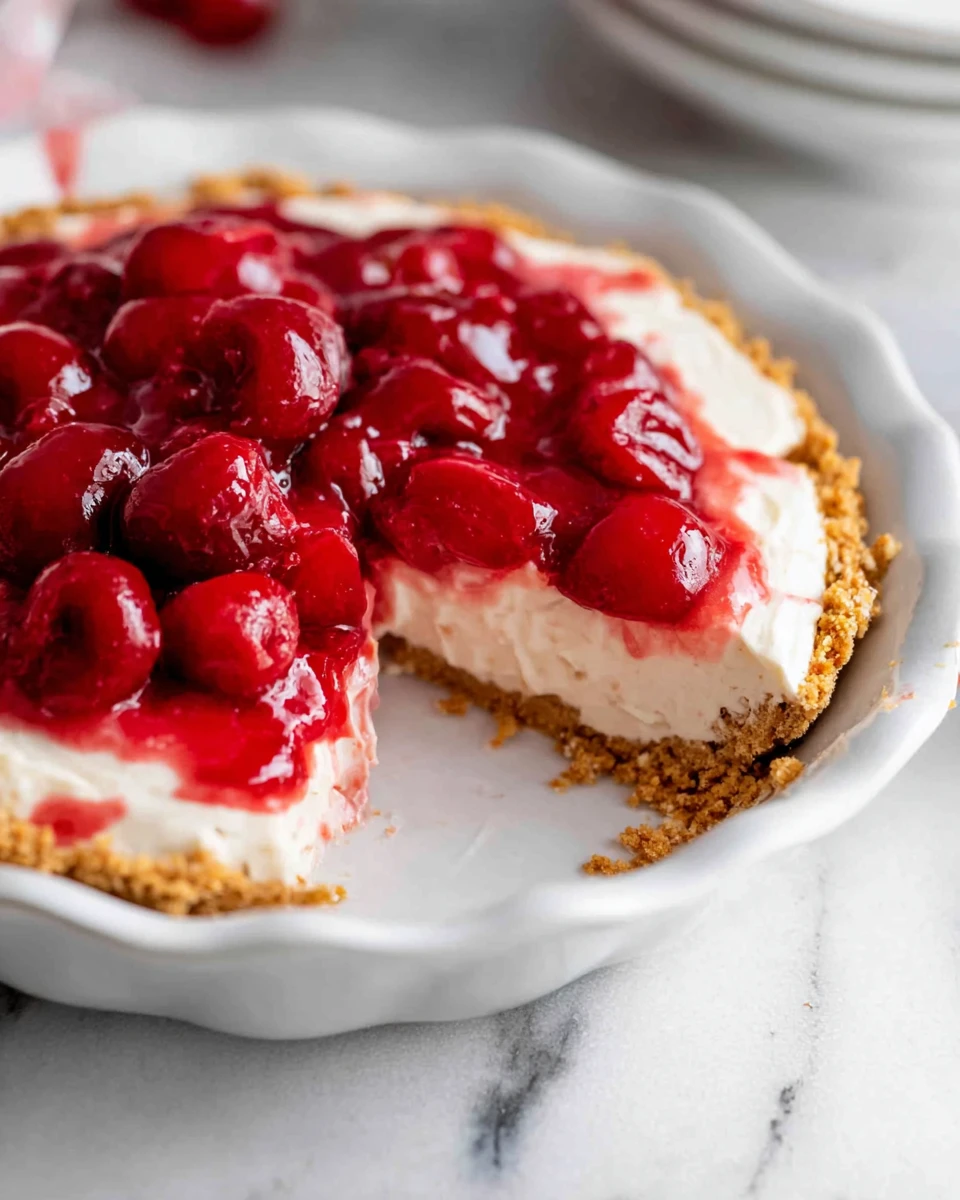
No Bake Cherry Cheesecake is one of those desserts that feels like a special treat without all the fuss of traditional baking. Imagine a cool, creamy cheesecake topped with a glossy cherry filling, just waiting to be enjoyed after a meal or at a summer gathering. The best part? You don’t have to turn on the oven! This recipe is quick and simple, making it ideal for anyone who loves delicious desserts but might be short on time.
Thank you for reading this post, don't forget to subscribe!The beautiful thing about No Bake Cherry Cheesecake is how it brings together the rich, smoothness of cream cheese with the sweetness and tartness of cherry pie filling. It’s so easy to whip up in under 20 minutes! Plus, it’s a fantastic option whether you’re hosting a barbecue, celebrating a birthday, or just treating yourself after a long day. Trust me, whoever you serve it to will be coming back for seconds! So, gather your ingredients, and let’s get started crafting this delightful dessert.
Why This Recipe Works
The No Bake Cherry Cheesecake is a delightful fusion of creamy richness and fruity sweetness, perfect for summer gatherings. Its simplicity comes from the use of minimal ingredients that harmonize beautifully to create a satisfying dessert without the hassle of baking. The combination of the graham cracker crust and the fluffy cream cheese filling creates a mouthwatering texture that balances out perfectly with the cherries. You don’t have to worry about complicated techniques or baking times; this cheesecake practically makes itself!
Why You’ll Love This No Bake Cherry Cheesecake
This No Bake Cherry Cheesecake is not only easy to make, but it also comes together in fewer than 20 minutes! It’s an ideal dessert for any occasion and a guaranteed crowd-pleaser, especially with its vibrant cherry topping that adds a pop of color and flavor. Plus, it’s incredibly refreshing, making it a must-have during those warm months. Every bite is like a little party in your mouth. It’s really hard to resist going back for more!
Ingredients for No Bake Cherry Cheesecake
- 1 (9-inch) graham cracker crust (store-bought or homemade)
- 8 oz. cream cheese (softened)
- 1 cup powdered sugar
- 1 tsp vanilla extract
- 1 cup heavy cream
- 21 oz. cherry pie filling
Preparing the No Bake Cherry Cheesecake

Make the Crust (if Homemade)
If you prefer a homemade crust, combine graham cracker crumbs with melted butter and sugar in a bowl. Mix well until the crumbs are fully coated. Then, press the mixture into a 9-inch pie pan evenly, making sure it’s compact. After that, allow it to set in the refrigerator while you prepare the filling. This chilling step helps the crust hold its shape nicely when you add the creamy filling.
Whip the Cream Cheese Mixture
In a medium mixing bowl, combine softened cream cheese, powdered sugar, and vanilla extract. It’s best to make sure the cream cheese is really softened for the smoothest texture. Use a hand mixer or stand mixer to blend everything together until it’s nice and smooth. This mixture is going to be the creamy base of your cheesecake, so take your time and make sure it’s well combined. Once smooth, set this mixture aside; it will be merged with the whipped cream later.
Whip the Heavy Cream
In a large mixing bowl, pour in the heavy cream. Start mixing on low speed, but slowly increase to high speed until stiff peaks form. This typically takes around 5 minutes. It’s so satisfying to see the transformation from liquid cream to fluffy peaks! Make sure you don’t overbeat it; you want a light, airy consistency.
Combine the Mixtures
Now comes the fun part! Gently fold the whipped cream into the cream cheese mixture using a rubber spatula. This step is crucial because you want to retain that airy texture. Be careful not to deflate the whipped cream; the lightness is what gives the cheesecake its delightful quality.
Assemble the Cheesecake
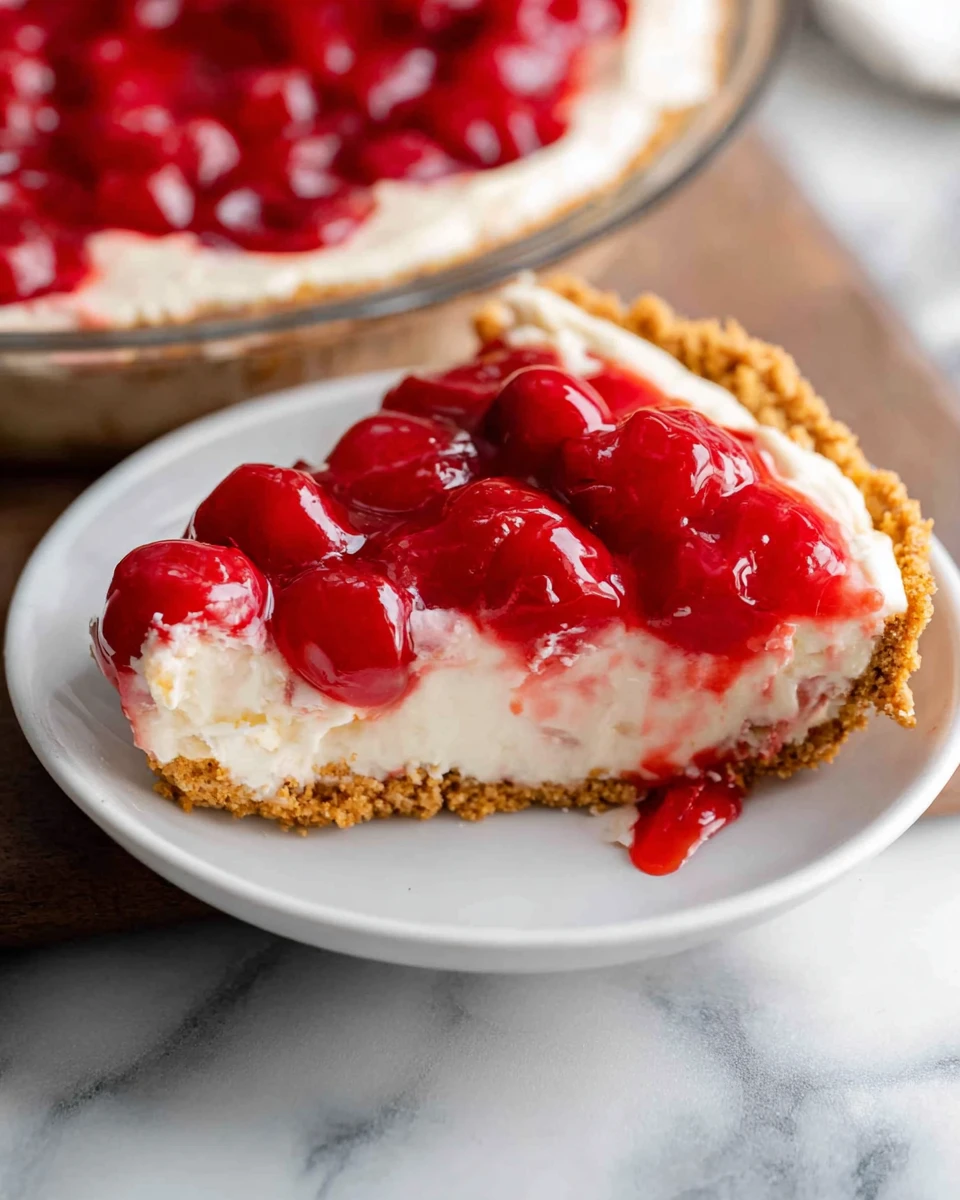
Transfer the combined mixture into the prepared graham cracker crust. Use a spatula to smooth the top; you want it to look pretty because we eat with our eyes first! Cover the cheesecake with plastic wrap or foil, then refrigerate it for at least 4 hours, or preferably overnight. This chilling time allows it to set properly, making slicing much easier later.
Top with Cherry Filling
Once your cheesecake has set in the fridge, carefully remove it and top it generously with cherry pie filling. Don’t be shy! You can create a beautiful layer of cherries that will not only look appealing but will add a burst of flavor in each bite. Slice and serve chilled for the best experience.
Serving Suggestions
Pair the No Bake Cherry Cheesecake with a dollop of freshly whipped cream for extra happiness. You might even sprinkle some crushed graham crackers on top for an added crunch. For a delightful summer twist, consider adding slices of fresh fruit, like strawberries or blueberries around the edges. They complement the cherry topping beautifully and make for a stunning presentation.
Tips for Success
- Ensure your cream cheese is softened properly to avoid lumps in the filling.
- For best results, chill the cheesecake overnight for a firmer texture.
- Using a rubber spatula to fold in the whipped cream helps maintain the lightness of the mixture.
Variations
Feel free to switch things up! You can substitute cherry pie filling with other fruit fillings like blueberry, strawberry, or raspberry for different flavor profiles. Don’t hesitate to get creative! Additionally, experimenting with flavored cream cheeses, like strawberry or lemon, can add a fun twist that enhances your dessert.
Storage Tips
Store any leftovers in an airtight container in the refrigerator for up to 3 days. If you’re not serving it immediately, keep the cherry topping separate until you’re ready to enjoy. This helps maintain its freshness and prevents the crust from getting soggy.
Pairing Ideas
This No Bake Cherry Cheesecake pairs beautifully with a light, crisp white wine or iced tea. Imagine enjoying a slice at a summer barbecue or picnic; it makes the perfect ending to a warm evening spent outside with friends and family.
FAQs
1. Can I use a different type of crust?
Yes! Go ahead and try a chocolate cookie crust or an Oreo crust for a fun flavor experience.
2. How long can I keep the cheesecake in the refrigerator?
The cheesecake can be stored in the refrigerator for up to 3 days in an airtight container; just be sure to keep it covered.
3. Can I freeze No Bake Cherry Cheesecake?
Absolutely! You can freeze it for up to 2 months. Just make sure you wrap it well and store it in an airtight container.
4. Can I make this cheesecake dairy-free?
Yes! You can substitute the cream cheese with a dairy-free alternative and use coconut cream instead of heavy cream for a great variation.
5. What can I use if I don’t have pie filling?
You can use fresh cherries, homemade cherry sauce, or even another type of fruit topping to customize your cheesecake experience.
No Bake Cherry Cheesecake is the perfect sweet indulgence for any gathering or casual dessert craving. Its unique combination of creamy cheesecake and vibrant cherry topping creates a delightful balance of flavors. Not only is it visually appealing, but its no-bake preparation is a fantastic solution for hot summer days when you want a delicious treat without turning on the oven. Whether enjoyed at a family gathering or a simple weeknight dessert, it’s sure to bring smiles and satisfaction to everyone. Happy baking!
Print
No Bake Cherry Cheesecake
This No Bake Cherry Cheesecake offers a cool, creamy dessert topped with cherry filling, perfect for summer gatherings and easy to whip up in under 20 minutes.
- Total Time: 20 minutes
- Yield: 8 servings 1x
Ingredients
- 1 (9-inch) graham cracker crust (store-bought or homemade)
- 8 oz. cream cheese (softened)
- 1 cup powdered sugar
- 1 tsp vanilla extract
- 1 cup heavy cream
- 21 oz. cherry pie filling
Instructions
- Make the crust by combining graham cracker crumbs with melted butter and sugar, then set in the refrigerator.
- Mix softened cream cheese, powdered sugar, and vanilla extract until smooth.
- Whip heavy cream until stiff peaks form and fold it into the cream cheese mixture gently.
- Transfer the mixture into the prepared crust and smooth the top. Cover and refrigerate for at least 4 hours.
- Top chilled cheesecake with cherry pie filling and serve.
Notes
Ensure cream cheese is properly softened to avoid lumps.
Chilling overnight helps achieve a firmer texture.
Use a rubber spatula for folding in whipped cream to maintain lightness.
- Prep Time: 20 minutes
- Cook Time: 0 minutes
- Category: Dessert
- Method: No-Bake
- Cuisine: American
Nutrition
- Calories: 350
- Sugar: 20g
- Sodium: 200mg
- Fat: 25g
- Saturated Fat: 15g
- Unsaturated Fat: 5g
- Trans Fat: 0g
- Carbohydrates: 30g
- Fiber: 1g
- Protein: 4g
- Cholesterol: 80mg


