 Skip to content
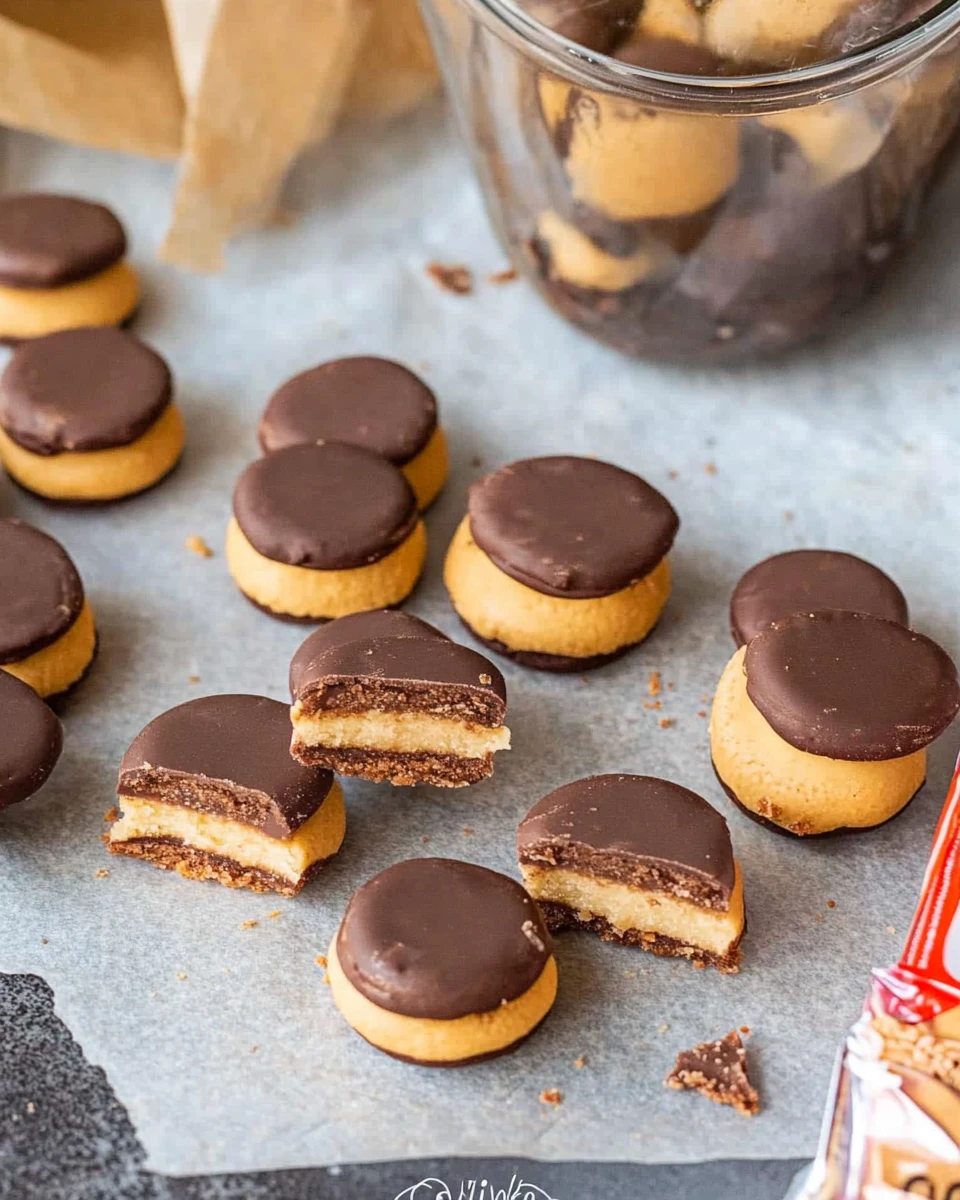
Indulging in homemade treats can be a wonderful experience, especially when it comes to No Bake Homemade Twix. Imagine biting into a delicious layer of creamy caramel, all wrapped in a delicate chocolate coating, resting between two crunchy vanilla wafers. It’s a combination that evokes memories of candy bar bliss, all without turning on the oven! This recipe is perfect for anyone who loves a quick, easy, and fun dessert that doesn’t require baking skills. You can whip up these delightful bars in no time, making them a fantastic choice for last-minute cravings or a sweet surprise for friends and family. Plus, the best part? You can customize them to match your taste buds perfectly! From richer chocolate to a touch of sea salt, this recipe invites creativity. Let’s get started!
Thank you for reading this post, don't forget to subscribe!Why This Recipe Works
The No Bake Homemade Twix recipe captures the iconic flavors of the beloved candy bar without the hassle of baking. Using simple ingredients like vanilla wafers, soft caramels, and chocolate candy melts, this recipe ensures a quick and satisfying treat that hits all the right notes of sweet, creamy, and crunchy. The combination of textures and flavors creates a delightful experience, making it a perfect choice for both novice and experienced cooks.
Why You’ll Love This No Bake Homemade Twix
This version of No Bake Homemade Twix is not only incredibly simple to make but also allows you to customize the flavors to suit your preferences. Whether you enjoy a richer caramel, darker chocolate, or even a hint of sea salt for added flavor, this recipe encourages creativity. Plus, the no-bake aspect means you can whip up a batch any time you need a dessert fix without turning on the oven!
Ingredients
- 11 oz box vanilla wafers
- 4.51 oz bag Kraft caramels or Werther’s Soft Caramels
- 12 oz bag chocolate candy melts
Preparing Your No Bake Homemade Twix

Unwrapping the Caramels
Start by unwrapping the soft caramels. Use clean hands to smush each caramel into a flat circle that matches the size of your vanilla wafers. This part is fun and quite satisfying since you’ll create the perfect base for the layers.
Melting the Chocolate
In a microwave-safe bowl, melt the chocolate candy melts. Heat them in 30-second increments, stirring in between, until the chocolate becomes smooth and fully melted. Be careful not to overheat it; just a few intervals should do the trick.
Assembling the Twix
Once the chocolate is melted, pour it into a piping bag or a zip-top freezer bag. Snip off the end to create a small opening. This will make it easy to add layers without any mess.
Creating the Chocolate Layer
Pipe a layer of melted chocolate onto the flat side of one vanilla wafer. Make sure to cover it well, as this will create a delicious chocolatey coating that enhances every bite.
Adding the Caramel
Place the flattened caramel on top of the chocolate layer. This adds that sweet and chewy character, melding beautifully with the chocolate.
Completing the Sandwich
Top the caramel with another chocolate-coated vanilla wafer, pressing them gently together. The pressure will help seal the layers; trust me, it’s worth the effort!
Setting the Twix
Place the assembled No Bake Homemade Twix on a sheet of parchment or wax paper to set the chocolate. It shouldn’t take long, just enough for the chocolate to firm up. Repeat the process for the remaining cookies.
Storing the Treats
Once the chocolate has hardened, store your homemade Twix in an airtight container at room temperature. Keeping them sealed is key to maintaining that delightful texture and flavor.
Serving Suggestions
Serve your No Bake Homemade Twix as a delightful dessert for parties, add them to lunchbox snacks, or enjoy them as an afternoon treat with your favorite coffee or tea. The versatility of these treats makes them perfect for any occasion.
Tips for Success
- Make sure to have clean hands when handling the caramels to ensure they stick together without mess.
- Stir the chocolate frequently while melting to avoid burning.
- Allow the chocolate to set completely before storing to prevent them from sticking together.
Variations
- Substitute vanilla wafers with graham crackers for a different texture.
- Add crushed nuts or a sprinkle of sea salt on top of the chocolate before it sets for an added crunch.
- Experiment with different types of chocolate melts, like milk or dark chocolate, to enhance the flavor profile.

FAQs
Can I use homemade caramel instead of store-bought?
Yes, homemade caramel can be used, but ensure it’s a pipeable consistency for the best results.
How long do these homemade Twix last?
They typically last about 5-7 days when stored in an airtight container at room temperature.
Can I freeze No Bake Homemade Twix?
Yes! They can be frozen for up to three months. Make sure to layer them with parchment paper to prevent sticking.
Are there any nut-free alternatives in this recipe?
Yes! The ingredients used, vanilla wafers, caramels, and chocolate melts, can be found in nut-free versions.
What’s the best way to serve these treats?
Serve them at room temperature for optimal flavor and texture experience.
Indulging in the sweet, crunchy, and creamy delight of No Bake Homemade Twix is an experience that promises satisfaction. This simple recipe allows for personalization and creativity, making it a fun activity to share with family or friends. Whether you’re enjoying them during a quiet evening at home or showcasing them at a gathering, these treats are sure to impress and satisfy your sweet cravings effortlessly.
Print
No Bake Homemade Twix
These No Bake Homemade Twix bars offer a sweet, creamy, and crunchy experience. Perfect for a quick dessert fix or special gatherings, they’re easy to make and customize!
- Total Time: 0 hours
- Yield: 12 bars 1x
Ingredients
- 11 oz box vanilla wafers
- 4.51 oz bag Kraft caramels or Werther's Soft Caramels
- 12 oz bag chocolate candy melts
Instructions
- Unwrap the caramels and shape them into flat circles.
- Melt the chocolate candy melts in the microwave, stirring until smooth.
- Pipe a layer of melted chocolate onto one vanilla wafer.
- Add the flattened caramel on top of the chocolate layer.
- Seal with another chocolate-coated vanilla wafer, pressing gently.
- Place the bars on parchment to set until the chocolate hardens.
- Store in an airtight container at room temperature.
Notes
Clean hands help in handling the caramels without mess.
Stir the chocolate frequently while melting to avoid burning.
Ensure the chocolate sets completely before storage.
- Prep Time: 15 minutes
- Cook Time: None
- Category: Dessert
- Method: No Bake
- Cuisine: American
Nutrition
- Calories: 150
- Sugar: 14g
- Sodium: 45mg
- Fat: 7g
- Saturated Fat: 4g
- Unsaturated Fat: 2g
- Trans Fat: 0g
- Carbohydrates: 22g
- Fiber: 0g
- Protein: 1g
- Cholesterol: 5mg


